

 Rules
Rules
Log in
Search
Latest topics
» Nostalgia alert, my 1959 Corvette revisitedby KariFS Today at 8:59 pm
» 12 string guitar suggestions
by akjgardner Today at 7:36 pm
» A choke-tube with velocity-stack configured Bee
by roddie Today at 6:48 pm
» Hawk had breakfast and then took a bath
by rsv1cox Today at 6:26 pm
» Jim Walkers FireBee - This is going to be fun
by getback Today at 5:55 pm
» WenMac 049 - Glow Plug & Head Gasket replacements?
by Ken Cook Today at 4:06 pm
» Prop Rod - resto to a runner
by rsv1cox Today at 3:32 pm
» Jim Walker Firebaby
by rdw777 Today at 12:58 am
» Prayers for my Wife Please
by akjgardner Yesterday at 6:28 pm
» Cox prop rod
by Wiggy Yesterday at 12:30 am
» "Red Neck" .049 elec. starter
by getback Fri May 17, 2024 3:19 pm
» Cox prop rod
by Wiggy Fri May 17, 2024 1:35 pm


CEF Traveling Engine


Win This Engine!

Live on Patrol


A Long Time Coming
Page 1 of 1

A Long Time Coming
![]() batjac Sat Oct 03, 2020 2:00 pm
batjac Sat Oct 03, 2020 2:00 pm
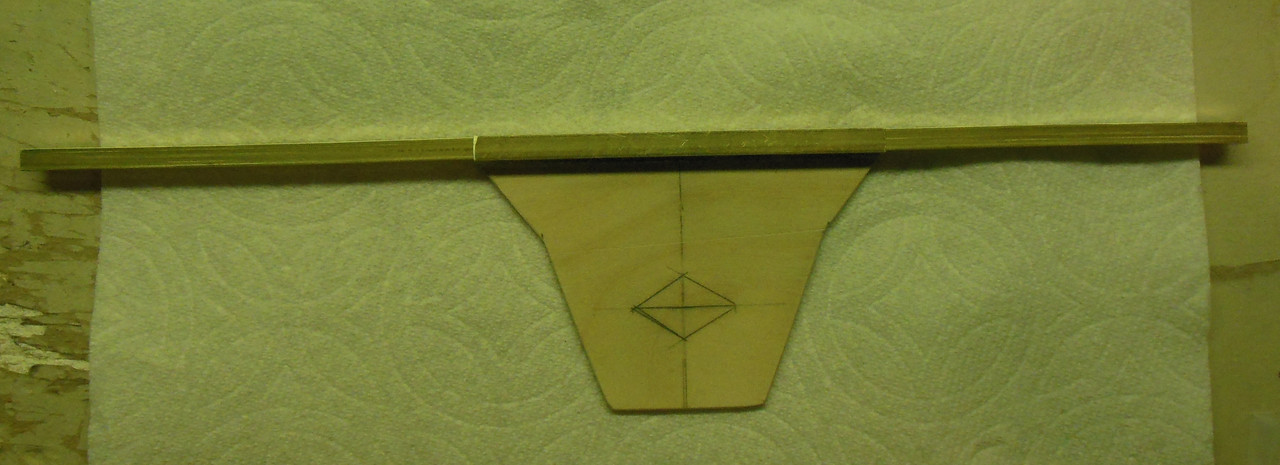
I’ve been saying for a long time that I need to make a 1/2A size incidence meter. I finally decided to make one up. I started by going to the local hobby shop and picking up the two largest sizes of K&S square tubing. I verified the second largest fit tightly in the largest. Then I pulled out some paper and drew out what I thought would be good.
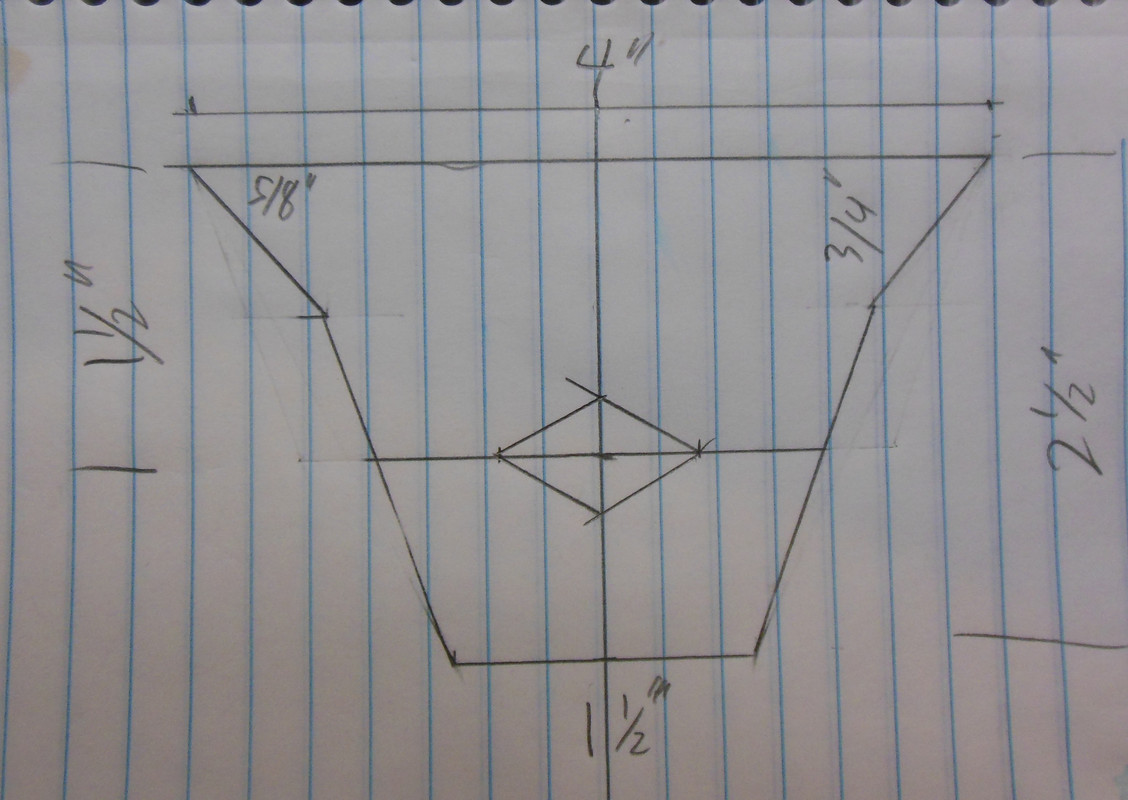
I then transferred the measurements to some 3/32” ply and cut a 4” section of the larger tube.
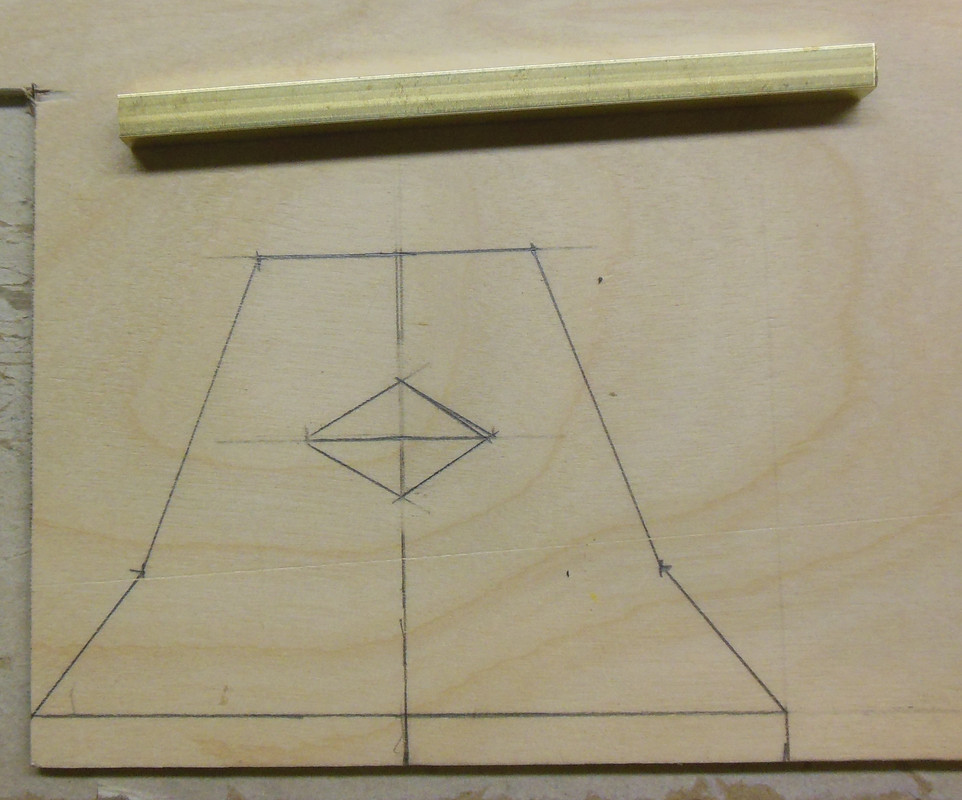
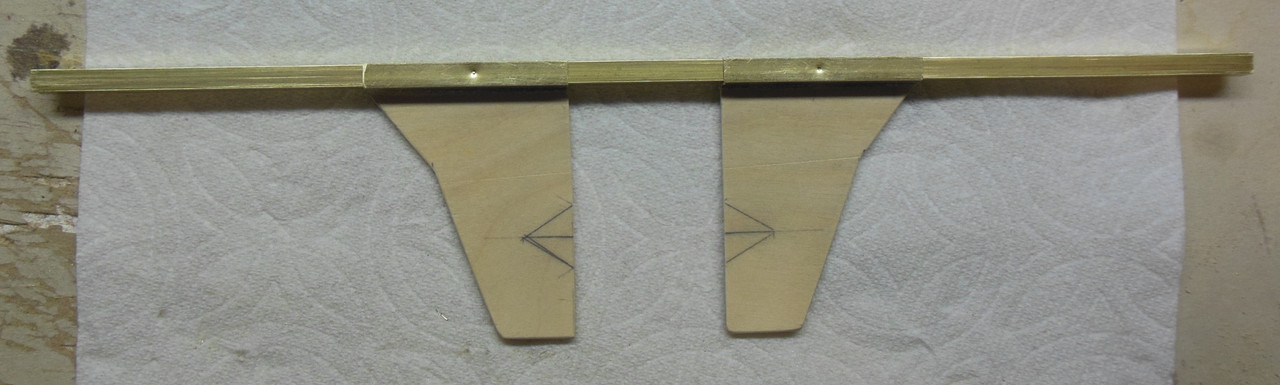
I cut out the frame and glued the tube to the top of the frame.
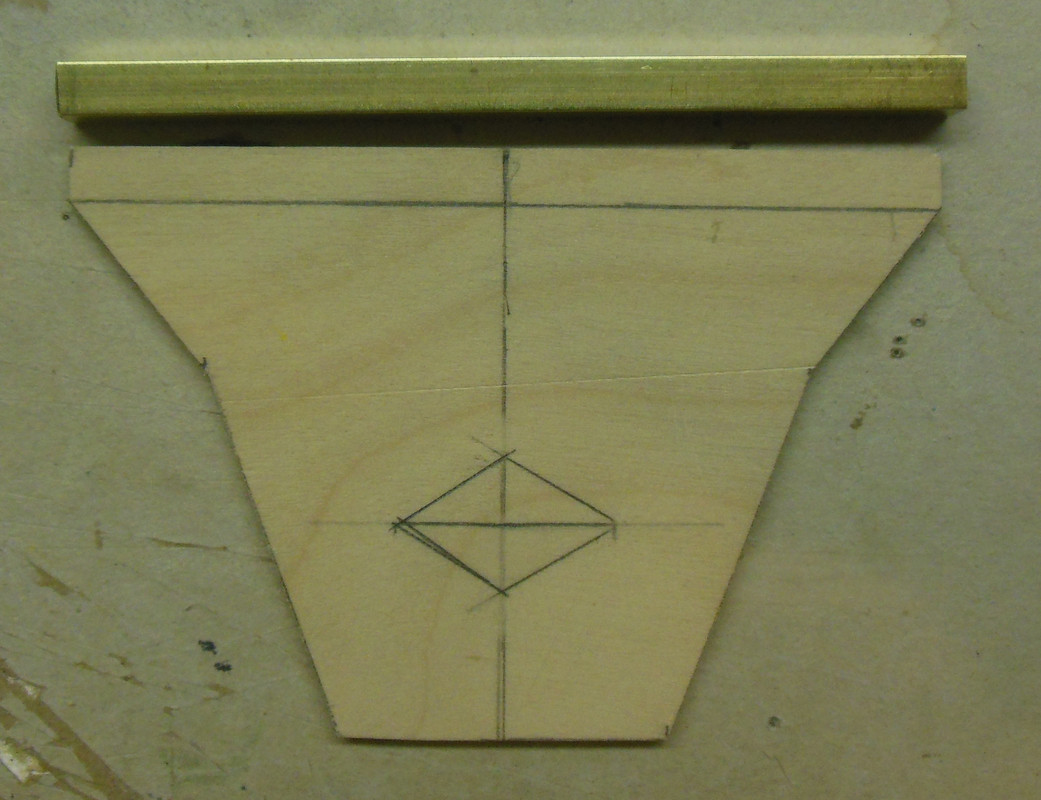
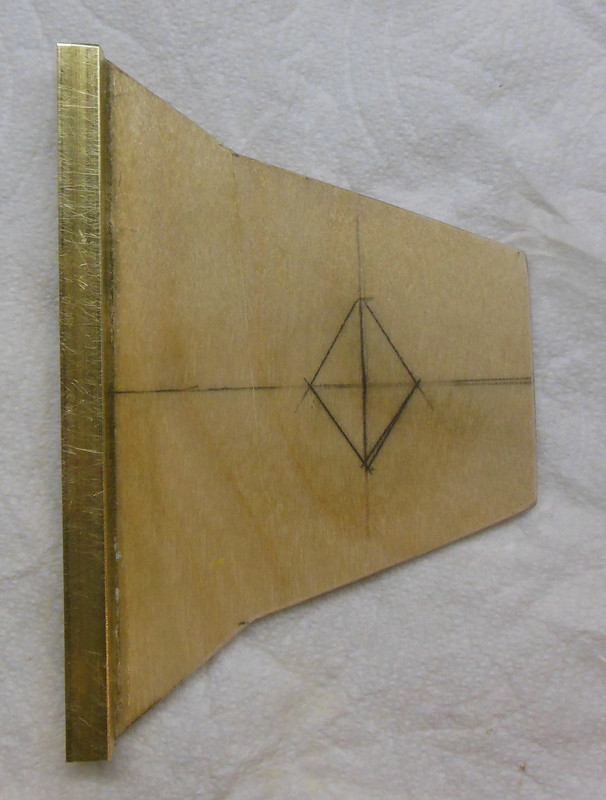
I slid the smaller tube back in to check everything, then cut the two halves apart. Next I cut the angles for the leading and trailing edges of the wing. I also put a dimple in each outer tube to ensure there was a good friction fit.
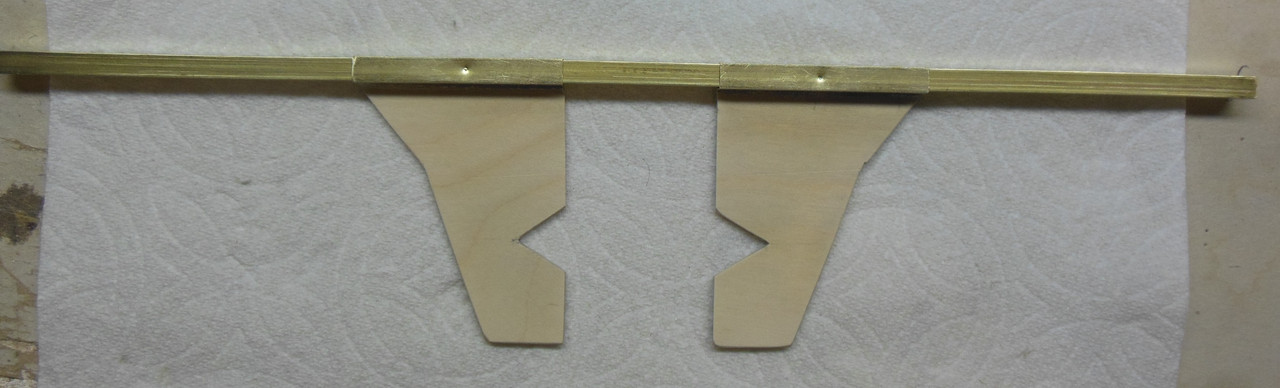
I cut another piece of tubing and glued a bubble level to it, verifying the level matched the level I use for the tail surfaces and the prop fixture.
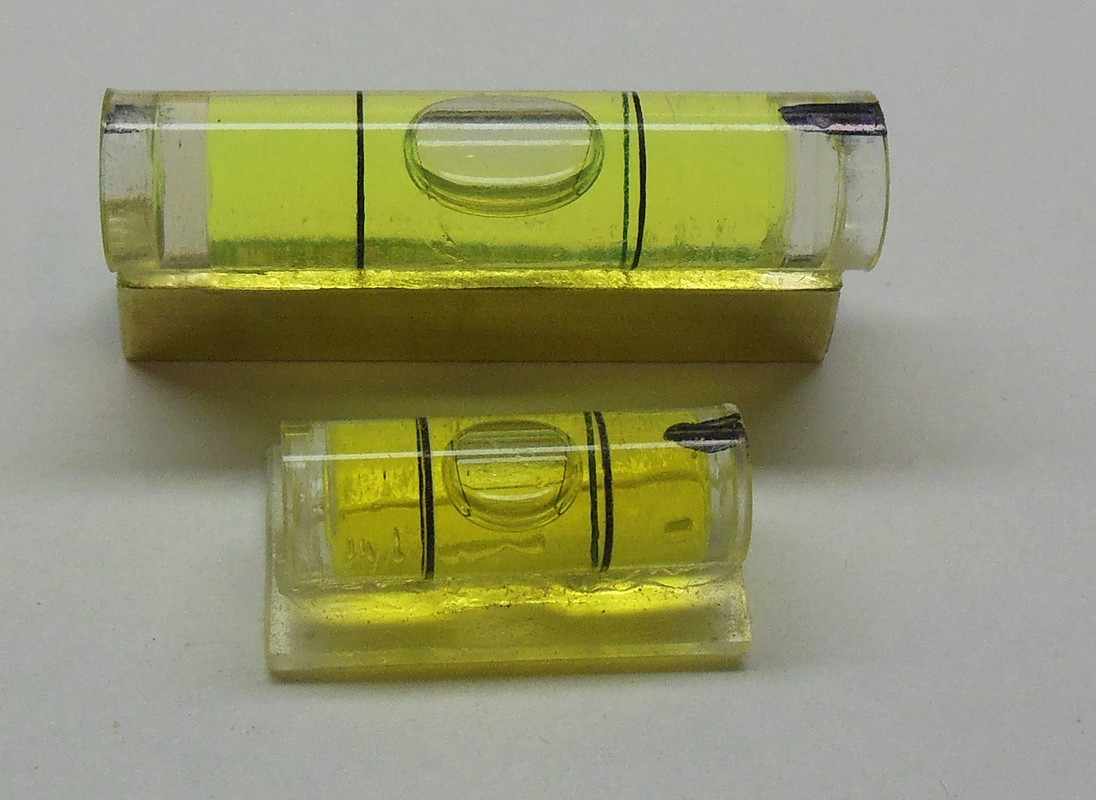
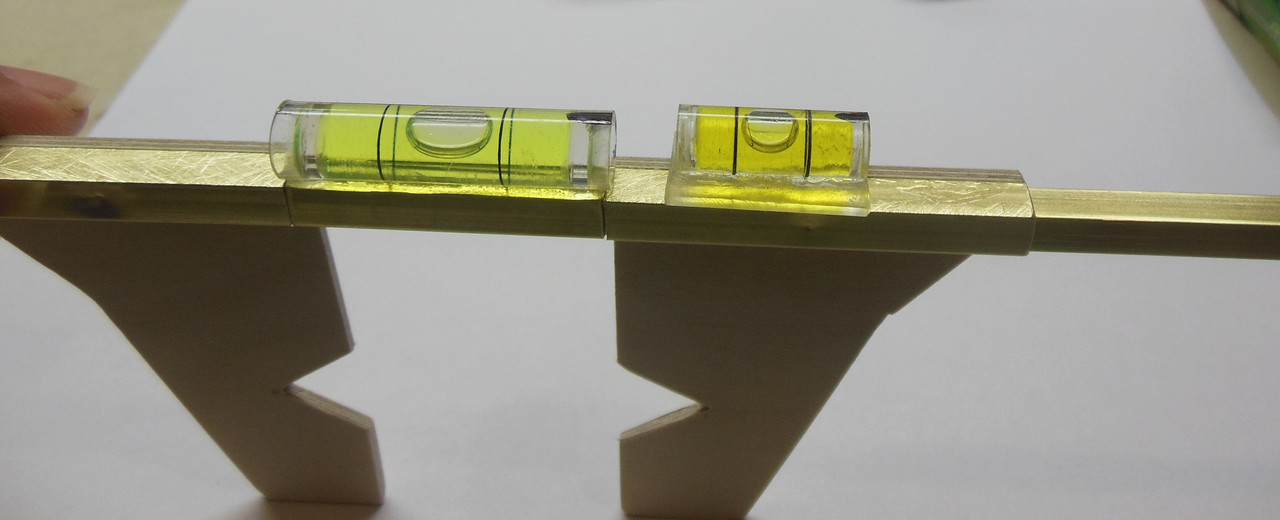
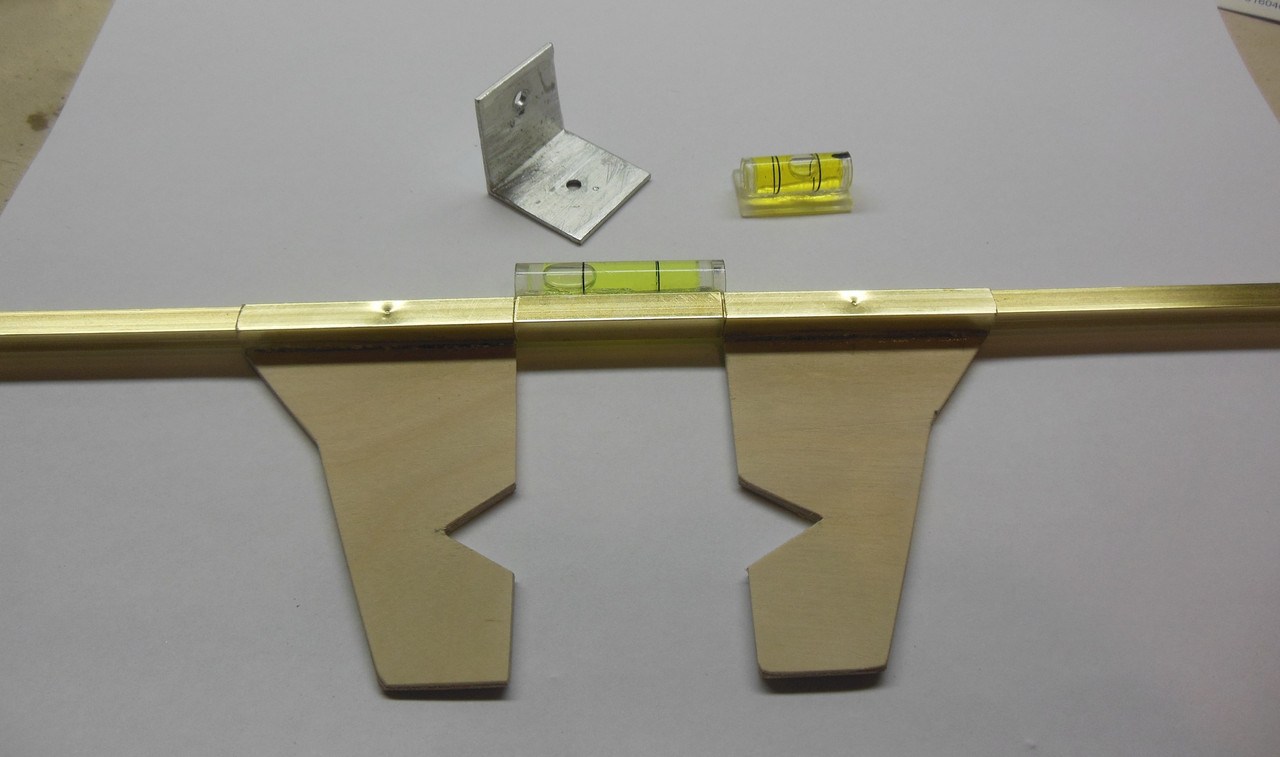
Perfect size for 1/2A:
The On the Level Mark
I then transferred the measurements to some 3/32” ply and cut a 4” section of the larger tube.
I cut out the frame and glued the tube to the top of the frame.
I slid the smaller tube back in to check everything, then cut the two halves apart. Next I cut the angles for the leading and trailing edges of the wing. I also put a dimple in each outer tube to ensure there was a good friction fit.
I cut another piece of tubing and glued a bubble level to it, verifying the level matched the level I use for the tail surfaces and the prop fixture.
Perfect size for 1/2A:
The On the Level Mark

batjac- Diamond Member


Posts : 2339
Join date : 2013-05-23
Age : 61
Location : Broken Arrow, OK, USA
Re: A Long Time Coming
![]() Ken Cook Sat Oct 03, 2020 2:43 pm
Ken Cook Sat Oct 03, 2020 2:43 pm
Mark, I've commented many times on your builds. Your above most in terms of sheets to finished product. Most of this is your determination and your skills and the fact that you execute a plan before cutting. I always use centerlines and I do this with fine line ink pens. However, on a fuse, I use drafting pencils. Basically, the reasoning is due to the fact that I always dope my planes and ink bleeds forever and there's no getting rid of it. Most of your builds are in iron on. I'm not knocking that at all just saying that if you have a centerline on your root rib and a register of centerline on your fuse there's no need for a incidence gauge. It's more of a matter of seeing that your gluing the wing in properly always referring back to the centerline. Most if not almost all control line planes utilize a thrust line which is parallel to the centerline hence the wing and stab equally. Always maintaining a register so to speak of a centerline is key to building straight as this is always the working point. Whereas guessing and assuming a bubble is true isn't as quite accurate. As we say at work, there's always a square within a circle you just have to establish it. Ken

Ken Cook- Top Poster

- Posts : 5489
Join date : 2012-03-28
Location : pennsylvania
Re: A Long Time Coming
![]() 944_Jim Sat Oct 03, 2020 5:33 pm
944_Jim Sat Oct 03, 2020 5:33 pm
Thanks, Mark!
I appreciate this thread to the point that it is bookmarked AND printed.
I appreciate this thread to the point that it is bookmarked AND printed.
_________________
Never enough time to build them all...always enough time to smash them all!
944_Jim- Diamond Member
-
Posts : 1964
Join date : 2017-02-09
Age : 59
Location : NE MS
Re: A Long Time Coming
![]() Marleysky Sat Oct 03, 2020 6:13 pm
Marleysky Sat Oct 03, 2020 6:13 pm
Things that make me go Hmmm? ??
Not that I am a prolific builder, I’m not. Most of my builds have been slab wing or built up profiles following the plans. Most of them flew more than once! Other than my Christmas gifted TD3. I still have my original Goldberg Lil Wizard. Never quite understood what some of those fancy gauges and meters were for OR how to use them.
I learned something today thanks to Marks DIY incidence meter post.
1- How to make a really cool handmade meter
2- How to use it, and WHY!
For the second thing I looked up the following instructions:
https://www.little-bellanca.com/manual_download/rob404v2_manual.pdf
Thanks Mark!
The never too old to learn something.
Marleysky

Marleysky- Top Poster
-
Posts : 3618
Join date : 2014-09-29
Age : 71
Location : Grand Rapids, MI
Re: A Long Time Coming
![]() oldguy Sat Oct 03, 2020 8:19 pm
oldguy Sat Oct 03, 2020 8:19 pm
That would work for checking to see if the wing is twisted, wouldn't it?
oldguy- Gold Member

- Posts : 368
Join date : 2015-12-10
Age : 70
Location : Idaho
Re: A Long Time Coming
![]() batjac Sat Oct 03, 2020 11:06 pm
batjac Sat Oct 03, 2020 11:06 pm
Oldguy,
Yes, jigs help for wing twist. Or at least they do for me.
Ken,
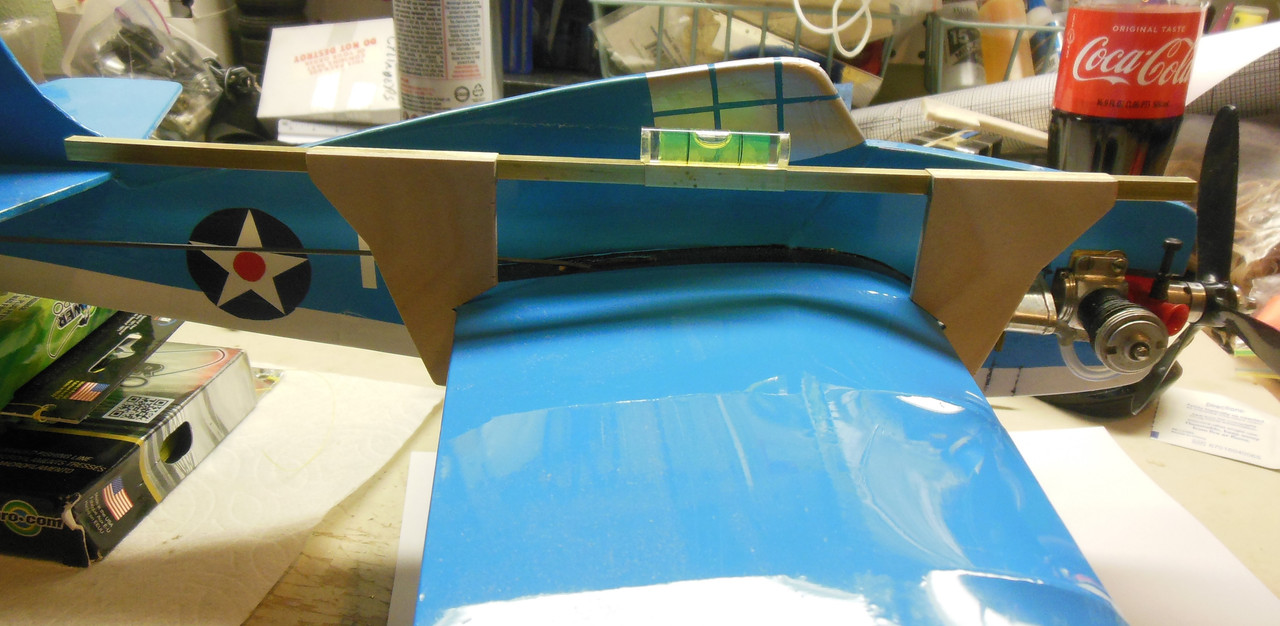
I do make good centerlines on my scratch builds and reference everything to those. And if I cut a slot for the stab into the rear of the plane it’s not a problem getting the wing/stab aligned. The three places that this is most useful for me are when the stab is glued on the top of the rear fuselage, I find that I sometimes have the stab saddle a couple of degrees off and need to ensure I sand it level with the wing. As Oldguy says, this is good for ensuring there’s no wing twist. I wear glasses with medium/heavy astigmatism correction, and usually sighting down the wing doesn’t help, as depending on the angle I hold the wing at, and the lighting in the room, the way my glasses make the trailing edges convex/concave vexes me greatly, especially a tapered wing. But mostly where this helps is when I am drilling the holes for a beam mount engine. If I just try and measure, I invariably get a little up or down thrust on the engine. Just my Waterloo. Using the wing jig and the angled piece on the prop, I ensure that as I drill my holes the engine stays at 0 degrees to the wing. I don’t assume any bubble level is true. I just pick which of my levels is going to be the master, in this case the one glued to the tube, and then match my other levels to that one. The other level above I glued to a piece of plastic to keep it from rolling, and then sanded the base to ensure that it was true to the master level. You can see that I took a Sharpie and made a line on one side so that both levels are always mounted in the same direction. Do I get an Expert class plane with perfect alignment as a result? No. I get a plane that’s close enough to zero as makes no difference and that flies straight for me. And that’s alright. I’m far from a serious competitor. Actually, I’ve never entered a contest. I have fun with getting an idea and building it. That’s what this jig is perfect for. I’ve never expected to end up with a plane like the guys who are better than me, especially with the finish.
Jim and Marleysky,
Glad to give Y’all ideas and information. I went about 30 years without ever using a jig. In the last couple of years I started using them. I made my first one, then bought one at a swap meet. But they were too big for most of my stuff so I made this one. Like I said, they were mostly helpful with engine incidence and wing twist. Not as important with R/C, but important now that I’ve pretty much gone exclusively to CL.
The Emperor Mark
Yes, jigs help for wing twist. Or at least they do for me.
Ken,
I do make good centerlines on my scratch builds and reference everything to those. And if I cut a slot for the stab into the rear of the plane it’s not a problem getting the wing/stab aligned. The three places that this is most useful for me are when the stab is glued on the top of the rear fuselage, I find that I sometimes have the stab saddle a couple of degrees off and need to ensure I sand it level with the wing. As Oldguy says, this is good for ensuring there’s no wing twist. I wear glasses with medium/heavy astigmatism correction, and usually sighting down the wing doesn’t help, as depending on the angle I hold the wing at, and the lighting in the room, the way my glasses make the trailing edges convex/concave vexes me greatly, especially a tapered wing. But mostly where this helps is when I am drilling the holes for a beam mount engine. If I just try and measure, I invariably get a little up or down thrust on the engine. Just my Waterloo. Using the wing jig and the angled piece on the prop, I ensure that as I drill my holes the engine stays at 0 degrees to the wing. I don’t assume any bubble level is true. I just pick which of my levels is going to be the master, in this case the one glued to the tube, and then match my other levels to that one. The other level above I glued to a piece of plastic to keep it from rolling, and then sanded the base to ensure that it was true to the master level. You can see that I took a Sharpie and made a line on one side so that both levels are always mounted in the same direction. Do I get an Expert class plane with perfect alignment as a result? No. I get a plane that’s close enough to zero as makes no difference and that flies straight for me. And that’s alright. I’m far from a serious competitor. Actually, I’ve never entered a contest. I have fun with getting an idea and building it. That’s what this jig is perfect for. I’ve never expected to end up with a plane like the guys who are better than me, especially with the finish.
Jim and Marleysky,
Glad to give Y’all ideas and information. I went about 30 years without ever using a jig. In the last couple of years I started using them. I made my first one, then bought one at a swap meet. But they were too big for most of my stuff so I made this one. Like I said, they were mostly helpful with engine incidence and wing twist. Not as important with R/C, but important now that I’ve pretty much gone exclusively to CL.
The Emperor Mark
batjac- Diamond Member
-
Posts : 2339
Join date : 2013-05-23
Age : 61
Location : Broken Arrow, OK, USA
Re: A Long Time Coming
![]() oldguy Sun Oct 04, 2020 1:02 am
oldguy Sun Oct 04, 2020 1:02 am
Marleysky wrote:Things that make me go Hmmm? ??
Not that I am a prolific builder, I’m not. Most of my builds have been slab wing or built up profiles following the plans. Most of them flew more than once! Other than my Christmas gifted TD3. I still have my original Goldberg Lil Wizard. Never quite understood what some of those fancy gauges and meters were for OR how to use them.
I learned something today thanks to Marks DIY incidence meter post.
1- How to make a really cool handmade meter
2- How to use it, and WHY!
For the second thing I looked up the following instructions:
https://www.little-bellanca.com/manual_download/rob404v2_manual.pdf
Thanks Mark!
The never too old to learn something.
Marleysky
I was looking at the Roberts tool, and had a question on something i have been doing on all of my scratch built planes and i'm now wondering if i have been building them wrong. Question on profile C/L planes. I have been building them all with the stabilizer and wing cord line parallel with the datum line. Is this correct or not?
oldguy- Gold Member
- Posts : 368
Join date : 2015-12-10
Age : 70
Location : Idaho
Re: A Long Time Coming
![]() Ken Cook Sun Oct 04, 2020 3:08 pm
Ken Cook Sun Oct 04, 2020 3:08 pm
Mark, I know what you mean by the glasses. I never wore glasses in my life. I had a eye injury which required surgery 2 years ago and now glasses are a part of my life. During the surgery, other problems were discovered and I'm currently on several medications to slow these problems down. I can fully understand your issues.
Ken Cook- Top Poster
- Posts : 5489
Join date : 2012-03-28
Location : pennsylvania
Re: A Long Time Coming
![]() 944_Jim Sun Oct 04, 2020 8:28 pm
944_Jim Sun Oct 04, 2020 8:28 pm
Mark,
I'm curious...where does one source fairly accurate mini levels?
TIA
I'm curious...where does one source fairly accurate mini levels?
TIA
_________________
Never enough time to build them all...always enough time to smash them all!
944_Jim- Diamond Member
-
Posts : 1964
Join date : 2017-02-09
Age : 59
Location : NE MS
Re: A Long Time Coming
![]() 944_Jim Sun Oct 04, 2020 8:49 pm
944_Jim Sun Oct 04, 2020 8:49 pm
Never mind...found your answer over on SH under the same title.
Sacrificial cheap Dollar Store level for donor pieces.
Sacrificial cheap Dollar Store level for donor pieces.
_________________
Never enough time to build them all...always enough time to smash them all!
944_Jim- Diamond Member
-
Posts : 1964
Join date : 2017-02-09
Age : 59
Location : NE MS
» Flew yesterday, first time in a LONG time....
» First time in 26 months...or Went flying today
» Has anyone seen a Cox crankshaft like this
» Honoring a Long-Time Modeler
» First new project in a long time...well sorta new
» First time in 26 months...or Went flying today
» Has anyone seen a Cox crankshaft like this
» Honoring a Long-Time Modeler
» First new project in a long time...well sorta new
Page 1 of 1
Permissions in this forum:
You cannot reply to topics in this forum