

 Rules
Rules
Log in
Search
Latest topics
» 12 string guitar suggestions by akjgardner Today at 11:36 am
» A choke-tube with velocity-stack configured Bee
by roddie Today at 10:48 am
» Hawk had breakfast and then took a bath
by rsv1cox Today at 10:26 am
» Jim Walkers FireBee - This is going to be fun
by getback Today at 9:55 am
» WenMac 049 - Glow Plug & Head Gasket replacements?
by Ken Cook Today at 8:06 am
» Prop Rod - resto to a runner
by rsv1cox Today at 7:32 am
» Jim Walker Firebaby
by rdw777 Yesterday at 4:58 pm
» Nostalgia alert, my 1959 Corvette revisited
by rsv1cox Yesterday at 2:25 pm
» Prayers for my Wife Please
by akjgardner Yesterday at 10:28 am
» Cox prop rod
by Wiggy Fri May 17, 2024 4:30 pm
» "Red Neck" .049 elec. starter
by getback Fri May 17, 2024 7:19 am
» Cox prop rod
by Wiggy Fri May 17, 2024 5:35 am


CEF Traveling Engine


Win This Engine!

Live on Patrol


Christmas Present from my Aussie friend --- cleaned & rebuilt
Page 1 of 1

Christmas Present from my Aussie friend --- cleaned & rebuilt
![]() sosam117 Sat Feb 25, 2023 12:34 pm
sosam117 Sat Feb 25, 2023 12:34 pm
Something different from my usual Enya engine cleaning and rebuilding.
I received a nice Christmas present from Allan a few months ago. (My Aussie friend)
Three Cox engines.
Well, I just finished reassembling them after a good cleaning, and with new parts (gaskets and screw sets).
The Space Bug and Thermal Hopper both were missing a 2-56 screw that was 1/8 long on the bottom of the crankcase housing.
Luck would have it that I was able to get screw sets from Cox International in Canada for all three engines.
I had one screw head broke off when I was trying to disassemble the Space Bug Jr.
I was lucky to have the rest of the screw sticking out from the crankcase to grab onto to remove it. (And I use some heat to help remove it as the castor oil was in the threads.
Anyway, I had to heat up the rest of the engines because of the congealed castor oil.
Then the engines were sonic cleaned in my sonic tank. They left my tank really dirty!
Checked the connecting rod to piston play and used the "special" tool to reset the piston and connecting rod play.
The Space Bug Jr. has the worst play of the three.
I also made some nice display stands for each engine.
I took photos of how they looked before my cleaning and photos after.
Thanks, Allan, for the engines!
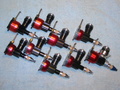
Before ----- all stuck and gooey:

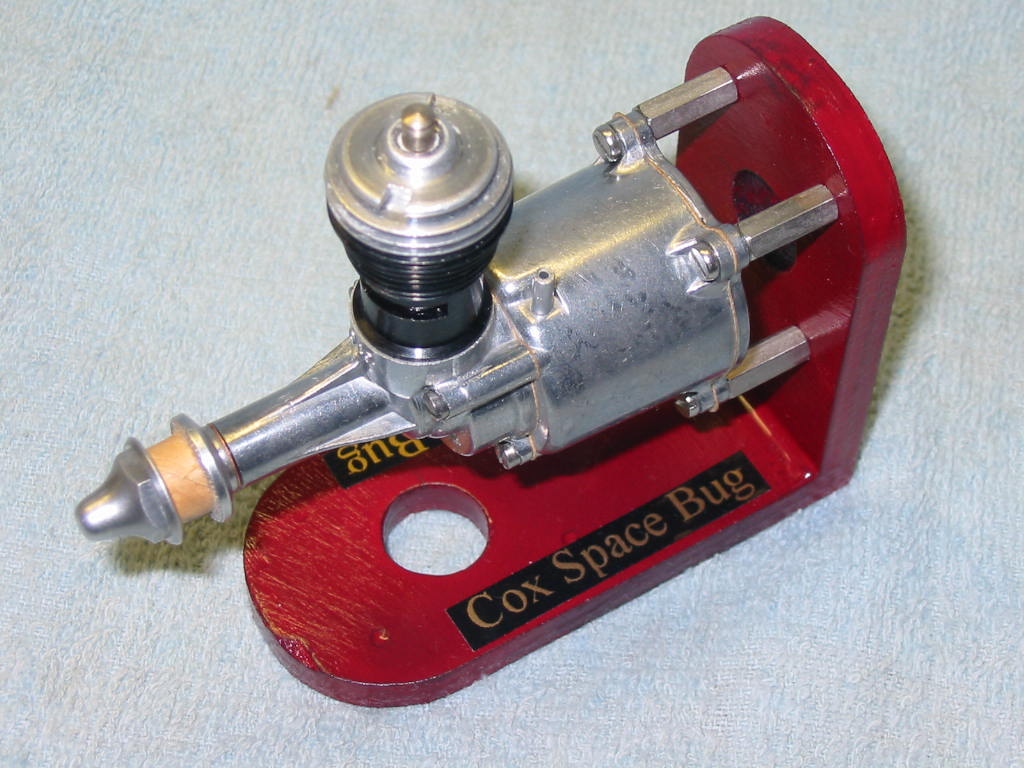
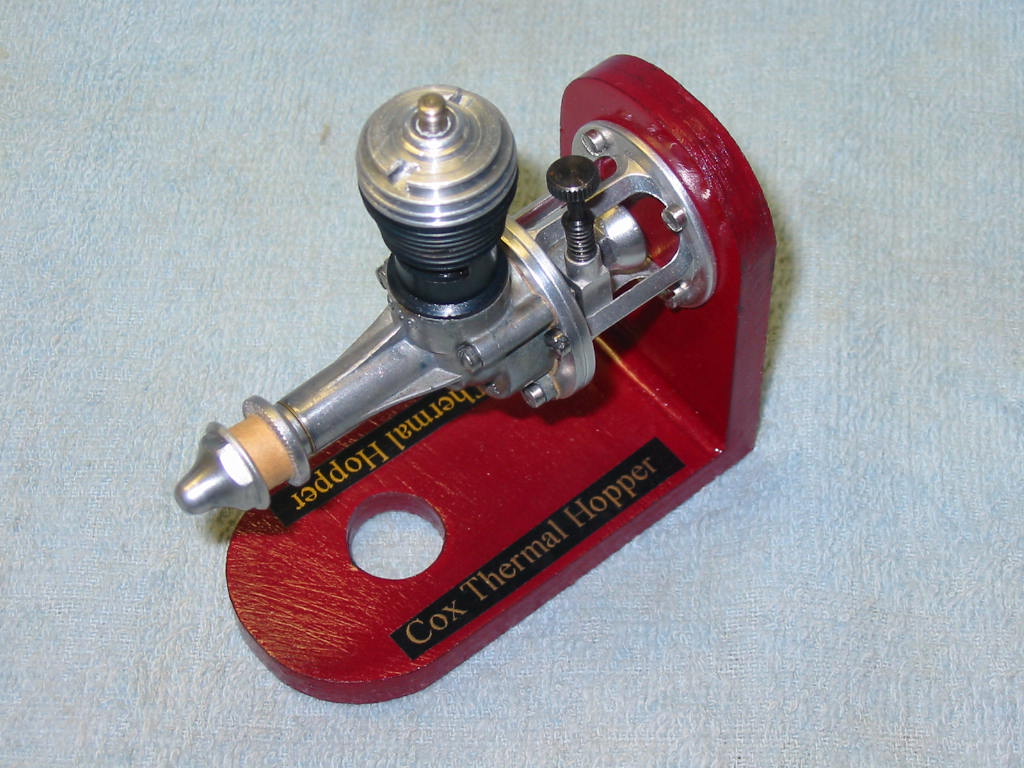
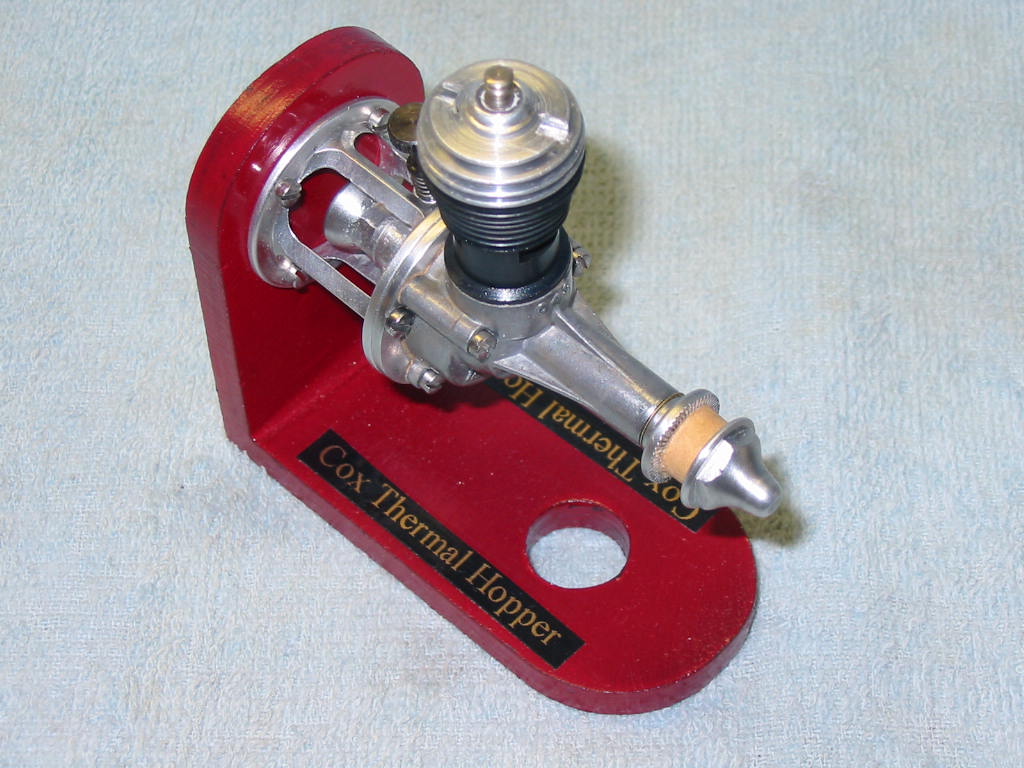
After on homemade stands:
Space Bug

Space Bug Jr.


Thermal Hopper
I received a nice Christmas present from Allan a few months ago. (My Aussie friend)
Three Cox engines.
Well, I just finished reassembling them after a good cleaning, and with new parts (gaskets and screw sets).
The Space Bug and Thermal Hopper both were missing a 2-56 screw that was 1/8 long on the bottom of the crankcase housing.
Luck would have it that I was able to get screw sets from Cox International in Canada for all three engines.
I had one screw head broke off when I was trying to disassemble the Space Bug Jr.
I was lucky to have the rest of the screw sticking out from the crankcase to grab onto to remove it. (And I use some heat to help remove it as the castor oil was in the threads.
Anyway, I had to heat up the rest of the engines because of the congealed castor oil.
Then the engines were sonic cleaned in my sonic tank. They left my tank really dirty!
Checked the connecting rod to piston play and used the "special" tool to reset the piston and connecting rod play.
The Space Bug Jr. has the worst play of the three.
I also made some nice display stands for each engine.
I took photos of how they looked before my cleaning and photos after.
Thanks, Allan, for the engines!
Before ----- all stuck and gooey:
After on homemade stands:
Space Bug
Space Bug Jr.
Thermal Hopper
sosam117- Diamond Member

- Posts : 1293
Join date : 2016-03-23
Location : Suburb of Chicago, Illinois
Re: Christmas Present from my Aussie friend --- cleaned & rebuilt
![]() GallopingGhostler Sat Feb 25, 2023 1:09 pm
GallopingGhostler Sat Feb 25, 2023 1:09 pm
Nice assortment of historic early Cox engines, and very well done in-house display stands, @sosam117, any museum would be proud to use those on display.
I gather that prior to the lower cost extruded Cox crankcase engines, that most would have opted for the Space Bug Jr. engine. It's tank probably permitted the same length of run as the Babe Bee.
The Thermal Hopper's machined bulkhead mount is a work of art. Personally I'd be reluctant to install and fly using that because it would be easily destroyed in a crash or even a rough landing. It makes me think that probably a good number of modelers who bought it mounted the engine with a hole in the bulkhead to allow the venturi and needle assembly to pass through it, or made their own mount system.

GallopingGhostler- Top Poster


Posts : 5350
Join date : 2013-07-13
Age : 70
Location : Clovis NM or NFL KC Chiefs
Re: Christmas Present from my Aussie friend --- cleaned & rebuilt
![]() KariFS Sat Feb 25, 2023 1:28 pm
KariFS Sat Feb 25, 2023 1:28 pm
Nice work on cleaning up the engines and building the stands! Good idea to use circuit board stand-offs(?) to mount the engines to a distance from the stands. Going to use those on mine too... My Hopper does not have that nice birdgage mount, so I’ll need some extra-long stand-offs. These might work on Tee Dees and other beam mount engines too 
KariFS- Diamond Member
- Posts : 2005
Join date : 2014-10-10
Age : 52
Re: Christmas Present from my Aussie friend --- cleaned & rebuilt
![]() balogh Sat Feb 25, 2023 1:53 pm
balogh Sat Feb 25, 2023 1:53 pm
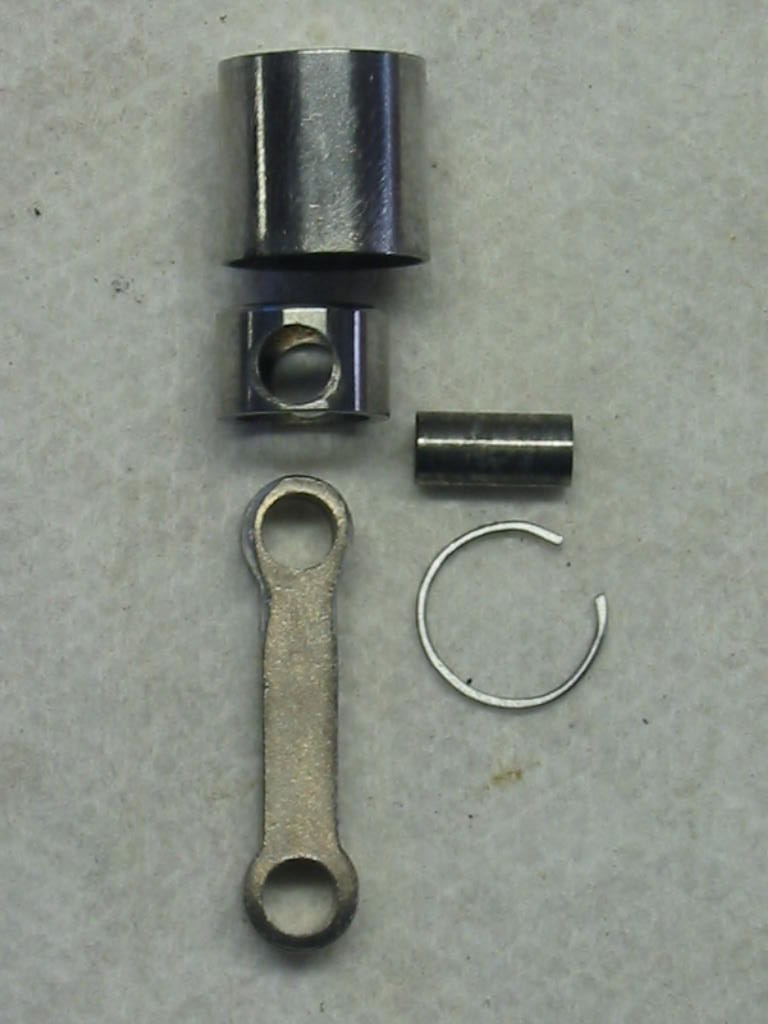
I am wondering if these old stock Bug and Hopper engines still had 3-piece pistons? That piston did not have the swaged cup, but a removable retaining piece with a circlip to hold it in place. I have a very old Babe Bee with such a 3 piece piston, and pretty loose piston to rod connection, that I could not reset with the tool we use for later pistons with balljoint..
balogh- Top Poster

Posts : 4755
Join date : 2011-11-06
Age : 65
Location : Budapest Hungary
Re: Christmas Present from my Aussie friend --- cleaned & rebuilt
![]() sosam117 Sun Feb 26, 2023 7:27 am
sosam117 Sun Feb 26, 2023 7:27 am
balogh wrote:I am wondering if these old stock Bug and Hopper engines still had 3-piece pistons? That piston did not have the swaged cup, but a removable retaining piece with a circlip to hold it in place. I have a very old Babe Bee with such a 3 piece piston, and pretty loose piston to rod connection, that I could not reset with the tool we use for later pistons with balljoint..
Hello balogh!
Yes, all three engines have the 3-piece piston/connecting rod assembly.
Allan (my Aussie friend) used the Space Bug Jr. the most of the three.
And of course, it had the most play of the three.
The Space Bug Jr. is close to the newer Cox Baby Bee engines for design.
Just the venturi sticks out on the Space Bug Jr.
On to the piston reset tool.
I tried to remove the clip inside the piston but could not (like I can on the small Enya engines.)
SO,
I slightly modified the reset tool to make it work on the 3-piece piston assembly.
Widened the slot on either side and also made it deeper with my Dremel cut-off disc, so it would work.
It may not really reset the newer Cox piston assembly now, but there is more clearance for the con rod now?
One thing to know if you do reset the 3-piece piston assembly.
Do not hit the reset tool very hard and after each hit, rotate the tool 90° after each hit.
I usually check the play after each hit to see if it has been reduced, then reinsert the tool at the next 90° hit from the last hit.
I did notice that it took much less hard hitting on the reset tool on the 3-piece piston compared to a swaged cup piston.
sosam117- Diamond Member
- Posts : 1293
Join date : 2016-03-23
Location : Suburb of Chicago, Illinois
Re: Christmas Present from my Aussie friend --- cleaned & rebuilt
![]() balogh Sun Feb 26, 2023 7:50 am
balogh Sun Feb 26, 2023 7:50 am
Thanks for the clarification, Sosam117...yes, the retaining disc in the 3 piece piston is certainly thinner than the swaged cup and bends easier, so one should tap on it with caution..I have not tried to remove the circlip either, but maybe a sewing needle with a 90 degree bent tip might help pry it out?
balogh- Top Poster
-
Posts : 4755
Join date : 2011-11-06
Age : 65
Location : Budapest Hungary
Re: Christmas Present from my Aussie friend --- cleaned & rebuilt
![]() sosam117 Sun Feb 26, 2023 9:16 am
sosam117 Sun Feb 26, 2023 9:16 am
KariFS wrote:Nice work on cleaning up the engines and building the stands! Good idea to use circuit board stand-offs(?) to mount the engines to a distance from the stands. Going to use those on mine too... My Hopper does not have that nice birdgage mount, so I’ll need some extra-long stand-offs. These might work on Tee Dees and other beam mount engines too
Hi KariFS,
I have used the circuit board stand-offs for many years.
When I change out a small 1/2A engine to a electric outrunner motor to have the prop clear the sides of the fuselage.
I use stronger(larger) stand-offs on bigger outrunner motors.
Here is what I used for my stand-offs:
On the Space Bug
I used 2.5mm cheese head screws, as the screws were a good fit to the original holes.
The original screws that were there is an odd size 3-56 inch screw which measures fairly close to the M2.5 metric screw.
So the matching stand-offs are M2.5 metric threads and are 10mm long.
For the Space Bug Jr.
I used 2.0mm cheese head screws as well, as the size of the Cox 2-56 screw measures slightly more than 2.0mm and the mounting holes fit the 2-56 screws with no problems.
So the matching stand-offs are M2.0 metric threads and are 10mm long.
L would have liked to use "four" nylon stand-offs to have blended in with the plast tank of the Space Bug Jr.
But the Hardware store was all out of the nylon stand-offs I needed, so I had to settle for the steel ones.
The nylon stand-offs would have been nice, but didn't want to pay $8.00 in shipping for $3.00 worth of nylon stand-offs.
Last the Thermal Hopper
I was lucky that Allan did have the Birdcage mount on his Thermal Hopper.
With the Thermal Hopper, I just used the 2.5mm screws to mount the engine to my stand.
KariFS,
For your situation, screwing together "two" stand-offs that are 10mm long will just clear the needle valve assembly to the firewall.
Here is a short description on how I would do it.
The 2-56 screw on the upper crankcase housing is about 1/2" (about 13mm) long
The 2-56 screw on the lower portion on the crankcase housing is about 1/8" (about 6mm) long.
Order "twelve" cheese head (Filister) head 2-56 screws that are 3/4" long (about 20mm)
Order "eight" circuit board stand-offs that are about 3/8" (about 10mm) long and the internal threads are 2-56".
Cut "four" of those 2-56 screws in half. Don't loose any part of the cut-off screw!
The one end that has no head you thread that into the one stand-off with a little thread lock dripped into the stand-off threads.
After the stand-off with the thread lock has cure enough, thread another stand-off onto cut-off screw sticking out of the one stand-off and after screwing then together you should have two stand-offs screwed together.
Now that other end of the cut-off screw(with the head on it), clean up the end of the thread using your Dremel tool and try to put a camphor on the cut-off end. ( this is a hard task to do without loosing the screw!)
Next is to replace the original 2-56" OEM screws in the Thermal Hopper's crankcase with the 3/4" length 2-56 screws you have.
The screws should stick out from the Thermal Hopper's back plate by about an 1/8of an inch (about 6mm).
Next, screw on your doubled stand-offs that you screwed together to the screws sticking out from the back plate of the Thermal Hopper. The stand-offs should screw down to the back plate? If the screws are too long, cut them shorter until the stand-offs screw down to the back plate.
Now you have "four" stand-offs that should be just passed the venturi intake for you to mount the engine to the firewall or mount.
If you are really going to use the engine, I would use the nylon stand-offs, as in a crash, the nylon stand-offs would break-off.
sosam117- Diamond Member
- Posts : 1293
Join date : 2016-03-23
Location : Suburb of Chicago, Illinois
Re: Christmas Present from my Aussie friend --- cleaned & rebuilt
![]() sosam117 Sun Feb 26, 2023 9:30 am
sosam117 Sun Feb 26, 2023 9:30 am
balogh wrote:Thanks for the clarification, Sosam117...yes, the retaining disc in the 3 piece piston is certainly thinner than the swaged cup and bends easier, so one should tap on it with caution..I have not tried to remove the circlip either, but maybe a sewing needle with a 90 degree bent tip might help pry it out?
I have tried everything.
sewing needle at 90°
dental pick
Everything that I use to remove the Enya's c-clip on the Cox engines. ----- nothing.
No Luck

And those Enya clips are a SOB to remove as they spin around in the groove. Like the Cox c-clip does.
Only time it is easier is when they have been run and not cleaned, the c-clip doesn't move around in the groove.
Then I can get the c-clip with the dental pick and it is still tough! (Without losing it when it flies out)
sosam117- Diamond Member
- Posts : 1293
Join date : 2016-03-23
Location : Suburb of Chicago, Illinois
Re: Christmas Present from my Aussie friend --- cleaned & rebuilt
![]() KariFS Sun Feb 26, 2023 11:20 am
KariFS Sun Feb 26, 2023 11:20 am
Thanks or the tips and measurements, Mike! I am not going to fly, probably not even run my old Thimble Drome engines, as I only have one of each.
As it happens, I was just about to place an order for some electronics stuff, and the store carries many kinds of stand-offs. Actually my electronics project requires both M2.5 and M3 stand-offs and a bunch of other small hardware. I’ll add some for the engines too
My local hardware stores only carry a small selection of M3, some M4, only the bigger sizes have a good selection and reasonable prices, so just about anything special needs to be ordered. Postage is usually about 7€, but with the gas prices and parking fees nowadays that is not that bad compared to driving to a couple of stores in the city.
KariFS- Diamond Member
- Posts : 2005
Join date : 2014-10-10
Age : 52
Re: Christmas Present from my Aussie friend --- cleaned & rebuilt
![]() Ken Cook Sun Feb 26, 2023 11:42 am
Ken Cook Sun Feb 26, 2023 11:42 am
I recently had a similar situation with a K&B .049. I ended up gluing the circlip with CA and hitting it with kicker on one end to prevent it from rotating. I then used the picks to remove it. My father made dental equipment and tools . He has quite a variety of them to choose from but many of them are too weak.

Ken Cook- Top Poster
- Posts : 5489
Join date : 2012-03-27
Location : pennsylvania
Re: Christmas Present from my Aussie friend --- cleaned & rebuilt
![]() sosam117 Sun Feb 26, 2023 6:23 pm
sosam117 Sun Feb 26, 2023 6:23 pm
Ken Cook wrote: I recently had a similar situation with a K&B .049. I ended up gluing the circlip with CA and hitting it with kicker on one end to prevent it from rotating. I then used the picks to remove it. My father made dental equipment and tools . He has quite a variety of them to choose from but many of them are too weak.
When I go and get my teeth cleaned (twice a year), I ask my dentist "if" he has old picks I could have?
I usually go out the door with about six to ten dental instruments.
I find them handy for working on the engines.
Also, some of the tools have nice and hard tips and some have bendable tips.
sosam117- Diamond Member
- Posts : 1293
Join date : 2016-03-23
Location : Suburb of Chicago, Illinois
Re: Christmas Present from my Aussie friend --- cleaned & rebuilt
![]() GallopingGhostler Sun Feb 26, 2023 7:38 pm
GallopingGhostler Sun Feb 26, 2023 7:38 pm
I find it interesting that Enya used a stamped steel con rod. From what I heard, it still did the job.
Some years ago, I remembered that the New Mexico Army National Guard in Gallup, NM had a grease gun from WW2. I got to examine it closely, was amazed that although it had a long magazine and could be put on fully auto shooting 45 caliber what I guess was pistol ammunition, most of it was made of heavy duty stamped steel parts. Was said to be very cost effective to make in its day.
These were carried by tanker crews, because it was compact and easy to carry moving in and out of those confined spaces. Think I may still have my father's lead casting soldier molds with a WW2 soldier posed firing one.
GallopingGhostler- Top Poster
-
Posts : 5350
Join date : 2013-07-13
Age : 70
Location : Clovis NM or NFL KC Chiefs
Re: Christmas Present from my Aussie friend --- cleaned & rebuilt
![]() sosam117 Mon Feb 27, 2023 9:17 am
sosam117 Mon Feb 27, 2023 9:17 am
GallopingGhostler wrote:I find it interesting that Enya used a stamped steel con rod. From what I heard, it still did the job.
GallopingGhoster,
The connecting rods are made of tempered aluminum and not of steel.
Originally, the con rods were stamped out then shaped to a round section in the middle.
These stamped out and rounded con rods were seen in the early Enya rear induction engines.
1st piston assembly in the photo on the left side.
Later on, when Enya came out with the Enya front rotary induction, the con rods were a diamond shape.
Middle piston assembly in the photo.
I think these were going to be shaped round but never went to the next step in the mfg. process.
The last piston assembly on the right is my finishing up the diamond shape con rods to a round one.
I did just this one, but will not do anymore as it takes some time and a little rough on the fingers.
I have talked to Ken as to why the later versions were just stamped out and not really finished shaped round and just the top of one end was shaped slightly (corners rounded slightly) to fit into the underside of the piston?
It was a cost cutting measures as the slightly cheaper Cox engines were flooding the home market and Enya wanted to undercut the cost of the Cox engine to keep the home market share for Enya.
The Enya less work intensive Piston Assembly (cheaper -- less costly) found in the later smaller Enya engines.
Enya's Earlier piston assemblies with shaped con rods (more intensive work ---cost more in time/money)
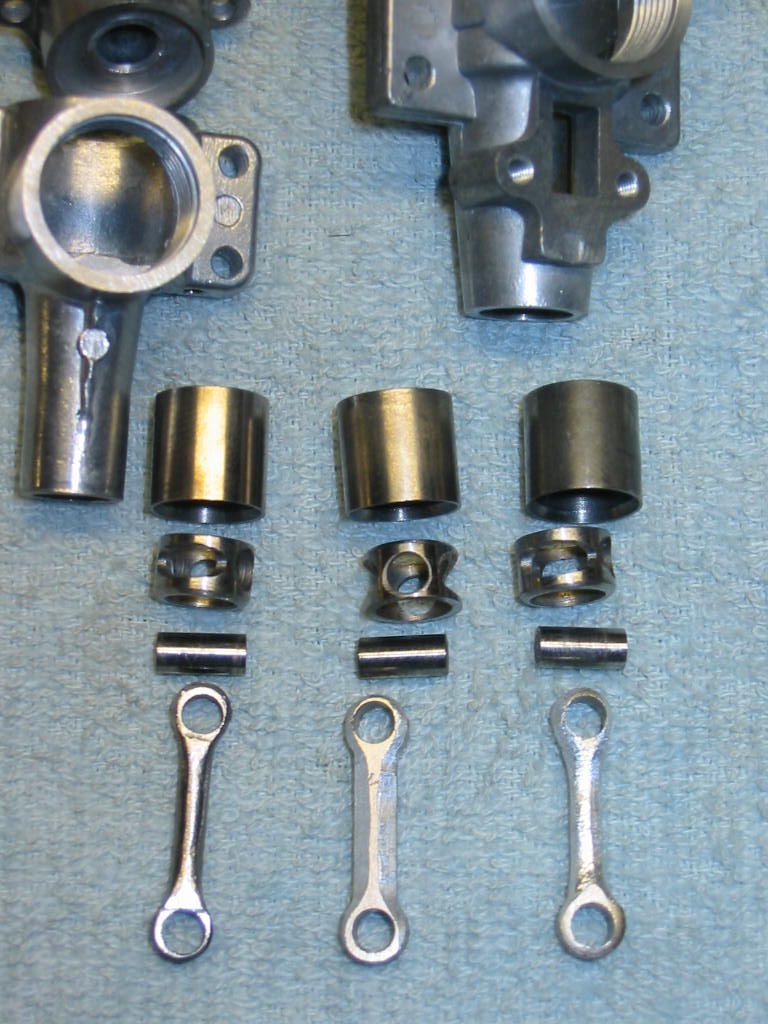

Another thing to notice is the cage (the part under the piston).
The earlier versions had a milled section on either side of where the con rod pin goes. (lighter)
The later version does not have this done (heaver) --- more cost cutting and less machining/labor.
I have been rebuilding:
The Enya .049 engines (almost 73 of them)
The Enya .06 engines (almost 84 of them)
The Enya .08 engines (almost 20 of them)
And the Enya .10 engines (almost 38 of them)
And most of them I have noticed vary from one to another of manufacturing.
Starting from some missing the thrust washer behind the prop drive washer.
Wrong throttle valve barrel in the carburetor on the wrong engine, (a larger barrel size for the .08 on a Enya .06 engine)
More that 50% of the time, the crankshaft rubbing on the back plate (inside).
But also noticed two or three gaskets on the back plate to shim back the rear back plate so that the crank would not rub on the back plate.
And some of that is from the excessive play because the crankcase housing is shorter that it should be.
And when I rebuild the engine, I use copper spacers to get the correct end play, so the crank doesn't grind into the back plate.
Ken has been helpful letting me know some of the specifics on the play there.
It is interesting to know that how much the aluminum housing expands to where under operating temp that large gap at the beginning is reduced when the engine is up to running temperature.
So, you need to have enough end play in that shaft!
sosam117- Diamond Member
- Posts : 1293
Join date : 2016-03-23
Location : Suburb of Chicago, Illinois
Sponsored content
» Aerotech kits from my Aussie friend
» Cox .049 Thermal Hopper - a never ending story
» Latest Reed engine cleaned and rebuilt
» Tach Race 2014 !!!!!!!!!
» Enya fitted with Muffler // "Two" G-Mark .061 engines rebuilt/cleaned up
» Cox .049 Thermal Hopper - a never ending story
» Latest Reed engine cleaned and rebuilt
» Tach Race 2014 !!!!!!!!!
» Enya fitted with Muffler // "Two" G-Mark .061 engines rebuilt/cleaned up
Page 1 of 1
Permissions in this forum:
You cannot reply to topics in this forum