

 Rules
Rules
Log in
Search
Latest topics
» World's largest weathervaneby Cox International Today at 3:38 pm
» Norvel Needle Needed
by Ken Cook Today at 3:23 pm
» My Cox .049 Marine inboard engine
by 1/2A Nut Today at 2:42 pm
» A prototype Cox Reed-valve marine engine
by F4D Phantom II Today at 2:22 pm
» Help Pee Wee tank cap .020
by rdw777 Today at 1:30 pm
» **VOTE-ON-THE-NEXT-COX-ENGINE-OF-THE-MONTH** (May 2024)
by GallopingGhostler Today at 11:34 am
» Jim Walker Firebaby
by rdw777 Today at 10:32 am
» Here we go again... another Lawn-Boy
by rdw777 Today at 9:17 am
» Revivng Some Childhood Classics
by getback Today at 8:21 am
» Roddie-Rigger.. a 2005 original design
by getback Today at 6:31 am
» Jim Walkers FireBee - This is going to be fun
by rsv1cox Yesterday at 7:29 am
» Post your Older books
by rsv1cox Mon May 06, 2024 7:51 pm
Cox Engine of The Month


CEF Traveling Engine


Win This Engine!

Live on Patrol


Properly restoring a Strato Bug
Page 1 of 1

Properly restoring a Strato Bug
![]() Jason_WI Thu Jan 10, 2013 8:05 pm
Jason_WI Thu Jan 10, 2013 8:05 pm
What is the best way to restore the aluminum finish on the tank and crankcase of a Strato Bug. I don't want the mirrored look of mothers or the variable look of a wire brush.
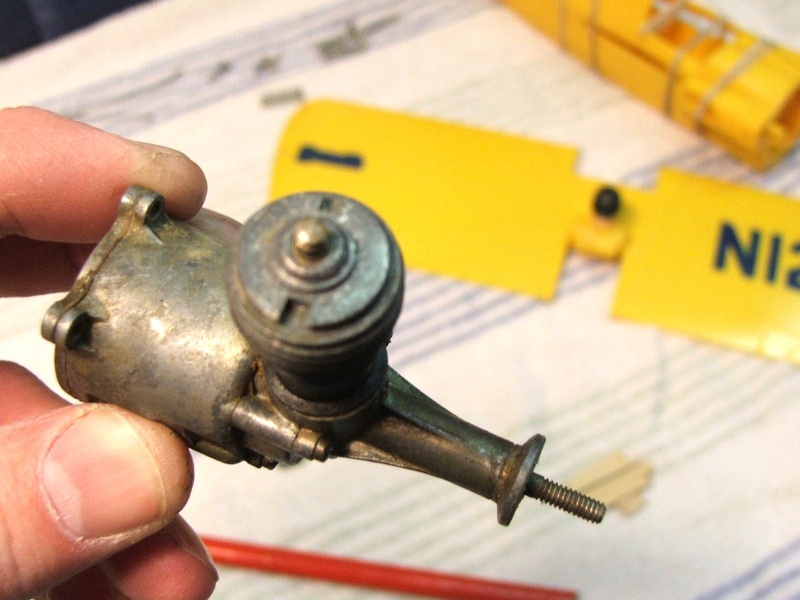
Here is a picture of the Strato Bug I got today.


Jason
Here is a picture of the Strato Bug I got today.

Jason
Jason_WI- Top Poster


Posts : 3123
Join date : 2011-10-09
Age : 48
Location : Neenah, WI
Re: Properly restoring a Strato Bug
![]() Mudhen Thu Jan 10, 2013 8:34 pm
Mudhen Thu Jan 10, 2013 8:34 pm
.
Last edited by Mudhen on Sun Nov 14, 2021 8:28 am; edited 1 time in total

Mudhen- Gold Member

- Posts : 489
Join date : 2011-09-19
Re: Properly restoring a Strato Bug
![]() Jason_WI Thu Jan 10, 2013 8:40 pm
Jason_WI Thu Jan 10, 2013 8:40 pm
Mud,
Thank you for the tips on restoring. I will have to pick up some Novus #3. I think it is defiantly worth restoring this engine.
Did you happen to see my post on the fake Strato bug I bought a few weeks back?
Jason
Thank you for the tips on restoring. I will have to pick up some Novus #3. I think it is defiantly worth restoring this engine.
Did you happen to see my post on the fake Strato bug I bought a few weeks back?
Jason
Jason_WI- Top Poster
-
Posts : 3123
Join date : 2011-10-09
Age : 48
Location : Neenah, WI
Re: Properly restoring a Strato Bug
![]() andrew Thu Jan 10, 2013 8:50 pm
andrew Thu Jan 10, 2013 8:50 pm
Nice post, Mud. Thanks for sharing your techniques.
Do you ever apply any sealant to protect the buffed out aluminum from eventual corrosion and/or oxidation?
Do you ever apply any sealant to protect the buffed out aluminum from eventual corrosion and/or oxidation?

andrew- Diamond Member

- Posts : 1813
Join date : 2011-08-11
Age : 76
Location : Western Kentucky -

Re: Properly restoring a Strato Bug
![]() Mudhen Thu Jan 10, 2013 8:52 pm
Mudhen Thu Jan 10, 2013 8:52 pm
.
Last edited by Mudhen on Sun Nov 14, 2021 8:28 am; edited 1 time in total
Mudhen- Gold Member
- Posts : 489
Join date : 2011-09-19
Re: Properly restoring a Strato Bug
![]() Jason_WI Thu Jan 10, 2013 9:01 pm
Jason_WI Thu Jan 10, 2013 9:01 pm
Mudhen wrote:I just saw the post on the fake engine. That blows. What did you pay for it?
Also, although I've had good success with restoring Strato Bugs, wait to see what Mark posts. I'm always interested in good restoring techniques. He may have some info to improve the restoration. I can tell from your engine that it's a diamond in the rough. It should turn out nice.
Mud
It was on ebay so I paid too much! I have sent it back and am awaiting refund. It was sent back insured and with signature confirmation.
I will definately post pics and run it and post a video. It's already a used engine so using it one more time wont hurt it.
Jason
Jason_WI- Top Poster
-
Posts : 3123
Join date : 2011-10-09
Age : 48
Location : Neenah, WI
Re: Properly restoring a Strato Bug
![]() Mark Boesen Thu Jan 10, 2013 9:10 pm
Mark Boesen Thu Jan 10, 2013 9:10 pm
Yeah! You gotcha one!
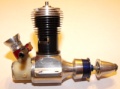
I personally don't like the 'chrome' look you get from using a cleaner/polish, it does look cool, but it also stands out like a sore thumb if you're trying to restore a engine. I like to use a fine grit of wet/dry sandpaper, water or WD-40 to cut with and recreate the factory machine marks. To do it right you should pull vent tubes or work around, lots easier. I've never done a Strato, but I'm guessing you can chuck the airtube of tank in a drill much like a Babe Bee, if you're gonna leave the tubes in, gently 'sand' the area top and bottom of tubes before you 'turn' the tank, use light pressure, slowly, you don't want to take off a bunch of aluminum. The cast aluminum case is pretty hard unless you got a cheep Harbor freight polisher http://www.harborfreight.com/5-lb-metal-vibrator-tumbler-67617.html I've had good luck with Brasso Metal polish and a stiff nylon brush, using the Brasso as a cleaner more then a polish, when you're done scrubbing, rinse compound with WD-40 or water, then WD-40, don't wipe off as then you're buffing, it’s tuff, as not enough and it's not very bright, too much and it's too 'chrome like'!
The photo of Babe Bee is a mint '57-'58 from a Super Cub, notice grooves in tank.
Last edited by Mark Boesen on Thu Jan 10, 2013 9:22 pm; edited 1 time in total

Mark Boesen- Top Poster
- Posts : 3977
Join date : 2011-09-01
Age : 65
Location : Rockford, Il -

Mark Boesen- Top Poster
- Posts : 3977
Join date : 2011-09-01
Age : 65
Location : Rockford, Il -
Re: Properly restoring a Strato Bug
![]() Mark Boesen Thu Jan 10, 2013 9:26 pm
Mark Boesen Thu Jan 10, 2013 9:26 pm
I like the Dawn idea, sounds like the perfect cleaner to remove the Novus #3 or Brasso.
Mark Boesen- Top Poster
- Posts : 3977
Join date : 2011-09-01
Age : 65
Location : Rockford, Il -
Re: Properly restoring a Strato Bug
![]() ahrma_581 Fri Jan 11, 2013 11:48 am
ahrma_581 Fri Jan 11, 2013 11:48 am
Were the cast crankcases tumble polished originally or just as cast?

ahrma_581- Gold Member
- Posts : 290
Join date : 2012-03-21
Location : Sonoran desert
Re: Properly restoring a Strato Bug
![]() Mark Boesen Fri Jan 11, 2013 1:10 pm
Mark Boesen Fri Jan 11, 2013 1:10 pm
You know i'm not really sure...Help Mudd! I've used the tumbler to clean-up/polished parts.
I guess I was thinking a lot of the early engines (Atwood, McCoy, etc.) were tumbled polished, but now I'm second guessing myself?
I guess I was thinking a lot of the early engines (Atwood, McCoy, etc.) were tumbled polished, but now I'm second guessing myself?
Mark Boesen- Top Poster
- Posts : 3977
Join date : 2011-09-01
Age : 65
Location : Rockford, Il -
Re: Properly restoring a Strato Bug
![]() Mudhen Fri Jan 11, 2013 5:33 pm
Mudhen Fri Jan 11, 2013 5:33 pm
.
Last edited by Mudhen on Sun Nov 14, 2021 8:29 am; edited 1 time in total
Mudhen- Gold Member
- Posts : 489
Join date : 2011-09-19
Re: Properly restoring a Strato Bug
![]() Mark Boesen Fri Jan 11, 2013 9:06 pm
Mark Boesen Fri Jan 11, 2013 9:06 pm
Ok, so surfing thru my old info, about the only one I could find that confirmed ‘tumbling’ crankcases is a article from Air Trails Annual ‘53, the article is titled ‘How a Engine is made’ and show the steps required to build a Herkimer ‘Cub’. There’s even a photo of the tumbling barrel.
Unless there were different casting processes that required the additional step of tumbling to achieve a smooth case, I got to think other manufactures of that period used similar manufacturing techniques?
Lol, we do know that Herkimer didn’t have ‘Temp-Trol’!
Unless there were different casting processes that required the additional step of tumbling to achieve a smooth case, I got to think other manufactures of that period used similar manufacturing techniques?
Lol, we do know that Herkimer didn’t have ‘Temp-Trol’!
Mark Boesen- Top Poster
- Posts : 3977
Join date : 2011-09-01
Age : 65
Location : Rockford, Il -
Re: Properly restoring a Strato Bug
![]() Jason_WI Thu Jan 31, 2013 9:44 pm
Jason_WI Thu Jan 31, 2013 9:44 pm
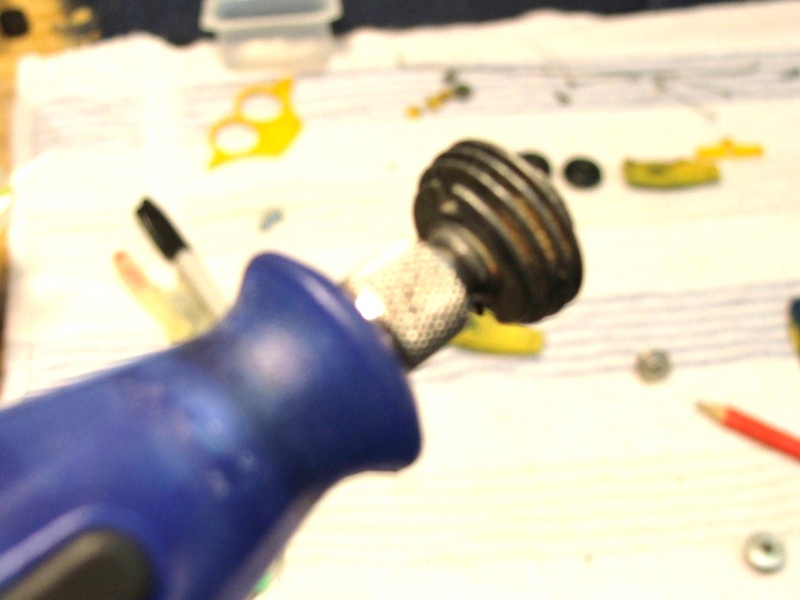
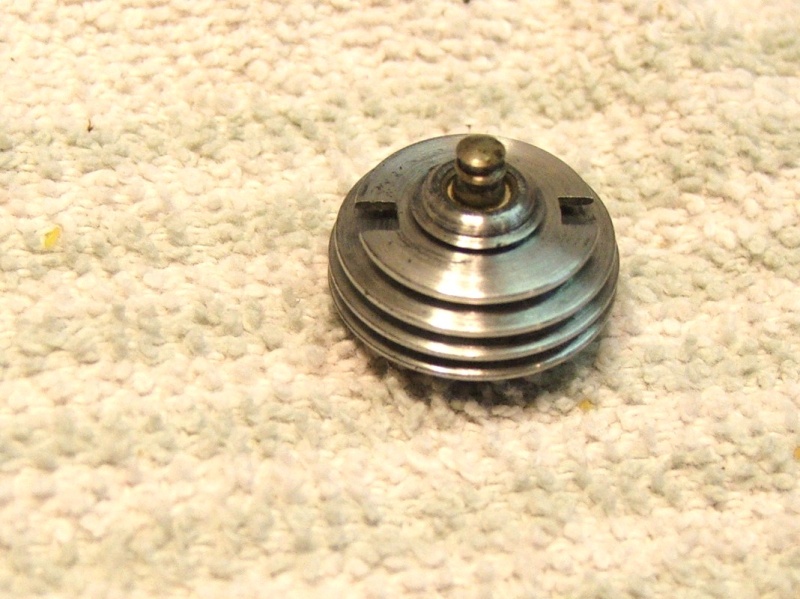
It's looking better than when I got it in.


Jason_WI- Top Poster
-
Posts : 3123
Join date : 2011-10-09
Age : 48
Location : Neenah, WI
Re: Properly restoring a Strato Bug
![]() Cribbs74 Thu Jan 31, 2013 9:55 pm
Cribbs74 Thu Jan 31, 2013 9:55 pm
Yeah man, it looks pretty darn good!

Cribbs74- Moderator
-

Posts : 11895
Join date : 2011-10-24
Age : 50
Location : Tuttle, OK
» Just finished rebuilding and restoring Cox 190-8 engine
» Why won't my tee 049 run properly
» Anyone know how to put this screen in properly/
» Restoring Cox Engines in general
» Restoring a B&S 5HP
» Why won't my tee 049 run properly
» Anyone know how to put this screen in properly/
» Restoring Cox Engines in general
» Restoring a B&S 5HP
Page 1 of 1
Permissions in this forum:
You cannot reply to topics in this forum