

 Rules
Rules
by Eddy Today at 6:48 pm
» Roddie's flat-bottomed boat..
by rsv1cox Today at 6:26 pm
» Happy Anzac Day!
by GallopingGhostler Today at 4:16 pm
» Three -- sold out (making two more) Cox .010 Carburetors with wrench
by MauricioB Today at 3:43 pm
» Jim Walkers FireBee - This is going to be fun
by rsv1cox Today at 12:27 pm
» Project Cox .049 r/c & Citabrian Champion
by rdw777 Today at 8:14 am
» Revivng Some Childhood Classics
by getback Today at 7:31 am
» Fox .35 Modifications
by Ken Cook Today at 3:16 am
» Introducing our Cox .049 TD Engines
by getback Yesterday at 6:20 am
» Cox powered jet-pump for model Sprint Boat
by roddie Thu Apr 25, 2024 10:25 pm
» Micro Draco Gets to Fly on a Beautiful Morning.
by rdw777 Thu Apr 25, 2024 8:15 pm
» Jim Walker Firebaby
by rdw777 Thu Apr 25, 2024 8:06 pm


RIngmaster
Page 1 of 3 • 1, 2, 3 ![]()

RIngmaster
![]() ian1954 Sun Sep 15, 2019 6:43 pm
ian1954 Sun Sep 15, 2019 6:43 pm
Anyway, the fuselage won't take long but I am thinking of using SIG Koverall for the covering and wondered if anyone had experience of this. I have seen mixed reviews.

ian1954- Diamond Member

- Posts : 2688
Join date : 2011-11-16
Age : 69
Location : England
Re: RIngmaster
![]() NEW222 Sun Sep 15, 2019 7:17 pm
NEW222 Sun Sep 15, 2019 7:17 pm

NEW222- Top Poster

- Posts : 3892
Join date : 2011-08-13
Age : 45
Location : oakbank, mb
Re: RIngmaster
![]() Ken Cook Sun Sep 15, 2019 7:43 pm
Ken Cook Sun Sep 15, 2019 7:43 pm
Last edited by Ken Cook on Mon Sep 16, 2019 4:39 am; edited 1 time in total

Ken Cook- Top Poster
- Posts : 5453
Join date : 2012-03-27
Location : pennsylvania
Re: RIngmaster
![]() Oldenginerod Sun Sep 15, 2019 8:21 pm
Oldenginerod Sun Sep 15, 2019 8:21 pm
Rod.


Oldenginerod- Top Poster
- Posts : 3970
Join date : 2012-06-15
Age : 61
Location : Drouin, Victoria
Re: RIngmaster
![]() GUS THE I.A. Sun Sep 15, 2019 10:53 pm
GUS THE I.A. Sun Sep 15, 2019 10:53 pm
This is the one, and I built it in the summer of 2013

GUS THE I.A.- Gold Member

- Posts : 359
Join date : 2012-08-15
Location : Wichita, Kansas
Re: RIngmaster
![]() 944_Jim Sun Sep 15, 2019 11:28 pm
944_Jim Sun Sep 15, 2019 11:28 pm
Sweet looking model!
944_Jim- Diamond Member


Posts : 1953
Join date : 2017-02-08
Age : 59
Location : NE MS
Re: RIngmaster
![]() getback Mon Sep 16, 2019 7:47 am
getback Mon Sep 16, 2019 7:47 am

getback- Top Poster
-
Posts : 10116
Join date : 2013-01-18
Age : 66
Location : julian , NC

ticomareado- Account Under Review
- Posts : 1089
Join date : 2013-10-03
Location : NC
Re: RIngmaster
![]() ian1954 Mon Sep 16, 2019 11:18 am
ian1954 Mon Sep 16, 2019 11:18 am
I only use cellulose dope (nitrate). I always "knock off" the edhes of anything I am going to cover or paint and include the ribs in this but although I consider that I have very good building skills - my finishing skills are dismal and I lose patience quite quickly.
I am also too ham fisted to contemplate sanding out open bays - I watched quite a few of the Windy videos with him painstakingly going for the perfect finish - a few minutes to spray each coat of finish and hours and hours of sanding in between.
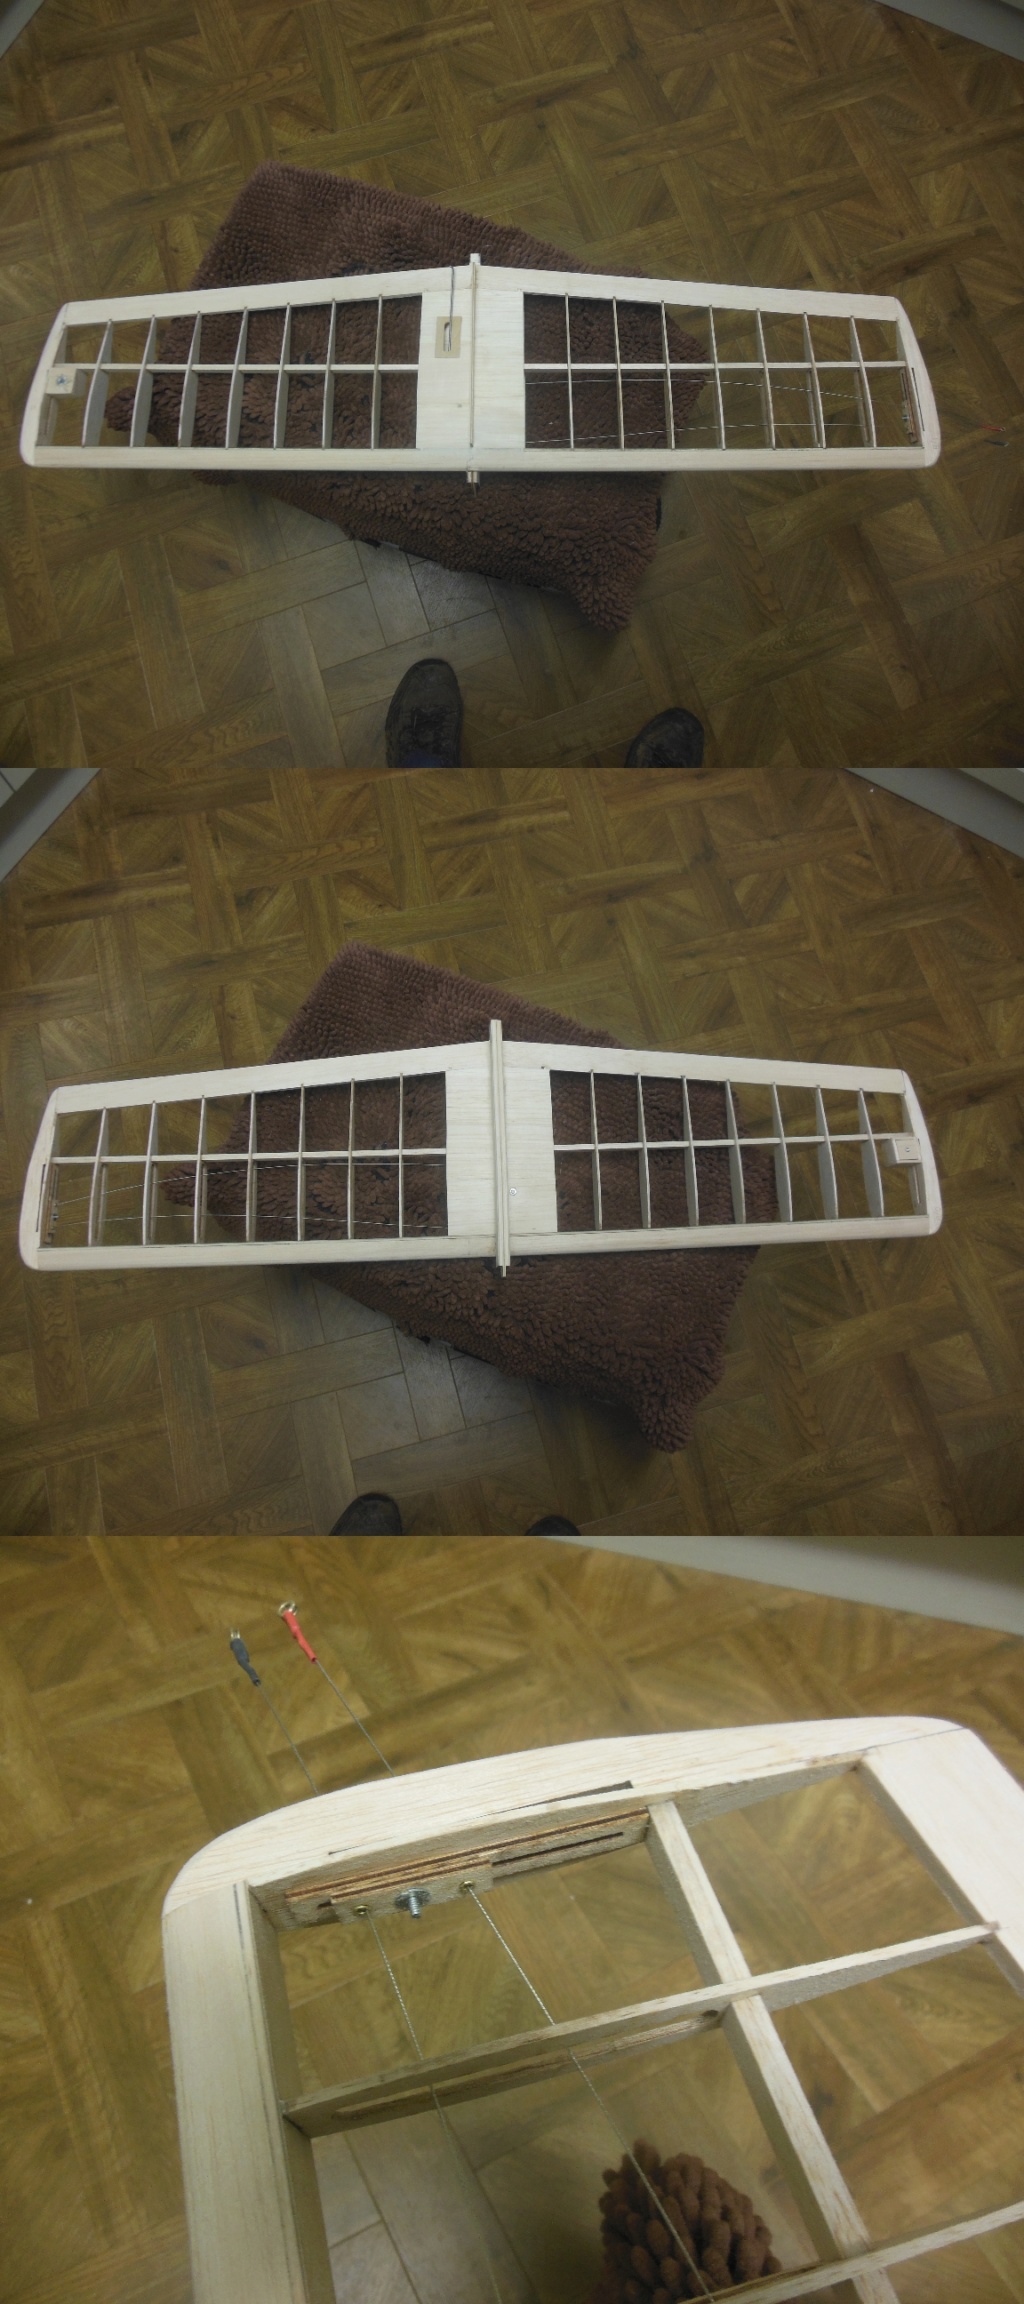
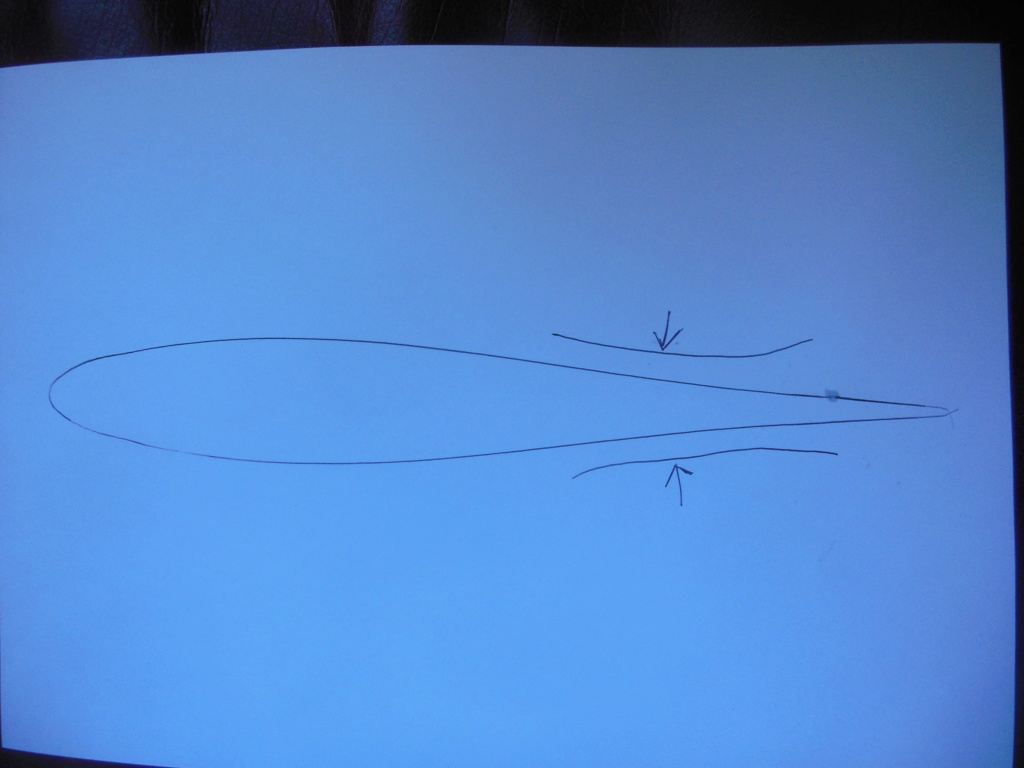
I have noticed though that the ribs on this have a slight undercamber as they approach the trailing edge. So far, it has been my experience that covering will shrink along the shortest possible path. How do you stop it bridging the undercamber?
The finish on Gus's model looks superb (I much prefer proper fuselages to these slabby things - I may have mentioned that before!) and I can see the profile of the ribs from where they join the leading edge to where the undercamber comes into play. Does the shrinking pull the covering down over the undercamber?
ian1954- Diamond Member
- Posts : 2688
Join date : 2011-11-16
Age : 69
Location : England
Re: RIngmaster
![]() rsv1cox Mon Sep 16, 2019 2:25 pm
rsv1cox Mon Sep 16, 2019 2:25 pm
GUS THE I.A. wrote:SIG Koverall is terrific stuff! I have a Sterling Super Ringmaster, which I Kovered with it, and it is still as tight and strong as the day I applied it! However, I did use butyrate dope throughout it's application: no problems. I painted white butyrate dope for it's base color, and Krylon spray paint for the trim colors - the FOX .35 STUNT engine does not require more than 10% nitro; therefore, the Krylon is not affected by the fuel. Good luck with your Ringmaster, and join Brotherhood of the Ring, for more people devoted to the Airplane.
This is the one, and I built it in the summer of 2013
Fantastic Ringmaster Gus, but I'm sure that Ian will give you a run for the money.
Bob

rsv1cox- Top Poster
-
Posts : 10556
Join date : 2014-08-18
Location : West Virginia
Re: RIngmaster
![]() Ken Cook Mon Sep 16, 2019 8:26 pm
Ken Cook Mon Sep 16, 2019 8:26 pm
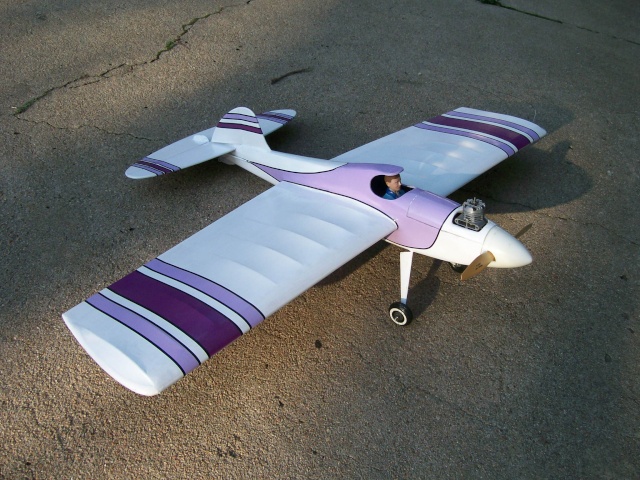
Here's my latest, covered in Koverall with nitrate base and water based polyurethane color coats. The color and clear coats were all painted with a 2" spongebrush.
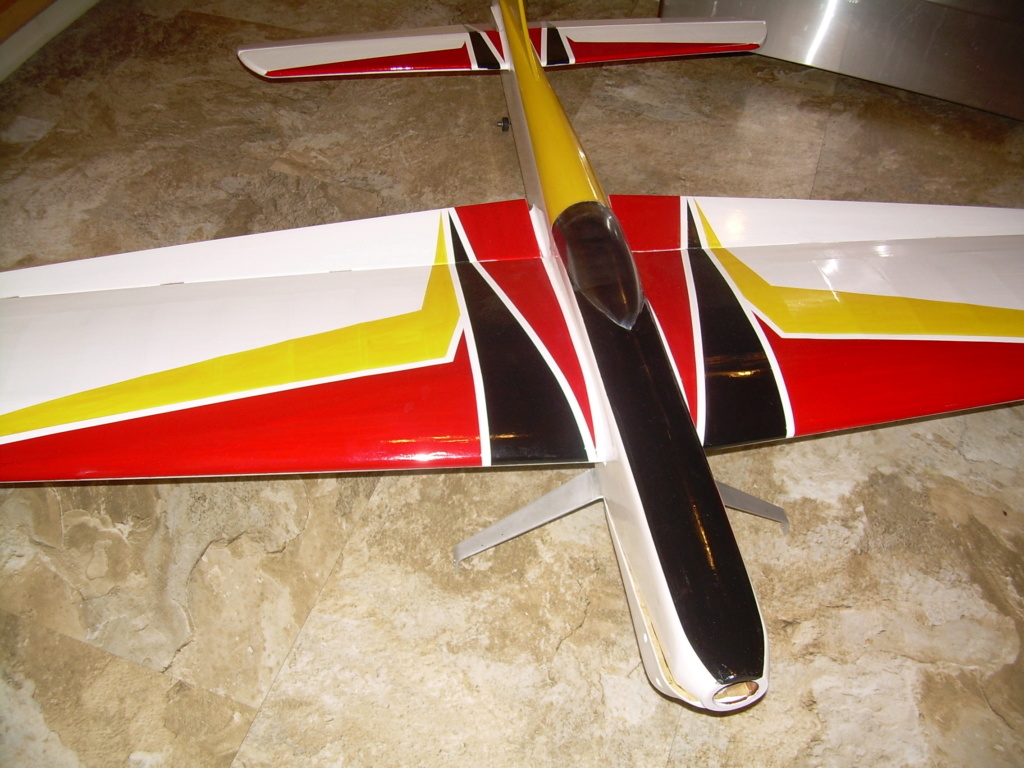 Brodak Vector
 This is also Koverall which is my Brodak Oriental, now going on 9 years old. This is all Brodak dope, Piper Metallic Green and Insignia White. There's probably 13 coats of clear on the model.
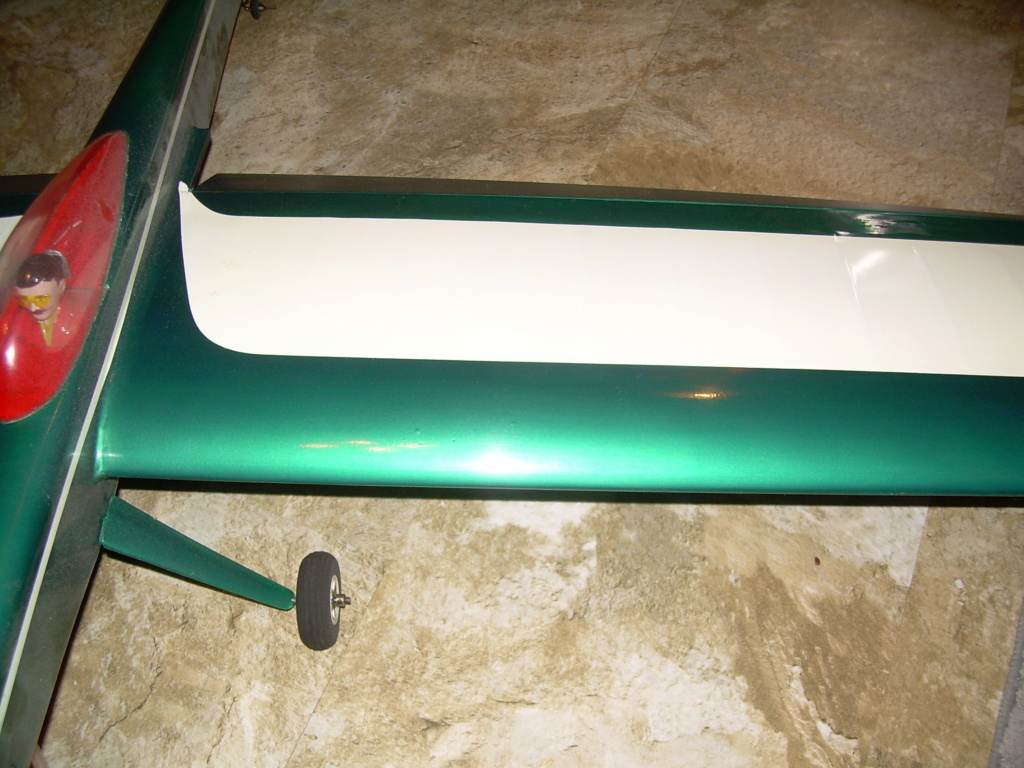
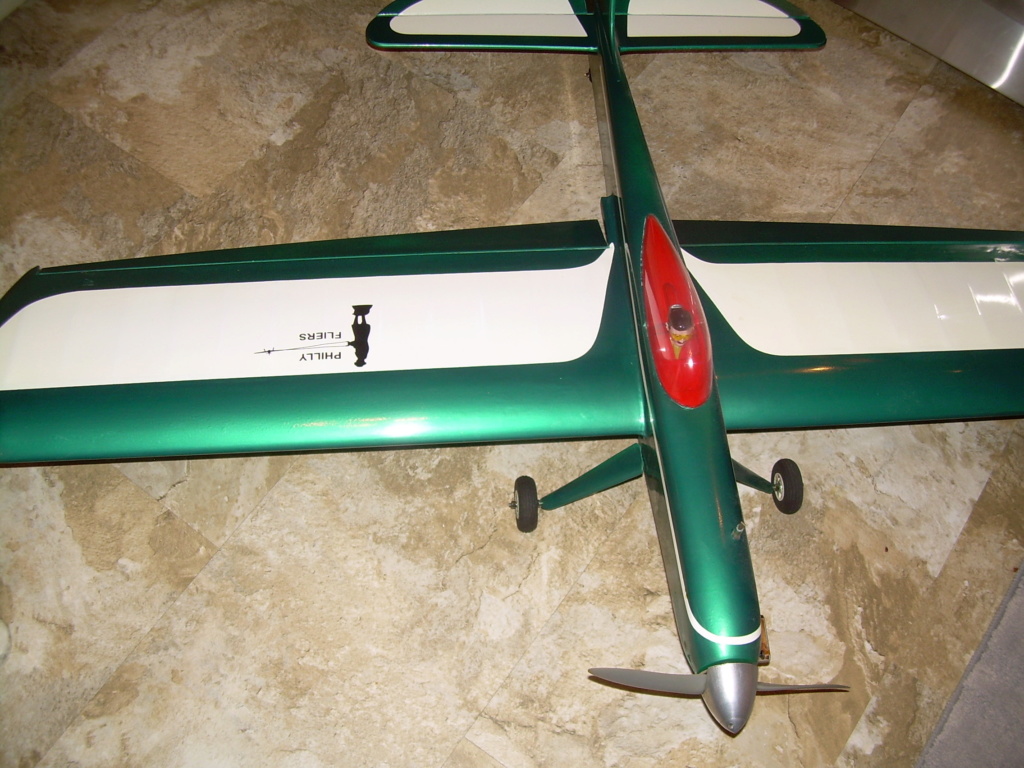
I don't use primer at all. I just use silkspan on the body and Koverall on the open bays. After the color coats, I generally spray on 3-4 clear butyrate coats and sand the clear with soapy water and 1500 grit followed by using silver polish and a sock on my hand and a coat of carnuba wax. The water based paints I've been using result in a instant shine.
I don't know why there's undercamber on the Ring but I would do a sample of using thinned pva glue and try and iron onto it and pull it to see if it comes off. Typically the heat should melt into the weave of the Koverall. If that isn't sufficient, I would use dots of medium ca every 1/2" on the rib followed by nitrate coats over it.
Ken Cook- Top Poster
- Posts : 5453
Join date : 2012-03-27
Location : pennsylvania
Re: RIngmaster
![]() ian1954 Tue Sep 17, 2019 8:08 am
ian1954 Tue Sep 17, 2019 8:08 am
Here is the undercamber I am referring to.
To me - 13 coats of clear is dedication but make no mistake - I admire hose who strive for a concourse finish and the best finish possible in the time available.
However, as mentioned, I lack the patience even though I have the time and am currently only intersted in flight ready. Time at the field is limited - for IC engines, Sunday afternoons 1pm to dusk. So far this year, there have only been 4 (yes, four! flying afternoons with our increasingly variable weather. I turn up at the field to fly with at least 6 models. Being an utter novice - I expect breakages and put asides but I am still ready to fly. This field is 45 miles away (11/2 hours drive - although 20 miles of this is motorway -70 mph, the rest is mostly 30mph and we have speed cameras everywhere!)
So, at the moment - I am build it fast ready to fly. I use various cyanos, fast setting aliphatic and a structural epoxy. Glue and go - not glue and wait.
As an aside, I have had many problems with the newer formulations of epoxy glues. I have concluded that the faster set glues aren't as strong as the slower set. The slower set need clamping and at least 8 hours before handling. The faster set are a bit hit and miss and some of them are difficult to mix correctly leaving less time to apply them. In warm weather - they have set while I was stirring them. I also find that I mix too much - mixing too little can be a disaster.
I now use this stuff
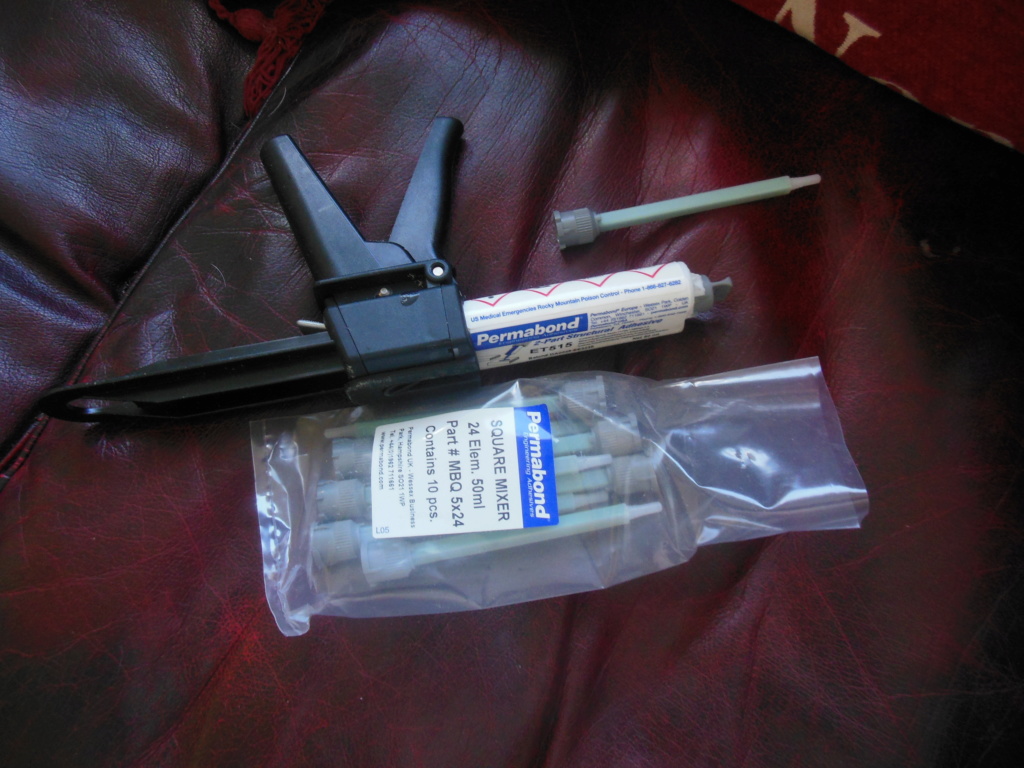
Cartridge inserted in the gun and mixing tube attached. The glue can then be applied directly and spread. !0 minutes working time and parts ready to handle in twenty minutes. 24 hours for full cure. Easy to apply to multiple parts and only a few seconds to replace the cartridge. Tube discarded after use. Little material is wasted in the mixing tube. Not cheap though - especially for small applications and the tube being discarded.
For covering I prefer material and dope even though it takes longer than the iron on coatings.
I use cellulose sanding sealer on the woodwork, Usually two coats each ready for a light sanding after 10 minutes. Then I apply a coat of clear dope and 10 minutes later the material is ready to apply. Once stuck down - and depending whether or not it needed applying wet I would then leave overnight to dry). Two coats of dope (brushed on) and then further coats to fill weave etc. No sanding unless i have a run or large blob. If I have prominent brush marks I then spary quite a thin coat and they usually disappear after one application.
I don't colour the whole wing - only trim and usually two coats of coloured dope. Apply transfers and a final spray of clear followed by, if necessary fuel proofer.
I colour the whole fuselage either with dope or enamel paints. Occasionally I will use polyurethane on a fusealge with appropriste primers and undercoat. One day, I may use one of the 2K paints when I am confident I can clean my equpment.
Most of the finishes I use are not compatible with butyrate dope.
I understand why some of these finishes and models take three years to create - Windy quoted between 400 and 600 hours per model. Even after the final coat of clear I watched him sand it flat with 1200 -1500 grit paper, followed by polishing with Gorhams and Finesse-it - buffing ......
I am envious of that level of patience. The finshes on Ken's and Gus's models are out of my league - I am no more than two colours and the simplest of trims. When (notice when and not if! I break it it will be "Oh dear, how sad, well never mind!"
Thanks for your input.
ian1954- Diamond Member
- Posts : 2688
Join date : 2011-11-16
Age : 69
Location : England
Re: RIngmaster
![]() Cribbs74 Tue Sep 17, 2019 5:30 pm
Cribbs74 Tue Sep 17, 2019 5:30 pm
That undercamber is called “pollywog” which is slang for a tadpole. Not sure what term you guys use, at any rate that is what the ribs are supposed to look like on the Ringmaster.
Ron

Cribbs74- Moderator
-
Posts : 11895
Join date : 2011-10-24
Age : 50
Location : Tuttle, OK
Re: RIngmaster
![]() ian1954 Wed Sep 18, 2019 3:48 pm
ian1954 Wed Sep 18, 2019 3:48 pm

and the skeleton assembled
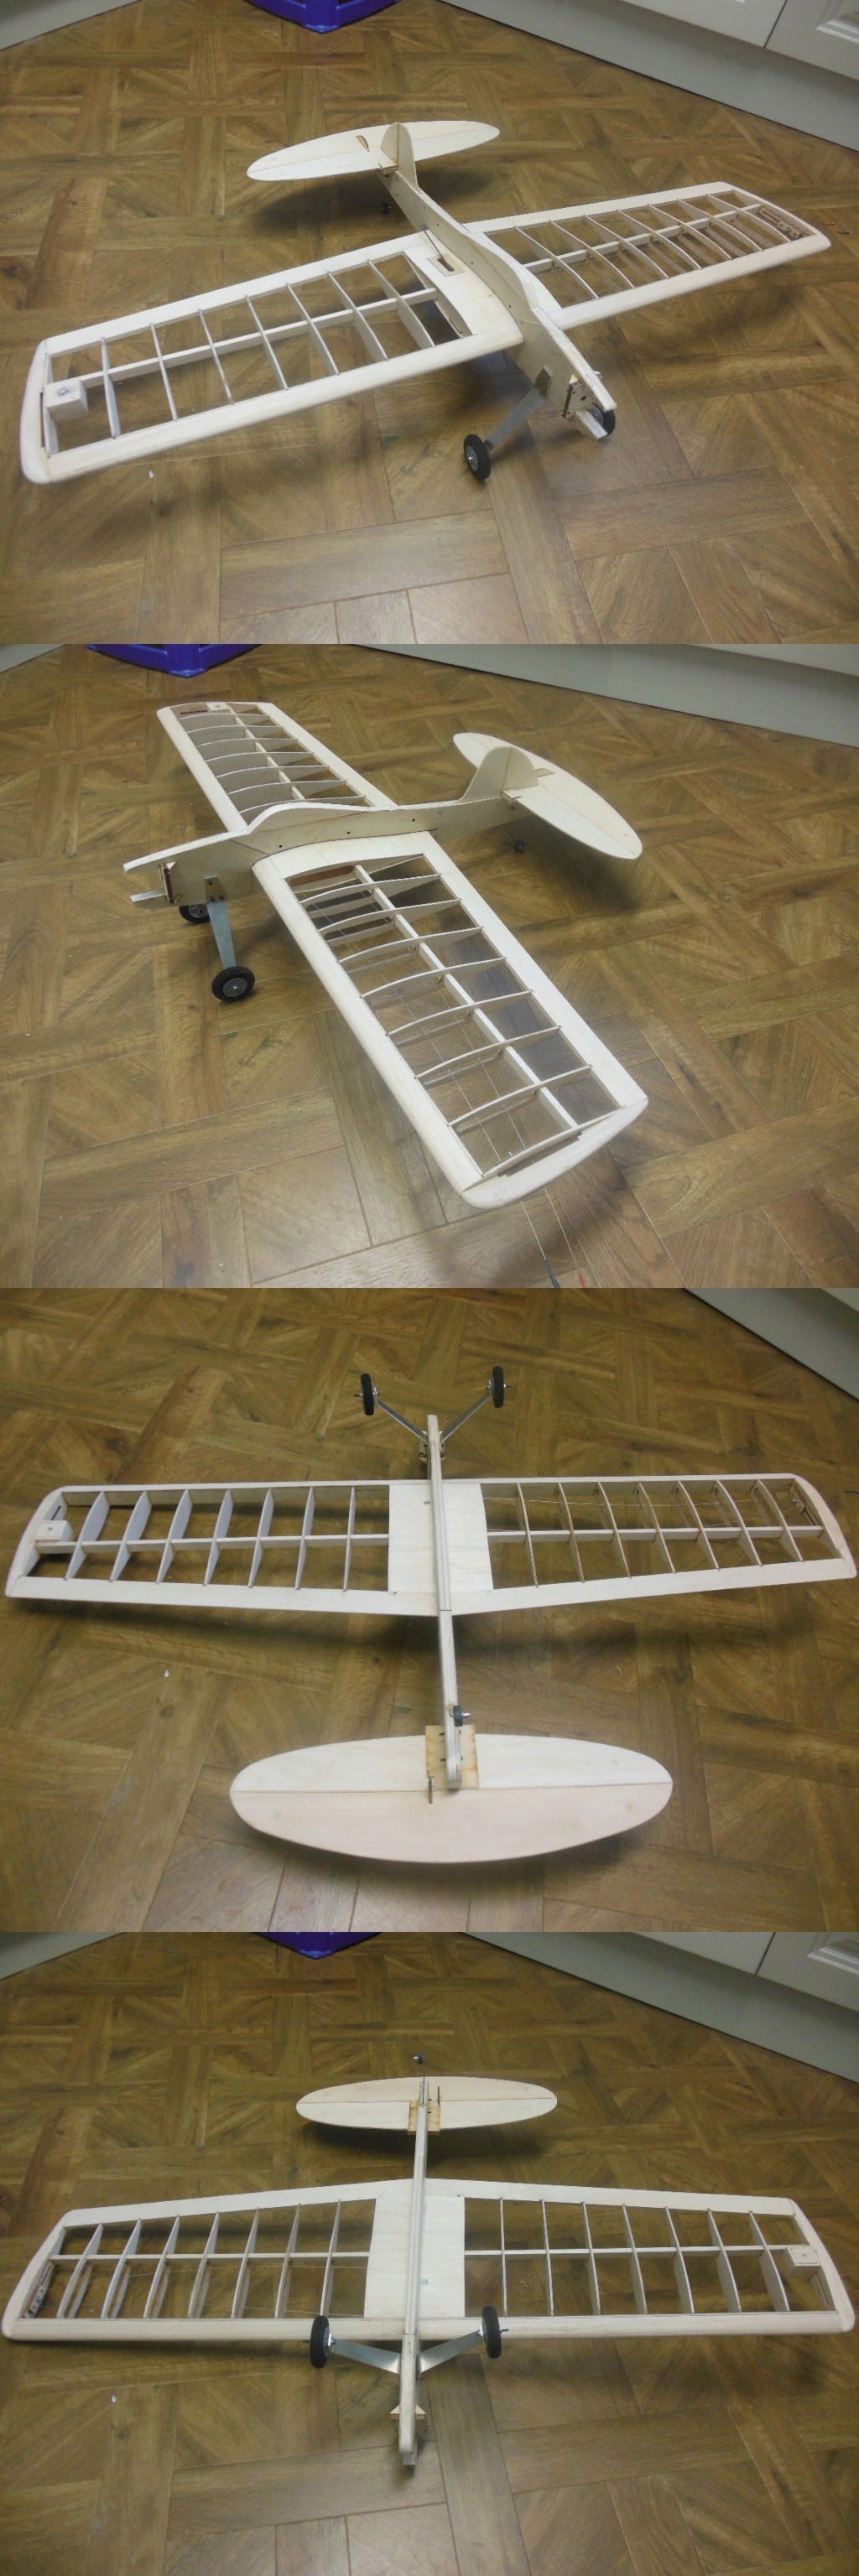
Only needs a bit of titivating here and there - the power plant preparing and it is ready for my attempts at finishing.
ian1954- Diamond Member
- Posts : 2688
Join date : 2011-11-16
Age : 69
Location : England
Re: RIngmaster
![]() Cribbs74 Wed Sep 18, 2019 8:05 pm
Cribbs74 Wed Sep 18, 2019 8:05 pm
Where is that kit from? Usually the fuse is cut out in a rib shape and the wing is slid in through the side. What you have is fine, just curious as to who kitted it.
If I can convey anything, no more than 1/4” (around 7mm) travel on that elevator. That thing has a ton of surface area and doesn’t need much input to stall he Ring. Extending the horn is the easiest fix, but using the inner hole on the bellcrank is the best bet.
Looks good BTW.
Ron
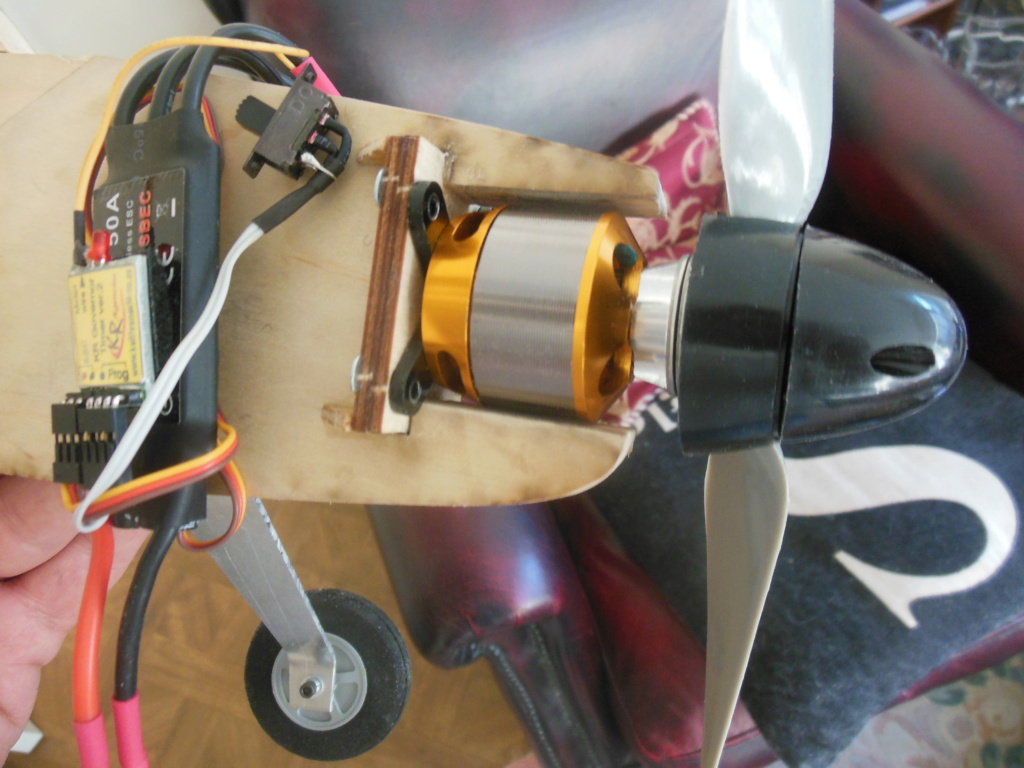
Wait a minute... Electric
Cribbs74- Moderator
-
Posts : 11895
Join date : 2011-10-24
Age : 50
Location : Tuttle, OK
Re: RIngmaster
![]() ticomareado Thu Sep 19, 2019 7:33 am
ticomareado Thu Sep 19, 2019 7:33 am
"Usually the fuse is cut out in a rib shape and the wing is slid in through the side."
Which invariably was a disaster in the case of Sterling kits. To start with the fuselage was typically from balsa that was as dense as an oak pallet slat and to add insult to injury the wing die mash/cut out was crooked and way off in dimensions. Impossible to get a solid glue joint between wing planking and fuselage. Similar issues with motor mount cut outs. I've been restoring a never flown old prison workshop built S-1 for quote some time and I'm going to go with a full length two piece horizontally split fuselage.
ticomareado- Account Under Review
- Posts : 1089
Join date : 2013-10-03
Location : NC
Re: RIngmaster
![]() getback Thu Sep 19, 2019 10:03 am
getback Thu Sep 19, 2019 10:03 am

getback- Top Poster
-
Posts : 10116
Join date : 2013-01-18
Age : 66
Location : julian , NC

ian1954- Diamond Member
- Posts : 2688
Join date : 2011-11-16
Age : 69
Location : England

getback- Top Poster
-
Posts : 10116
Join date : 2013-01-18
Age : 66
Location : julian , NC
ian1954- Diamond Member
- Posts : 2688
Join date : 2011-11-16
Age : 69
Location : England
Re: RIngmaster
![]() ian1954 Thu Sep 19, 2019 3:09 pm
ian1954 Thu Sep 19, 2019 3:09 pm
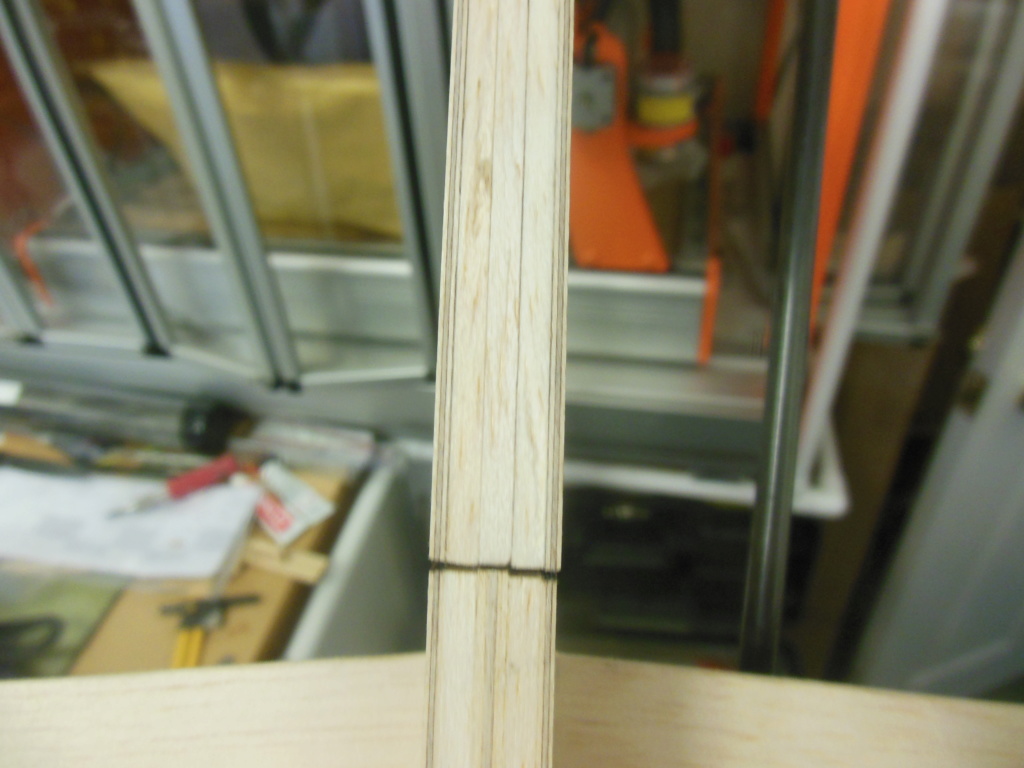
Nevertheless, I would be reluctant to rely on say a single piece of 1/2" balsa even with ply reinforcment up front. A dense piec of wood is more likely to stay straight but not guaranteed.
I have found that it is better to laminate the fuselage with a minum of two 1/4" sheets eopxied together and weighted flat overnight. Even go as far as carbon veil between the two or 1/64 ply. I use epoxy as I find aliphatic resin and PVA glues cause curling - although this can be flattened out while drying - it gets a little bit fiddly.
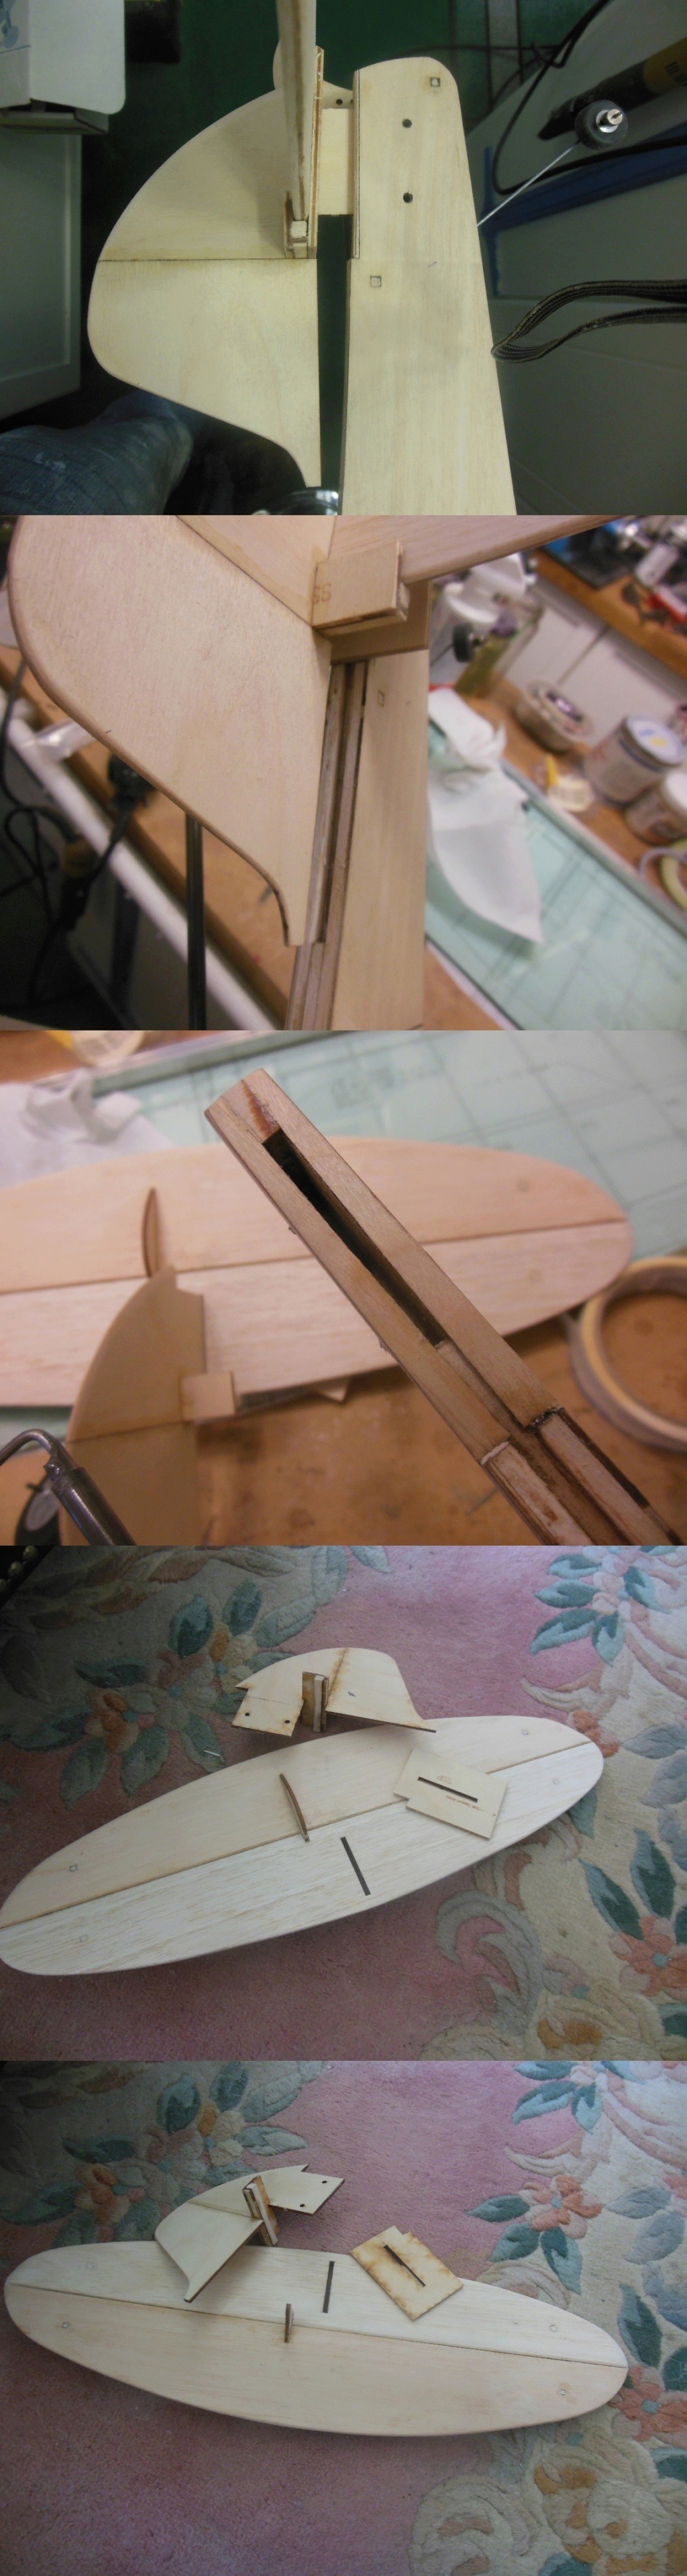
This fuselage is a 5 ply laminate - 3 1/8" balsa inner and two 1/16" ply outer.
It is an RSM take apart kit which is why it doesn't have the opening to poke the wing through.


This does make the build easier for getting a good wing to fusealge fit and there is no reason to leave it take apart. It can be permanently glued.
In fact, it would be difficult to seal from fuel and exhaust ingress as it stands,
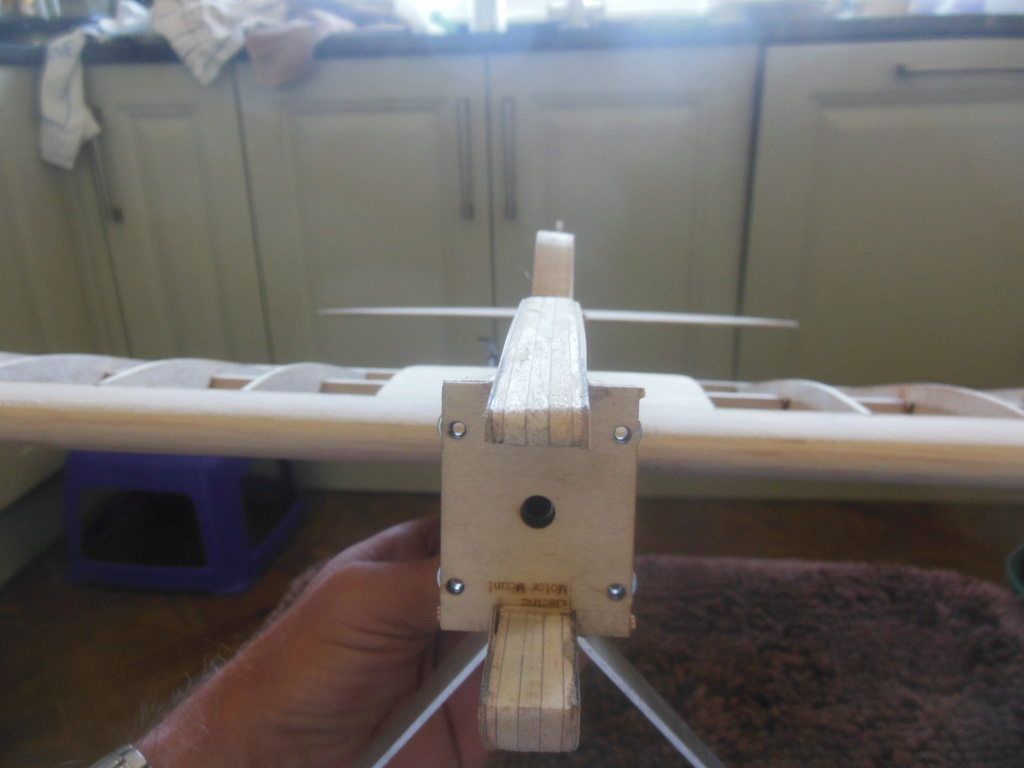
There is one major detail that needs very careful attention. The centre rib on the wing is also the tongue that slides into the fuselage either side of which has a 1/8" balsa rib to support the centre sheeting. These ribs must be perfectly aligned at 90deg to the leading edge and perfectly verticle or the wing won't level out on assembly.
The tailplane is also laminated - two 1/16" sheet balsa. This also proved ideal for fitting tape hinge along the whole length of the tailplane.
Good balsa is difficult to find but lamination ups the odds of a straight build.
The pushrod is on the inner hole of the bellcrank and the top hole of the elevator horn. It moves a lot more than
Ron's recommendation but I can fit stops or noit wiggle my hand so much!
ian1954- Diamond Member
- Posts : 2688
Join date : 2011-11-16
Age : 69
Location : England
Re: RIngmaster
![]() 944_Jim Thu Sep 19, 2019 7:50 pm
944_Jim Thu Sep 19, 2019 7:50 pm
I'm about to start a bigger build than my normal smalls, and need to consider the fuselage construction. The nose is potentially going to be cut out a bit wider between the engine mounts. I plan on making three aluminum mount pads...one for a Big Mig .15, one for an OS LA-S .15, and last one for a Cox Medallion .15. I want that last one so I can feature the build log here! The goal is to be able to test each engine against the others, and settle on the one the plane likes most.
Anyway, I have questions regarding the two engines...have you run them yet?
I have two .15 LAs similarly configured...one with a Jim Lee supplied nylon venturi and through venturi NVA, and one that is factory "LA-S" with the aluminum venturi and remote NVA. Granted, smaller engines...the baby cousins (same colors too, blue and unfinished alum) of yours.
Q1: Do the engines appear to be similar outputs?
Q2: If unmatched output, which setup appears to have the most torque?
Q3: Which setup do you prefer?
I ask, because if I had to have a matched pair (I love my twins), I need to determine whether to pick up another nylon venturi with the NVA, or pickup another aluminum "LA-S" NVA.
Thanks,
Last edited by 944_Jim on Thu Sep 19, 2019 10:06 pm; edited 1 time in total
944_Jim- Diamond Member
-
Posts : 1953
Join date : 2017-02-08
Age : 59
Location : NE MS
Re: RIngmaster
![]() ticomareado Thu Sep 19, 2019 8:25 pm
ticomareado Thu Sep 19, 2019 8:25 pm
ticomareado- Account Under Review
- Posts : 1089
Join date : 2013-10-03
Location : NC
Re: RIngmaster
![]() ian1954 Fri Sep 20, 2019 9:28 am
ian1954 Fri Sep 20, 2019 9:28 am
ticomareado wrote:This set up would allow Ian to pack the whole shooting match in some sort of custom back pack and take it to the field on a Vespa.
Not a back pack but it would sit in between my legs at the front.
ian1954- Diamond Member
- Posts : 2688
Join date : 2011-11-16
Age : 69
Location : England
Re: RIngmaster
![]() rsv1cox Fri Sep 20, 2019 9:30 am
rsv1cox Fri Sep 20, 2019 9:30 am
ian1954 wrote:ticomareado wrote:This set up would allow Ian to pack the whole shooting match in some sort of custom back pack and take it to the field on a Vespa.
Not a back pack but it would sit in between my legs at the front.
Nose forward I would hope Ian. Enjoying this build. Keep it up.
Bob
rsv1cox- Top Poster
-
Posts : 10556
Join date : 2014-08-18
Location : West Virginia
Page 1 of 3 • 1, 2, 3 ![]()