

 Rules
Rules
by rdw777 Today at 8:14 am
» Jim Walkers FireBee - This is going to be fun
by rdw777 Today at 8:10 am
» Three -- sold out (making two more) Cox .010 Carburetors with wrench
by sosam117 Today at 8:07 am
» Revivng Some Childhood Classics
by getback Today at 7:31 am
» Fox .35 Modifications
by Ken Cook Today at 3:16 am
» Happy Anzac Day!
by Boats13 Yesterday at 11:03 pm
» Introducing our Cox .049 TD Engines
by getback Yesterday at 6:20 am
» Roddie's flat-bottomed boat..
by Levent Suberk Yesterday at 12:23 am
» Cox powered jet-pump for model Sprint Boat
by roddie Thu Apr 25, 2024 10:25 pm
» Micro Draco Gets to Fly on a Beautiful Morning.
by rdw777 Thu Apr 25, 2024 8:15 pm
» Jim Walker Firebaby
by rdw777 Thu Apr 25, 2024 8:06 pm
» Hydro-bat by Vic Smeed: engine probs
by GallopingGhostler Thu Apr 25, 2024 5:12 pm


Goldberg Li'l Jumpin Bean build thread (Finished!)
Page 1 of 3 • 1, 2, 3 ![]()

Goldberg Li'l Jumpin Bean build thread (Finished!)
![]() Cribbs74 Mon Sep 10, 2012 12:21 am
Cribbs74 Mon Sep 10, 2012 12:21 am
This go around is a Goldberg Jumpin Bean. This is the re-kitted Brodak version.
I love the laser cutting. That's about it though. The plans are designed for someone who has experience building like most Goldberg plans are. I think the biggest problem with the kit is the hardware. Once again I am faced with the cheap plastic wheels and the kit does not have the firewall and nacelle pieces the the originall kit has. What it does provide is a plastic engine mount which is functional, but unsightly in my opinion.
Luckily the kit supplies some wing bracing shenanigans for building the wing that will function as nacelles. I will attempt to re-create the look of the original Bean that in my opinion was a great looking Goldberg model.
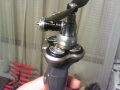
Not many pieces in this kit and I have knocked out most of the wing this evening. I should have it finished within the week. Oh! Forgot to mention the most important part. The powerplant will be the first Cox engine I ever purchased the venerable Black Widow!

https://i.imgur.com/j7TGo.jpg
Last edited by cribbs74 on Fri Sep 14, 2012 10:14 pm; edited 1 time in total

Cribbs74- Moderator


Posts : 11895
Join date : 2011-10-24
Age : 50
Location : Tuttle, OK
Re: Goldberg Li'l Jumpin Bean build thread (Finished!)
![]() Ivanhoe Mon Sep 10, 2012 5:23 am
Ivanhoe Mon Sep 10, 2012 5:23 am

I would really advise you to add some strengthening to the fuselage behind the wing, the 'Bean is VERY weak at this point, mine has a couple of bamboo skewers superglued along each side after a previous version snapped here every time it was landed "heavily"
(i.e crashed!)
Wilf

Ivanhoe- Diamond Member

- Posts : 1752
Join date : 2011-09-30
Location : Northern Ireland
Re: Goldberg Li'l Jumpin Bean build thread (Finished!)
![]() PV Pilot Mon Sep 10, 2012 6:29 am
PV Pilot Mon Sep 10, 2012 6:29 am

The 1/16" strip of craft plywood where the trailing edges meet. that whole area got a wrap of epoxy coated fiberglass tape once it was ready.

A lengthwise pic of the rib and wingtip bracing. I also sheeted top and bottom of the wingtips with 1/16" ply just because that soft basla tip seemed very,,soft. Did I need to do all of the rib bracing??,,probably not, but I was waiting for parts and supplies to show up so I had some time to kill. One thing is for sure, absolutely no wing warp when I put on the Ultracoat iron on covering.

PV Pilot- High Tech Balsa Basher
- Posts : 1854
Join date : 2011-08-11
Age : 57
Location : The ragged end of the Universe.
Re: Goldberg Li'l Jumpin Bean build thread (Finished!)
![]() lousyflyer Mon Sep 10, 2012 8:19 am
lousyflyer Mon Sep 10, 2012 8:19 am
lousyflyer- Gold Member

- Posts : 342
Join date : 2012-06-25
Age : 64
Location : Garden City Ga
Re: Goldberg Li'l Jumpin Bean build thread (Finished!)
![]() RknRusty Mon Sep 10, 2012 9:23 pm
RknRusty Mon Sep 10, 2012 9:23 pm
The nose is the next weak point with that stupid plastic mount. After mine snapped completely off, I made a new nose piece and re-installed the plastic mount with doublers to brace it. I had to make shims to take up the gaps beneath it, but once it was all epoxied together it was tough as nails. Believe me, I tested it repeatedly. When I took it out to test fly, that's when my Cox handle broke in two and she did a full power vertical dive into the sidewalk. No damage at all. I was furious, it took me a week of nights to remake the nose before that flight but it held.


After this mod, the nose never broke again. Not because I didn't try.
Crash after crash and the wing never took any damage. The only time it got hurt was when the poorly field-repaired nose broke loose in flight, the engine rocked over and chopped the outboard lead edge in half. Kind of funny at the time. You can see that repair in the first picture too.
_________________
...and never Ever think about how good you are at something...
while you're doing it!
My Hot Rock & Blues Playlist

RknRusty- Rest In Peace

- Posts : 10869
Join date : 2011-08-10
Age : 68
Location : South Carolina, USA
Re: Goldberg Li'l Jumpin Bean build thread (Finished!)
![]() Cribbs74 Mon Sep 10, 2012 9:57 pm
Cribbs74 Mon Sep 10, 2012 9:57 pm
It was your's and Wilfs' Bean's that inspired me to build one of my own. Both your suggestions dually noted!
I have epoxied the mount and the homemade nacelles in place tonight. The wing does look flimsy on mine Rusty, I have snapped the tips off twice just trying to line things. Which leads leads me to this rant......
The kit has poorly cut patterns as nothing is aligning properly! The leading edge tapers from left to right so where it meets in the middle is not the same thickness plus, when cut to the plans the mount for the bellcrank was way too large. Little things about the fit of the pieces are just slightly off. I am not totally impressed to be honest. I hope my Brodak clown is better.
Here is a picture of tonight's progress.

https://i.imgur.com/E70xf.jpg

https://i.imgur.com/Mrld5.jpg
Cribbs74- Moderator
-
Posts : 11895
Join date : 2011-10-24
Age : 50
Location : Tuttle, OK
Re: Goldberg Li'l Jumpin Bean build thread (Finished!)
![]() RknRusty Mon Sep 10, 2012 10:52 pm
RknRusty Mon Sep 10, 2012 10:52 pm
Your nacelles should help a lot. I would pack the gap between the front of the nacelle and the motor mount with epoxy and sawdust. I also recommend a 1/8" or 3/16" balsa brace between W2 and W1 where the crank mount is. Just to distribute some of the stress on W1. W1 is a double thick rib if I remember correctly, but mine broke. Probably from pulling it out of the stooge.
_________________
...and never Ever think about how good you are at something...
while you're doing it!
My Hot Rock & Blues Playlist
RknRusty- Rest In Peace
- Posts : 10869
Join date : 2011-08-10
Age : 68
Location : South Carolina, USA
Re: Goldberg Li'l Jumpin Bean build thread (Finished!)
![]() PV Pilot Mon Sep 10, 2012 11:05 pm
PV Pilot Mon Sep 10, 2012 11:05 pm
Those were my blocks and braceing pics Rusty.
PV Pilot- High Tech Balsa Basher
- Posts : 1854
Join date : 2011-08-11
Age : 57
Location : The ragged end of the Universe.
Re: Goldberg Li'l Jumpin Bean build thread (Finished!)
![]() Cribbs74 Mon Sep 10, 2012 11:15 pm
Cribbs74 Mon Sep 10, 2012 11:15 pm
PV Pilot wrote:Yep. A bit of massaging balsa before glueing anything is needed. Test fit, and test fit again,,,,and again
Those were my blocks and braceing pics Rusty.
I like your bracing on the wingtips Keith. I am thinking they are not up to the task as kitted. How much of a pain were those to cut out?
Ron
Cribbs74- Moderator
-
Posts : 11895
Join date : 2011-10-24
Age : 50
Location : Tuttle, OK
Re: Goldberg Li'l Jumpin Bean build thread (Finished!)
![]() Cribbs74 Mon Sep 10, 2012 11:18 pm
Cribbs74 Mon Sep 10, 2012 11:18 pm
RknRusty wrote:It looks good despite the kit problems. I don't recall any of that kind of trouble. Your joints look nice, the fiberglass is a good idea. I don't see all of those blocks you braced the ribs with in your earlier post, did you remove them?
Your nacelles should help a lot. I would pack the gap between the front of the nacelle and the motor mount with epoxy and sawdust. I also recommend a 1/8" or 3/16" balsa brace between W2 and W1 where the crank mount is. Just to distribute some of the stress on W1. W1 is a double thick rib if I remember correctly, but mine broke. Probably from pulling it out of the stooge.
Yeah that was PV's mod. Great minds must think alike as that was my plan. I was going to epoxy the gap and use the remainder of the nylon tape to wrap the nose.
Cribbs74- Moderator
-
Posts : 11895
Join date : 2011-10-24
Age : 50
Location : Tuttle, OK
Re: Goldberg Li'l Jumpin Bean build thread (Finished!)
![]() RknRusty Mon Sep 10, 2012 11:20 pm
RknRusty Mon Sep 10, 2012 11:20 pm
Oh shoot, I thought that was your picture, Ron. That's why I asked if you had removed the blocks, and was going on about the wing being stronger than it looked. DUH!cribbs74 wrote:PV Pilot wrote:Yep. A bit of massaging balsa before glueing anything is needed. Test fit, and test fit again,,,,and again
Those were my blocks and braceing pics Rusty.
I like your bracing on the wingtips Keith. I am thinking they are not up to the task as kitted. How much of a pain were those to cut out?
Ron
_________________
...and never Ever think about how good you are at something...
while you're doing it!
My Hot Rock & Blues Playlist
RknRusty- Rest In Peace
- Posts : 10869
Join date : 2011-08-10
Age : 68
Location : South Carolina, USA
Re: Goldberg Li'l Jumpin Bean build thread (Finished!)
![]() PV Pilot Tue Sep 11, 2012 1:31 am
PV Pilot Tue Sep 11, 2012 1:31 am
PV Pilot- High Tech Balsa Basher
- Posts : 1854
Join date : 2011-08-11
Age : 57
Location : The ragged end of the Universe.
Re: Goldberg Li'l Jumpin Bean build thread (Finished!)
![]() Ivanhoe Tue Sep 11, 2012 4:23 am
Ivanhoe Tue Sep 11, 2012 4:23 am
As far as I can see in your photos, the wingtips seem to be a single piece of 1/8" in this kit, in the original CG kit they were two layers of 1/16" with the grain at differing angles, FAR stronger. I have never managed to break the wing yet, and the fuselage (with it's strengthening) has also stood up well to multiple abuse, but of course one big advantage of scratchbuilding is the ability to select the wood you use, with a kit you are stuck with what they give you!
Wilf
Ivanhoe- Diamond Member
- Posts : 1752
Join date : 2011-09-30
Location : Northern Ireland
Re: Goldberg Li'l Jumpin Bean build thread (Finished!)
![]() Cribbs74 Tue Sep 11, 2012 7:56 am
Cribbs74 Tue Sep 11, 2012 7:56 am
Ron
Cribbs74- Moderator
-
Posts : 11895
Join date : 2011-10-24
Age : 50
Location : Tuttle, OK
Re: Goldberg Li'l Jumpin Bean build thread (Finished!)
![]() andrew Tue Sep 11, 2012 8:30 am
andrew Tue Sep 11, 2012 8:30 am
cribbs74 wrote:Yeah I am going to have to do something to strengthen them.
Ron --
Laminating tips from 1/16" stock with the grain at 90 degrees is likely the best method, but since you've already got them in place, there are a couple of options available.
One would be to laminate 3x5 card stock, brown wrapping paper or typing paper to the top and bottom of the tips. Paint with slightly thinned white glue, add paper and clamp using wax paper as a release agent. They will have to be clamped flat to keep them from warping while drying.
A second method, and probably easier, is to add a gusset. The tip rib has a solid vertical piece that can be used for the base of the gusset. Cut the gusset, test fit, and glue in. You can always sand a slight bow into the top and bottom if you don't want the covering to touch. I've attached a poorly drawn picture of what it might look like. Grain on the gusset should run horizontally.
andrew


andrew- Diamond Member
- Posts : 1813
Join date : 2011-08-11
Age : 76
Location : Western Kentucky -

Re: Goldberg Li'l Jumpin Bean build thread (Finished!)
![]() Cribbs74 Tue Sep 11, 2012 10:08 am
Cribbs74 Tue Sep 11, 2012 10:08 am
andrew wrote:cribbs74 wrote:Yeah I am going to have to do something to strengthen them.
Ron --
Laminating tips from 1/16" stock with the grain at 90 degrees is likely the best method, but since you've already got them in place, there are a couple of options available.
One would be to laminate 3x5 card stock, brown wrapping paper or typing paper to the top and bottom of the tips. Paint with slightly thinned white glue, add paper and clamp using wax paper as a release agent. They will have to be clamped flat to keep them from warping while drying.
A second method, and probably easier, is to add a gusset. The tip rib has a solid vertical piece that can be used for the base of the gusset. Cut the gusset, test fit, and glue in. You can always sand a slight bow into the top and bottom if you don't want the covering to touch. I've attached a poorly drawn picture of what it might look like. Grain on the gusset should run horizontally.
andrew
Good idea Andrew, I like the gusset option. I may just go that route with some ply.
Cribbs74- Moderator
-
Posts : 11895
Join date : 2011-10-24
Age : 50
Location : Tuttle, OK
Re: Goldberg Li'l Jumpin Bean build thread (Finished!)
![]() PV Pilot Tue Sep 11, 2012 11:22 am
PV Pilot Tue Sep 11, 2012 11:22 am
If you go the gusset route, make sure to sand the above wing covering points off of the gussets, or it will "tent" the covering and you will have little dimples in the covering that are out of profile from the way it should look. Even with my little balsa block and wedge braces, I had to remove those points because I could see that they would poke that covering up in places. Just sight down the wing from all angles and view it as already having covering on it,, any point you see above that covering profile, needs to be knocked down.
I Rit dyed the nylon engine mount to a dark black color to match my scheme I had in mind. Before the boiling and dyeing process, the mount was a scary stiff mold of nylon. After quite a few dippings in the hot dye it softened it considerably, made it a bit more plyable. Just some food for thought.
PV Pilot- High Tech Balsa Basher
- Posts : 1854
Join date : 2011-08-11
Age : 57
Location : The ragged end of the Universe.
Re: Goldberg Li'l Jumpin Bean build thread (Finished!)
![]() Cribbs74 Tue Sep 11, 2012 11:56 am
Cribbs74 Tue Sep 11, 2012 11:56 am
PV Pilot wrote:Like Wilf posted, the original CG kit wingtips were jigsaw puzzle pieces, that reversed the grain as you assembled, which made them considerably stronger. The new kits as you all know are just a lazer cut, which is a quicker manufacturer, but you sacrifice strength in my view.
If you go the gusset route, make sure to sand the above wing covering points off of the gussets, or it will "tent" the covering and you will have little dimples in the covering that are out of profile from the way it should look. Even with my little balsa block and wedge braces, I had to remove those points because I could see that they would poke that covering up in places. Just sight down the wing from all angles and view it as already having covering on it,, any point you see above that covering profile, needs to be knocked down.
I Rit dyed the nylon engine mount to a dark black color to match my scheme I had in mind. Before the boiling and dyeing process, the mount was a scary stiff mold of nylon. After quite a few dippings in the hot dye it softened it considerably, made it a bit more plyable. Just some food for thought.
That's a lot to chew on Keith. Between all the suggestions I should be able to come up with something.
Luckily I am choosing a blue and cream color scheme so the plastic should blend in. Good idea on the Rit dye though.
Cribbs74- Moderator
-
Posts : 11895
Join date : 2011-10-24
Age : 50
Location : Tuttle, OK
Re: Goldberg Li'l Jumpin Bean build thread (Finished!)
![]() RknRusty Tue Sep 11, 2012 11:59 am
RknRusty Tue Sep 11, 2012 11:59 am
Though I haven't snapped one, the Bean's tips really are flimsy. Mine curved a little downward when I shrink-wrapped them.
_________________
...and never Ever think about how good you are at something...
while you're doing it!
My Hot Rock & Blues Playlist
RknRusty- Rest In Peace
- Posts : 10869
Join date : 2011-08-10
Age : 68
Location : South Carolina, USA
Re: Goldberg Li'l Jumpin Bean build thread (Finished!)
![]() PV Pilot Tue Sep 11, 2012 12:27 pm
PV Pilot Tue Sep 11, 2012 12:27 pm
Good call on the rudder Rusty. Just a little bit of rethinking can save many headaches down the road. In a pinch for those around with less money, you can coat that thin grain sheet with a thin layer of epoxy on both sides.
One of the reasons I sheeted the tips and added bracing, because I knew how much Ultracoat or most iron-on's like to pull hard when it final shrinks. It's is just a simple glue joint attaching that tip to the wing and that didn't look good to me. It doesn't seem to matter where you start when you iron-on on a light structure or what technique you use, it will pull it this way or that and try to warp. A bit of braceing and luck and I got a nice flay wing with no warp afterwards. The newer Ultralite Ultracoat has less shrinkage pull and is much easier to work with, plus it is lighter weight per square foot.
PV Pilot- High Tech Balsa Basher
- Posts : 1854
Join date : 2011-08-11
Age : 57
Location : The ragged end of the Universe.
Re: Goldberg Li'l Jumpin Bean build thread (Finished!)
![]() RknRusty Tue Sep 11, 2012 1:32 pm
RknRusty Tue Sep 11, 2012 1:32 pm
PV Pilot wrote:One of the reasons I sheeted the tips and added bracing, because I knew how much Ultracoat or most iron-on's like to pull hard when it final shrinks. It's is just a simple glue joint attaching that tip to the wing and that didn't look good to me. It doesn't seem to matter where you start when you iron-on on a light structure or what technique you use, it will pull it this way or that and try to warp. A bit of braceing and luck and I got a nice flay wing with no warp afterwards. The newer Ultralite Ultracoat has less shrinkage pull and is much easier to work with, plus it is lighter weight per square foot.
I haven't used Ultralite yet, but I do like Ultracote. It has a wide difference in heat between glue activation and shrinking temps. And it will shrink tightly with the iron. Monokote, on the other hand, has a higher glue activation temperature and is only a fine line hotter before it starts to shrink. And it takes more heat than the iron has to get the final stretch, meaning I have to put the heat gun on it(maybe I was just impatient).
I can do it all with the iron with Ultracote with much more control of the temp that glues it, and the speed it shrinks. It makes wingtips and curves much much easier. I avoid the gun whenever possible. Unfortunately I now have 3 rolls of Monokote. Another thing about Ultracote is you can stick it to sheeting at a heat low enough that it doesn't bubble as much as Mono. I chased bubbles all over the sheeting on the Streak.
_________________
...and never Ever think about how good you are at something...
while you're doing it!
My Hot Rock & Blues Playlist
RknRusty- Rest In Peace
- Posts : 10869
Join date : 2011-08-10
Age : 68
Location : South Carolina, USA
Re: Goldberg Li'l Jumpin Bean build thread (Finished!)
![]() Cribbs74 Tue Sep 11, 2012 10:48 pm
Cribbs74 Tue Sep 11, 2012 10:48 pm
Mounted the bellcrank and installed the leadouts. Also installed the control rod and the center sheeting.
I made some braces for the wing tips which was a bit tricky as I couldn't run it down the center due to the leadout location. I epoxied some cloth over the gap in the nose. It would have been nice to have been able to ply the tips except I only have access to so much here in the hotel. Tomorrow will be sanding, painting and covering.
I have about 12hrs into it so far. This thing is turning out very nose heavy. Anyone else experience this? Also need to add the tip weight. Hopefully I remember before I cover this time. The weight supplied in the kit is a massive chunk of steel. I think it's too much.

https://i.imgur.com/ihXKm.jpg

https://i.imgur.com/4I058.jpg
Cribbs74- Moderator
-
Posts : 11895
Join date : 2011-10-24
Age : 50
Location : Tuttle, OK
re: nose heavy?
![]() happydad Tue Sep 11, 2012 11:17 pm
happydad Tue Sep 11, 2012 11:17 pm
Mounted the bellcrank and installed the leadouts. Also installed the control rod and the center sheeting.
I made some braces for the wing tips which was a bit tricky as I couldn't run it down the center due to the leadout location. I epoxied some cloth over the gap in the nose. It would have been nice to have been able to ply the tips except I only have access to so much here in the hotel. Tomorrow will be sanding, painting and covering.
I have about 12hrs into it so far. This thing is turning out very nose heavy. Anyone else experience this? Also need to add the tip weight. Hopefully I remember before I cover this time. The weight supplied in the kit is a massive chunk of steel. I think it's too much.
Ron: try placing temporary weights on the elevator, or pennies, to counter balance the nose heaviness. just to see how nose heavy the beast is?? is this a thing with your planes? my sterling BRM was pretty close to CG with a black widow, the same engine you used. of course i am not complete yet. i lost 1/2 of the engine mount again. "something happens when you get old, but i can't remember what it is" anon. happydad


happydad- Rest In Peace
- Posts : 1592
Join date : 2012-05-28
Age : 78
Location : Escondido, CA
Re: Goldberg Li'l Jumpin Bean build thread (Finished!)
![]() Cribbs74 Tue Sep 11, 2012 11:23 pm
Cribbs74 Tue Sep 11, 2012 11:23 pm
cribbs74 wrote:Tonights progress,
Mounted the bellcrank and installed the leadouts. Also installed the control rod and the center sheeting.
I made some braces for the wing tips which was a bit tricky as I couldn't run it down the center due to the leadout location. I epoxied some cloth over the gap in the nose. It would have been nice to have been able to ply the tips except I only have access to so much here in the hotel. Tomorrow will be sanding, painting and covering.
I have about 12hrs into it so far. This thing is turning out very nose heavy. Anyone else experience this? Also need to add the tip weight. Hopefully I remember before I cover this time. The weight supplied in the kit is a massive chunk of steel. I think it's too much.
Ron: try placing temporary weights on the elevator, or pennies, to counter balance the nose heaviness. just to see how nose heavy the beast is?? is this a thing with your planes? my sterling BRM was pretty close to CG with a black widow, the same engine you used. of course i am not complete yet. i lost 1/2 of the engine mount again. "something happens when you get old, but i can't remember what it is" anon. happydad
I am beginning to wonder...... With the BRM it was a tad undersized so it may have accounted for the nose heaviness. However, this is a kit build so by rights it should be somewhat balanced from the get go without adding weight. I did add the nacelles and the epoxy, but it shouldn't have made it that nose heavy. I'll add weight if needed. Another thing I noticed is no CG anywhere on the plans.
Ron
Cribbs74- Moderator
-
Posts : 11895
Join date : 2011-10-24
Age : 50
Location : Tuttle, OK
re: no CG
![]() happydad Wed Sep 12, 2012 1:07 am
happydad Wed Sep 12, 2012 1:07 am
happydad wrote:cribbs74 wrote:Tonights progress,
Mounted the bellcrank and installed the leadouts. Also installed the control rod and the center sheeting.
I made some braces for the wing tips which was a bit tricky as I couldn't run it down the center due to the leadout location. I epoxied some cloth over the gap in the nose. It would have been nice to have been able to ply the tips except I only have access to so much here in the hotel. Tomorrow will be sanding, painting and covering.
I have about 12hrs into it so far. This thing is turning out very nose heavy. Anyone else experience this? Also need to add the tip weight. Hopefully I remember before I cover this time. The weight supplied in the kit is a massive chunk of steel. I think it's too much.
Ron: try placing temporary weights on the elevator, or pennies, to counter balance the nose heaviness. just to see how nose heavy the beast is?? is this a thing with your planes? my sterling BRM was pretty close to CG with a black widow, the same engine you used. of course i am not complete yet. i lost 1/2 of the engine mount again. "something happens when you get old, but i can't remember what it is" anon. happydad
I am beginning to wonder...... With the BRM it was a tad undersized so it may have accounted for the nose heaviness. However, this is a kit build so by rights it should be somewhat balanced from the get go without adding weight. I did add the nacelles and the epoxy, but it shouldn't have made it that nose heavy. I'll add weight if needed. Another thing I noticed is no CG anywhere on the plans.
Ron
no CG shown. doesn't that mean it will fly the matter where the actual CG is? LOL.

the reason i suggested adding small weights or pennies to the elevator is to give US an idea how much nose heavy the plane is. if it's a little nose heavy you could 1 or 2 things, but if it is very nose heavy something else is wrong. enter rusty.
happydad
happydad- Rest In Peace
- Posts : 1592
Join date : 2012-05-28
Age : 78
Location : Escondido, CA
Page 1 of 3 • 1, 2, 3 ![]()
» Li'l Jumpin' Bean Tail Feathers
» Li'l Jumpin Bean
» Li'l Jumpin Bean
» Tha' Bandit builds a bean thread