

 Rules
Rules
by F4D Phantom II Today at 2:22 pm
» Help Pee Wee tank cap .020
by rdw777 Today at 1:30 pm
» **VOTE-ON-THE-NEXT-COX-ENGINE-OF-THE-MONTH** (May 2024)
by GallopingGhostler Today at 11:34 am
» Jim Walker Firebaby
by rdw777 Today at 10:32 am
» Here we go again... another Lawn-Boy
by rdw777 Today at 9:17 am
» Revivng Some Childhood Classics
by getback Today at 8:21 am
» Roddie-Rigger.. a 2005 original design
by getback Today at 6:31 am
» My Cox .049 Marine inboard engine
by F4D Phantom II Yesterday at 9:33 pm
» Jim Walkers FireBee - This is going to be fun
by rsv1cox Yesterday at 7:29 am
» Post your Older books
by rsv1cox Mon May 06, 2024 7:51 pm
» EXTREMELY RARE COX THIMBLE DROME PROTOTYPE "BLACK WIDOW" GAS MODEL AIRPLANE
by rsv1cox Mon May 06, 2024 6:58 pm
» I brake for Turtles....
by rsv1cox Mon May 06, 2024 6:38 pm


My Fancherized Twister build; 3 days til Huntersville
Page 7 of 10 •  1, 2, 3, 4, 5, 6, 7, 8, 9, 10
 ![]()
Re: My Fancherized Twister build; 3 days til Huntersville
![]() JPvelo Fri Jun 10, 2016 6:11 pm
JPvelo Fri Jun 10, 2016 6:11 pm
I love DC enamel, goes on nice and looks better dry than wet, and it's rock hard after 12 hours. You can paint more coats/other colors after 12 hours IF YOU APPLY VERY LIGHT MIST COATS, ABOUT 5 MINUTES APART. Get everything covered with the mist coats then lay it on like normal. Skip the mist coats and you'll have alligator skin on your airplane. Or you can let it cure for seven days if you are blessed with more patience than me.
Jim

JPvelo- Diamond Member

- Posts : 1972
Join date : 2011-12-02
Age : 56
Location : Colorado
Re: My Fancherized Twister build; 3 days til Huntersville
![]() RknRusty Fri Jun 10, 2016 6:41 pm
RknRusty Fri Jun 10, 2016 6:41 pm
Sounds a lot like the stuff I used. If I'm not mistaken it's more fuel resistant too. When I was ready to do the first priming, everybody around me was raving about DC-540, so that's the first reason I got the matching lacquer. Then I just wanted to try something different, and later read that it's the comparative lightest of the many DC blends. The fuelproof part makes the enamel look good. As I've said before, I don't fret too much over paint weight.JPvelo wrote:Rusty,
I love DC enamel, goes on nice and looks better dry than wet, and it's rock hard after 12 hours. You can paint more coats/other colors after 12 hours IF YOU APPLY VERY LIGHT MIST COATS, ABOUT 5 MINUTES APART. Get everything covered with the mist coats then lay it on like normal. Skip the mist coats and you'll have alligator skin on your airplane. Or you can let it cure for seven days if you are blessed with more patience than me.
Jim
I just finished painting the elevators. I got one minor sag on the pretty side, so I laid it horizontally to dry, hoping it'll flatten out.
Later,
Rusty
_________________
...and never Ever think about how good you are at something...
while you're doing it!
My Hot Rock & Blues Playlist

RknRusty- Rest In Peace

- Posts : 10869
Join date : 2011-08-10
Age : 68
Location : South Carolina, USA
Re: My Fancherized Twister build; 3 days til Huntersville
![]() JPvelo Fri Jun 10, 2016 9:08 pm
JPvelo Fri Jun 10, 2016 9:08 pm
JPvelo- Diamond Member
- Posts : 1972
Join date : 2011-12-02
Age : 56
Location : Colorado
Re: My Fancherized Twister build; 3 days til Huntersville
![]() RknRusty Sat Jun 11, 2016 10:52 am
RknRusty Sat Jun 11, 2016 10:52 am
I weighed .8 oz. on the painted elevators, so the weight is looking good. Main airframe 19.9 + .8 + painted flaps + LG + engine + tank and bolts, one long CF linkage & control horns,... am I missing anything? Tip weight is already in it. I think I'm on target for the 40 oz. range.
_________________
...and never Ever think about how good you are at something...
while you're doing it!
My Hot Rock & Blues Playlist
RknRusty- Rest In Peace
- Posts : 10869
Join date : 2011-08-10
Age : 68
Location : South Carolina, USA
Re: My Fancherized Twister build; 3 days til Huntersville
![]() ian1954 Wed Jun 15, 2016 6:25 am
ian1954 Wed Jun 15, 2016 6:25 am

ian1954- Diamond Member
- Posts : 2688
Join date : 2011-11-16
Age : 69
Location : England
Re: My Fancherized Twister build; 3 days til Huntersville
![]() getback Wed Jun 15, 2016 6:31 pm
getback Wed Jun 15, 2016 6:31 pm


 Sounds like yur on time there https://www.youtube.com/watch?v=LWTLUmUjo8A
Last edited by getback on Fri Jun 17, 2016 7:05 am; edited 1 time in total

getback- Top Poster


Posts : 10141
Join date : 2013-01-18
Age : 66
Location : julian , NC
Re: My Fancherized Twister build; 3 days til Huntersville
![]() RknRusty Thu Jun 30, 2016 11:26 pm
RknRusty Thu Jun 30, 2016 11:26 pm
This is the airframe I was building when I did the three jigging videos. Two of the three are on Walter Umland's site near the bottom of the page here: http://www.builtrightflyright.com/MiscPgs/AlignJigSet/AlignJigSet01a.htm
The stab jig video isn't on there yet. Right now I'm at that point where "The devil's in the details" gets tedious. My goal is a very capable and dependable Profile PA ship, so I've been meticulous with that in mind. It looks like I'm going to hit the mark pretty close on weight.
I'm in the process of silk-spanning the flaps right now, so after they're painted and hinges glued, I can spray the trim colors and apply the decals. Then hook up the linkages, bolt on the power plant and LG and go fly. Sounds like a week, but as usual it'll probably be two.
So here's a question: I have some tissue(ran out of silk span), and it seems stronger than silk span which I would think is good for the flaps. It has an obvious grain because it resists tearing much more in one direction. Should I run the grain lengthwise from end to end of the flaps, or crosswise? I can conceive of arguments to support both ways. Thanks for any tips on that.
Here are the two sets of plans I have for it. I'm using the one for the FP.35/.40, but there are hardly any differences. I hope it's as light as projected, I'd like to use the fp.35, because the tank cutout fits a new 3-1/2 oz. Uniflow tank I have. But after Bob Z. modded my fp.40 head, It may very well run on the small tank too.
Okay, hope y'all approve of my work. I have pics of it all in case anyone is curious about some other part of the model I haven't included here.
Rusty
Here's some pics and a couple more questions.
These pics are hosted on Photobucket. After opening a thumbnail, I think if you see a gray and white magnifying glass to the right of the picture, click it and you'll get a huge version for a closer look. You can see all my blems that way.

This fuselage came in the kit as two pieces to be laminated. My buddy Wayne Robinson built the fuse and sandwiched carbon fabric between the halves. He covered the whole fuse with light fiberglass and dope. After he built the fuse, he turned it over to me to me to finish the wing and rest of the kit.
I really like the sleek razorback look rather than the bubble canopy.
Now look at the 4th rib from center. Someone whacked it and it's chipped under the covering. Maybe it was me. At least I haven't dropped a screwdriver through it yet.

That white DC Lacquer is pretty bright and reflective. It might be heavier than dope, but it seems like the lightest paint I've ever used. I have blue red and black for trim colors.
Questions: Should I wet sand it before masking and spraying the trim colors on? Or wait until it's all painted, and wet sand before the clear dope?

I love the outboard tripler on the nose. Not only extra strength and resistance to vibrations, but at first glance, the recessed tank and engine will look like a full fuselage.

Here's a look at the fillets. Microballoons and eopxy.

The Stab fillet. I forgot I had 1/4" triangle stock for the underside, but I think the fillet will serve the same purpose. I'd already put it on there before I remembered.


Here is my only mistake so far as I can tell... the control rod hole is too far aft, so I have to move it forward and try not to ugly it up in the process. Another headslapper. GRRRRR!

My painting supplies.

_________________
...and never Ever think about how good you are at something...
while you're doing it!
My Hot Rock & Blues Playlist
RknRusty- Rest In Peace
- Posts : 10869
Join date : 2011-08-10
Age : 68
Location : South Carolina, USA
Re: My Fancherized Twister build; 3 days til Huntersville
![]() pkrankow Fri Jul 01, 2016 7:38 am
pkrankow Fri Jul 01, 2016 7:38 am
Looking good.
You might want to try making a fairing to cover the push rod exit if you think the hole got ugly. I think it looks OK, but I have never built for a competition concourse front line finish. It can be attached with a couple small screws afterwards but it should be painted at the same time so the colors match best. It can be a heat gun molding of plastic around a plug, or it can be fiberglass and epoxy around a plug, or even carved shaped balsa, or some combination of these.
I have mixed feelings about the canopy, but that might be because it is not in paint like the rest. I am sure it will look excellent when you are done.
Phil

pkrankow- Top Poster
- Posts : 3025
Join date : 2012-10-02
Location : Ohio
Re: My Fancherized Twister build; 3 days til Huntersville
![]() RknRusty Fri Jul 01, 2016 11:30 am
RknRusty Fri Jul 01, 2016 11:30 am
Yes, that's it. Makes a lot of sense, 45 degrees fanning out from the hinge lines toward the tips. Thanks Phil.pkrankow wrote:Diagonal on the grain.
Rusty
_________________
...and never Ever think about how good you are at something...
while you're doing it!
My Hot Rock & Blues Playlist
RknRusty- Rest In Peace
- Posts : 10869
Join date : 2011-08-10
Age : 68
Location : South Carolina, USA
Re: My Fancherized Twister build; 3 days til Huntersville
![]() Ken Cook Fri Jul 01, 2016 3:31 pm
Ken Cook Fri Jul 01, 2016 3:31 pm
I very rarely color sand prior to trim colors. I mask, spray the tape edge with clear and proceed. I do have some concerns for your clear though. Very rarely can you spray Brodak dope without using retarder especially now in the humid weather. It will blush and it can also cause the underlying DC coats to blister especially around fillet areas due to the top drying first and trapping in the solvents. If you do spray, I would do it in the later evening. As I always tell everyone, Brodak thinner is medium, it dries fast compared to Sig and it will trap moisture in causing bad blushing. This is why you need the retarder. I wouldn't spray it on the model at first, I would do a test panel and wait 1/2 hour and see what it's doing.

Ken Cook- Top Poster
- Posts : 5476
Join date : 2012-03-27
Location : pennsylvania
Re: My Fancherized Twister build; 3 days til Huntersville
![]() RknRusty Fri Jul 01, 2016 4:52 pm
RknRusty Fri Jul 01, 2016 4:52 pm
I'm going out now to do some work on it, catch y'all later,
Rusty
_________________
...and never Ever think about how good you are at something...
while you're doing it!
My Hot Rock & Blues Playlist
RknRusty- Rest In Peace
- Posts : 10869
Join date : 2011-08-10
Age : 68
Location : South Carolina, USA
Re: My Fancherized Twister build; 3 days til Huntersville
![]() RknRusty Mon Jul 04, 2016 12:14 am
RknRusty Mon Jul 04, 2016 12:14 am
I got tired of sanding so I only painted one flap white today, and I'll finish the other one tomorrow. Then I can shoot clear on the flaps and elevators and glue their hinges. All the controls are made up, but they'll wait for the trim colors to be applied just for the sake of convenience.
I painted a test board white before I painted the first flap this afternoon, so I'll practice on that with clear dope in the Preval sprayer and get the hang of it. And also confirm that it really is as compatible as my research indicated. Wayne suggested I thin the Brodak butyrate clear by 60% for the Preval. Now, after dusting on the first two coats of clear, how many more coats should I add? And in the past when I've used Lustrekote clear, I always spray more on the front end where fuel spillage is most likely. How much more should I apply in that area?
Boy I'm tired of sanding. I used 220, 320, and 800. After priming I was worried about how much grain I could see, but after sanding, the DC540 had filled it in like magic. The white is very forgiving paint too. It goes on so thin and covers so well, it can make anyone look like a pro.
Thanks for all of the advice throughout this build. I've been saving my "Thanks" button all this time, and I wish I could use it for more than one of you, but I'll review the whole thread and pick someone to anonomously crown with the rep points. And Greenies will be liberally distributed too. I could not have done as good of a job without the huge amount of input from everyone who's posted in this thread.
Rusty
The front flap in the picture is now in the cool dry house with the white paint curing.

_________________
...and never Ever think about how good you are at something...
while you're doing it!
My Hot Rock & Blues Playlist
RknRusty- Rest In Peace
- Posts : 10869
Join date : 2011-08-10
Age : 68
Location : South Carolina, USA
Re: My Fancherized Twister build; 3 days til Huntersville
![]() Ken Cook Mon Jul 04, 2016 7:31 am
Ken Cook Mon Jul 04, 2016 7:31 am
Dope takes repeated coats. There's a very good chance that when your spraying your not going to be able to keep a wet edge where the overspray dries on the existing coats. You may have to wait a day , lightly knock off the sandy gritty overspray with some 400-600 grit and respray. Fresh dope can sometimes clog paper badly which is why I suggested the aggressive jump between grits. Dope will melt right back into itself. I would spray about 3-5 coats of clear on the plane. I would also prior to using the contents of the bottle, spray areas such as the nose a additional time every time you spray the plane. Edges, they need to be cleared using additional coats equally. You have to be careful though when dusting edges, you will blow overspray across your flat surfaces revealing a sand dull flat look. My suggestion would be to first go around and spray all edges FIRST, then go into the main flats. If blushing occurs, it's not the end of the world. It just means that you picked a bad day to paint but if you do have a window of a less humid day and you spray again. This can release the underlying blush and it can also be trapped within the new coat. It will be a lot less and your white may not show it unless your in direct sunlight. You will know when it blushes though because it will be very milky with no shine too it.
Let me just add intersections, don't lay the dope heavy at any of these areas. They will naturally shine above all other areas due to dope settling into them from the verticals. It can also blister these areas due to too much dope and solvents being trapped there. Fillets don't require a lot of paint and when the dope shrinks from drying, it can cause a bit of a tug of war in these areas. Spray just enough to coat.
Spray a light misting coat, coat all surfaces, come back in 10 minutes, spray again, spend some time in and around the areas I mentioned, grab points, edges, nose area, etc. Let the plane sit. Place the model in the sun, this will lay down the dope and dry it faster and can eliminate blush. It also helps to lock in the shine. Unless something is jumping out at you as far as rough spots, I wouldn't knock down the model with paper, I would continue to spray. The whole idea is to build coats, not take them off. Spray again the following day keeping a mental note of where you experienced problems on the initial spraying. The majority of the dope is solvent so the weight is going to evaporate. Dope is very forgiving and can easily be repaired due to the high solvent content melting back into itself. If you want to further your fuel resistance, take the plane to a body shop and have them spray just the nose with auto urethane. I use two part urethane on the exhaust side and tank area. I just spray a touch of it.
While you will see initial shine, you will note that by the 3rd coat, the shine consistency will be far flatter and greater. If this suits your needs, by all means go fly. I would though wax the front end prior to fueling. If Brodak dope gets on the clear it will turn it milky white and eventually it will wash it off. Keep raw fuel off of it. Place extensions on your overflow vent to get it away from the plane. If you have fuel on your hands, wipe it off prior to handling the model.
Keep in mind though dope is not going to give you that new car like shine. It's going to be dull. It will have somewhat of a shine. If your looking for that bright new car look, well your in for a real experience. This requires a lot of patience. This takes a lot of time of wet sanding and polishing. I use Brasso and a old sock. The plane will have to sit for almost two weeks. Sand using 1000, 1500 , 2000 in soapy water wiping it off and noting how much orange peel you have due to the sprayer. When knocked down flat, you will have a continuous dull looking model with even sanding scratches. You will also burn through the clear which will cause you to spray again and again waiting and sanding even more. Once sanded, slip the sock on your hand, put some Brasso on it and begin to rub to the point your finger tips start burning in back and forth motions, This is so much fun you just can't explain it. You will note that the model and your finger is almost to the point of ready to ignite themselves and just about then your almost ready. Monokote is starting to look real good about now.
Ken Cook- Top Poster
- Posts : 5476
Join date : 2012-03-27
Location : pennsylvania
Re: My Fancherized Twister build; 3 days til Huntersville
![]() RknRusty Mon Jul 04, 2016 5:43 pm
RknRusty Mon Jul 04, 2016 5:43 pm
Regarding this statement:
Did you mean, "If fuel gets on Brodak dope..."? The Brodak dope is my clear...... If Brodak dope gets on the clear it will turn it milky white and eventually it will wash it off. Keep raw fuel off of it. Place extensions on your overflow vent to get it away from the plane. If you have fuel on your hands, wipe it off prior to handling the model.
I could take it to Wayne's airbrush, but then I'd have to politely juggle his and your advice, and I'd rather have one adviser. In the end, it really doesn't matter if it isn't beautiful, but it would just be nice if it turns out that way. I'd expected the statement on the label claiming "Fuel Proof Dope" to be more accurate than you suggest. But right now I'm ready to fly this bird. I'll take what you tell me, print it out as a reference and go for it. It'll be what it'll be. I bet you get weary typing the same doping instructions 10 times every year. Thanks for doing it again.
Rusty
_________________
...and never Ever think about how good you are at something...
while you're doing it!
My Hot Rock & Blues Playlist
RknRusty- Rest In Peace
- Posts : 10869
Join date : 2011-08-10
Age : 68
Location : South Carolina, USA
Re: My Fancherized Twister build; 3 days til Huntersville
![]() Ken Cook Mon Jul 04, 2016 6:12 pm
Ken Cook Mon Jul 04, 2016 6:12 pm
 This is two years of use using 10 percent. This is the result of raw fuel. Note underneath the fuse where my hands grab, it's all wiped off. No biggie, it could've been repaired, but I will continue flying it until the wings fall off.
 Your best defense against this is to build up coats on the nose and wax the nose using a quality automotive wax prior to fueling. I have gone to the auto urethane and since disregarded wax.
Ken Cook- Top Poster
- Posts : 5476
Join date : 2012-03-27
Location : pennsylvania
Re: My Fancherized Twister build; 3 days til Huntersville
![]() RknRusty Mon Jul 04, 2016 9:22 pm
RknRusty Mon Jul 04, 2016 9:22 pm
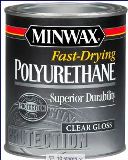
I will look into the automotive urethane, there are plenty of body shops around. I have a new can of clear Lustrekote on the shelf too, so I might spray some of it on the test board after the Brodak clear and see what happens. That L.kote is very fuel resistant, but gets crackles in it with age and abuse. I don't have a clue what's in it. I also have clear Minwax poly-u in the silver can that supposedly doesn't yellow. It's as fuel proof as anything I've ever used but I've never put it on top of paint. Nor do I know what would happen if I mixed it with Brodak thinner. That could be a screw up waiting to happen.
I sanded the primer on one side of the other flap today and got tired of sweating. The flap I painted white Saturday and the elevators are beautiful, looks like they were made in a factory. Do you think a couple of days is long enough to safely try the Brodak dope? My plan is to mix it to 60% thinner.
Thanks for hanging in there with me.
Rusty
_________________
...and never Ever think about how good you are at something...
while you're doing it!
My Hot Rock & Blues Playlist
RknRusty- Rest In Peace
- Posts : 10869
Join date : 2011-08-10
Age : 68
Location : South Carolina, USA
Re: My Fancherized Twister build; 3 days til Huntersville
![]() NEW222 Mon Jul 04, 2016 10:43 pm
NEW222 Mon Jul 04, 2016 10:43 pm

NEW222- Top Poster
- Posts : 3892
Join date : 2011-08-13
Age : 45
Location : oakbank, mb
Re: My Fancherized Twister build; 3 days til Huntersville
![]() NEW222 Mon Jul 04, 2016 10:54 pm
NEW222 Mon Jul 04, 2016 10:54 pm
NEW222- Top Poster
- Posts : 3892
Join date : 2011-08-13
Age : 45
Location : oakbank, mb
Re: My Fancherized Twister build; 3 days til Huntersville
![]() RknRusty Tue Jul 05, 2016 12:04 am
RknRusty Tue Jul 05, 2016 12:04 am
I just posted in your Twister thread on SH regarding the LE shaping gauge. I'm going to trace it and mail it to you in case yours is as square as it looks in the photo, as Paul Walker mentioned. Nice Twister though. You made a good choice for your first bigger plane.
Don't keep it a secret here at CEF.
Rusty
_________________
...and never Ever think about how good you are at something...
while you're doing it!
My Hot Rock & Blues Playlist
RknRusty- Rest In Peace
- Posts : 10869
Join date : 2011-08-10
Age : 68
Location : South Carolina, USA
Re: My Fancherized Twister build; 3 days til Huntersville
![]() Ken Cook Tue Jul 05, 2016 4:12 am
Ken Cook Tue Jul 05, 2016 4:12 am
Ken Cook- Top Poster
- Posts : 5476
Join date : 2012-03-27
Location : pennsylvania
Re: My Fancherized Twister build; 3 days til Huntersville
![]() RknRusty Tue Jul 05, 2016 10:08 am
RknRusty Tue Jul 05, 2016 10:08 am
That's a good idea. I did learn in my research that many people have used Lustrekote over DC Lacquer with very good results John Tate and Bill Little both have endorsed it for that specific use. I may very well take that route on the front end.Ken Cook wrote:...If you have the Lusterkote and you have had good success using it, spray the tank area and nose on the engine side and use the clear for the remainder...
Rusty
_________________
...and never Ever think about how good you are at something...
while you're doing it!
My Hot Rock & Blues Playlist
RknRusty- Rest In Peace
- Posts : 10869
Join date : 2011-08-10
Age : 68
Location : South Carolina, USA
Clear coat
![]() JMynes Wed Jul 06, 2016 6:25 am
JMynes Wed Jul 06, 2016 6:25 am
I've been using Klass Kote two part epoxy paint lately, and I'm very impressed with this stuff. It cures as hard as a hammer, and back when I was using fuel I never had any problems with fuel proofness.
They offer a clear, I have some, but haven't had an occasion to try it yet. I suspect it would provide a bullet proof layer of protection, but I have no idea if it would yellow over time. Perhaps someone else has tried it?
My finishes are nowhere near award winning, but Klass Kote makes my work look better.
Jim

JMynes- Moderate Poster

- Posts : 25
Join date : 2016-07-02
Location : Mt Dora, FL
Re: My Fancherized Twister build; 3 days til Huntersville
![]() RknRusty Wed Jul 06, 2016 5:50 pm
RknRusty Wed Jul 06, 2016 5:50 pm
Glad you joined us here at CEF. I have read plenty about Klass Kote, never used it, but since I'm expanding my horizons I may consider it. weather permitting I want to start painting the bulk of the Twister tonight, but it's iffy with storms in the area.
For a small forum, we have a surprising amount of talent here. I'd be handicapped without these folks, and they're easier to discuss things with than on some other forums. More of a fun-or-bust outlook here.
I'm looking forward to posting some pics of my masterpiece paint job
Rusty
_________________
...and never Ever think about how good you are at something...
while you're doing it!
My Hot Rock & Blues Playlist
RknRusty- Rest In Peace
- Posts : 10869
Join date : 2011-08-10
Age : 68
Location : South Carolina, USA
Re: My Fancherized Twister build; 3 days til Huntersville
![]() getback Wed Jul 06, 2016 6:16 pm
getback Wed Jul 06, 2016 6:16 pm
getback- Top Poster
-
Posts : 10141
Join date : 2013-01-18
Age : 66
Location : julian , NC
Re: My Fancherized Twister build; 3 days til Huntersville
![]() RknRusty Wed Jul 06, 2016 6:56 pm
RknRusty Wed Jul 06, 2016 6:56 pm
Rusty
_________________
...and never Ever think about how good you are at something...
while you're doing it!
My Hot Rock & Blues Playlist
RknRusty- Rest In Peace
- Posts : 10869
Join date : 2011-08-10
Age : 68
Location : South Carolina, USA
Page 7 of 10 • 1, 2, 3, 4, 5, 6, 7, 8, 9, 10 ![]()
» Some Days are Diamonds...Some Days are Stone...
» Guillows Cessna 150 build circa 1970 (Build Log)
» Twister on ebay
» Modified SIG Twister