

 Rules
Rules
by roddie Today at 8:59 pm
» Baja Bug / Dune Buggy Recoil Starter
by vambrosini Today at 8:57 pm
» Wanted: Pull Starter reapir kit for a Cox Dune Buggy.
by vambrosini Today at 8:55 pm
» cox dune buggy/ baja bug
by vambrosini Today at 8:49 pm
» Jim Walkers FireBee - This is going to be fun
by 944_Jim Today at 7:46 pm
» Joe Wagners Sioux
by GallopingGhostler Today at 7:37 pm
» Jim Walker Firebaby
by rsv1cox Today at 10:29 am
» B-25 Mitchell
by rdw777 Today at 9:49 am
» Artwork for Otto Kuhni
by rsv1cox Today at 9:39 am
» Cox water wizard
by Wiggy Today at 6:32 am
» My Cox .049 Marine inboard engine
by 1/2A Nut Yesterday at 9:52 pm
» Roddie's water-cooled bench-run vid
by roddie Yesterday at 8:55 pm


Getting Ready to Attempt some Restorations - Newbie
Page 2 of 4 •  1, 2, 3, 4
 ![]()
 Re: Getting Ready to Attempt some Restorations - Newbie
![]() NEW222 Tue Jan 12, 2021 8:12 pm
NEW222 Tue Jan 12, 2021 8:12 pm
Here is the link to the thread I did on it.
Babe Bee Restoration

NEW222- Top Poster

- Posts : 3892
Join date : 2011-08-13
Age : 45
Location : oakbank, mb
Re: Getting Ready to Attempt some Restorations - Newbie
![]() davidll1984 Tue Jan 12, 2021 8:16 pm
davidll1984 Tue Jan 12, 2021 8:16 pm

davidll1984- Diamond Member

- Posts : 2293
Join date : 2020-02-12
Age : 39
Location : shawinigan
Re: Getting Ready to Attempt some Restorations - Newbie
![]() Bretherman Tue Jan 12, 2021 8:39 pm
Bretherman Tue Jan 12, 2021 8:39 pm
NEW222 wrote:Good job on your first disassembly! Always remember to remove the cylinder AND piston prior to removing the drive plate. Rumor has it you can really do a number to the piston if you don't.... I may, or may not have personal knowledge of this.....
Just to throw another thing at you about removing the driveplate in case you did not see or read about it. Another option, of which I personally use and prefer, is to use a standard shop vice. If you do have one and want to try it, it is also simple. As you did, put the screw in like the video, open the vice up wide enough for the crankcase, put a piece of wood on the jaw where the rear of the crankcase will rest against, and slowly tighten it / close the jaws. I prefer this as it is just a nice slow steady pressure. Again, both ways work, and this is just the way I prefer to do it.
When it comes time to reassemble the engine, carefully put the driveplate against the crankshaft and you will feel it 'grab' telling you it is in the proper place to tighten it up.
I'm not going to lie, I had to Google what a drive plate was.
After reading your comment a few times, and examining the parts, I understand now that the splines will have to line up. Thank you! The assembly makes a little more sense now.
One day I'll have a nice vice... one day...
Just the words sound more pleasant than a hammer.
NEW222 wrote:And another thing about the crankcases to pretty them up should you desire. I have used Mothers Aluminum polish on a rotary tool to have them shine away. Can use on teh crankcase as well as the tank on a 'Bee' style engine. I start out with 400-600 gris sandpaper and oil working my way finer to I believe 800 I used last. You can go even finer for a shinier engine as the scratches will be nearly invisable. Take some time and patience to do, but well worth it if you do. I however do not do any sanding on the nose/front, or rear of the crankcase when I do this.
Here is the link to the thread I did on it.
Babe Bee Restoration
I really would like to try and shine it up nice. If it runs, that'll be the right of passage
davidll1984 wrote:Look Good remember go gentle on inside cylinder on piston if use steel wool very carful y prefer use car wax step 1 Not valve laping compound and just to polish litle like one micron but not mutch as just very fines scratch inside cylinder on piston wil let escape compression and buble on exaust port al that Good compression and performance lost if piston go up and down without friction its ok put engines back To one pice try it. if Feel like scratching inside tight passe the exaust opening it need polish steel wool wat ever u want To try just carful
If I end up needing some steel wool to get anything off that vinegar and a toothbrush can't, I'll be sure to take care. Best case scenario, I will scarcely, if at all, have to use it. You're right, I'll spot check to see how the engine feels after working through this part.
Thank you!

Bretherman- Moderate Poster

- Posts : 23
Join date : 2021-01-09
Location : Florida
Re: Getting Ready to Attempt some Restorations - Newbie
![]() OhBee Wed Jan 13, 2021 3:21 am
OhBee Wed Jan 13, 2021 3:21 am

OhBee- Platinum Member

- Posts : 698
Join date : 2016-03-23
Age : 73
Location : Minnesota
Re: Getting Ready to Attempt some Restorations - Newbie
![]() fredvon4 Wed Jan 13, 2021 11:08 am
fredvon4 Wed Jan 13, 2021 11:08 am

fredvon4- Top Poster

Posts : 4002
Join date : 2011-08-26
Age : 68
Location : Lampasas Texas
Re: Getting Ready to Attempt some Restorations - Newbie
![]() OhBee Wed Jan 13, 2021 12:10 pm
OhBee Wed Jan 13, 2021 12:10 pm
OhBee- Platinum Member
- Posts : 698
Join date : 2016-03-23
Age : 73
Location : Minnesota
Re: Getting Ready to Attempt some Restorations - Newbie
![]() rsv1cox Wed Jan 13, 2021 12:35 pm
rsv1cox Wed Jan 13, 2021 12:35 pm
OhBee wrote:FYI...Evaporust is WAY better at rust removal than vinegar. I've used both on mountain bike parts. Nothing is rustier than the last set of suspension forks I had to deal with...stuck tight for years. Now functioning quite nicely!. Makes crusty old sprockets shine like new.
Your right OB, it does work much better than vinegar. But it changes character over time and disintegrates to something that looks like what you blow out of your nose after a bad cold. "Clings to vertical surfaces" forget about that.
Still it works quite well, and many a cylinder of mine (and other things) has spent a couple of hours in it. But beware, it will remove anodizing as well.
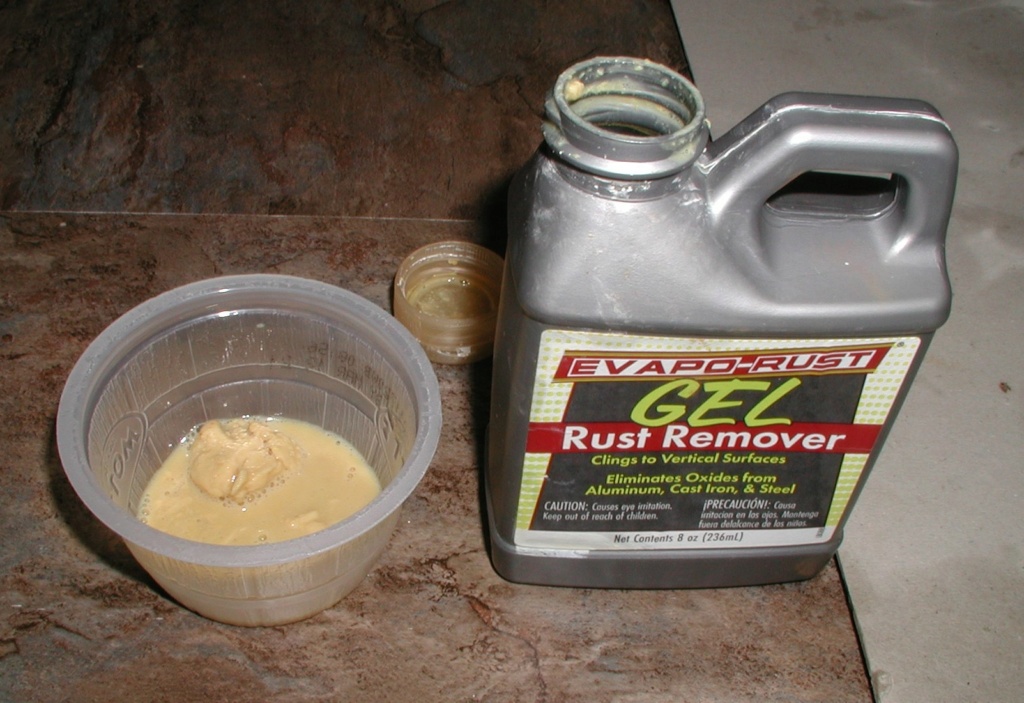
Vinegar is cheaper and is available anywhere.

rsv1cox- Top Poster
-

Posts : 10633
Join date : 2014-08-18
Location : West Virginia
Re: Getting Ready to Attempt some Restorations - Newbie
![]() Bretherman Wed Jan 13, 2021 1:26 pm
Bretherman Wed Jan 13, 2021 1:26 pm
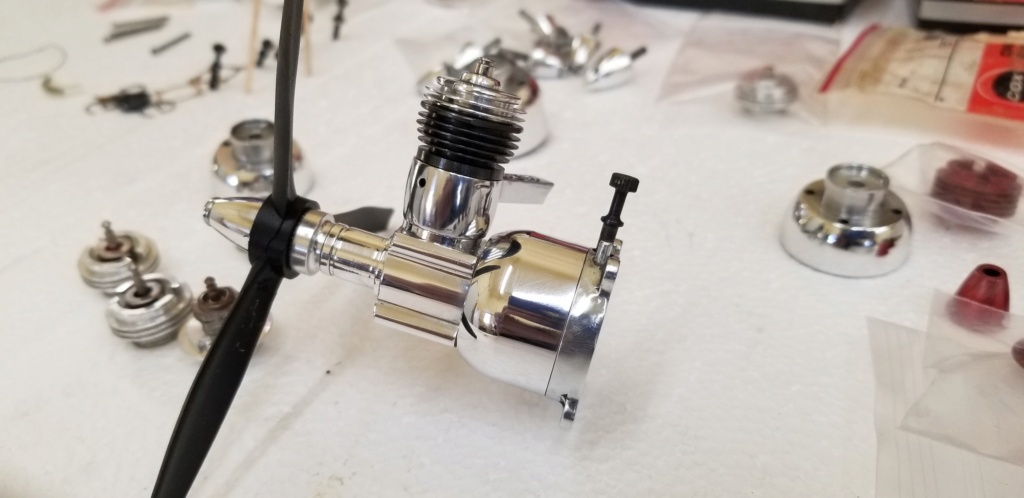
fredvon4 wrote:did some one say shine it up?
Holy smoke!
You wouldn't mind sharing your process for that would you?

I want to attempt sanding and polishing, but have never actually done so before.
My guess would be sand maybe: 800 up to 2000, then hit the buffing and polishing compound?
Bretherman- Moderate Poster
- Posts : 23
Join date : 2021-01-09
Location : Florida
Re: Getting Ready to Attempt some Restorations - Newbie
![]() Bretherman Wed Jan 13, 2021 1:29 pm
Bretherman Wed Jan 13, 2021 1:29 pm
rsv1cox wrote:OhBee wrote:FYI...Evaporust is WAY better at rust removal than vinegar. I've used both on mountain bike parts. Nothing is rustier than the last set of suspension forks I had to deal with...stuck tight for years. Now functioning quite nicely!. Makes crusty old sprockets shine like new.
Your right OB, it does work much better than vinegar. But it changes character over time and disintegrates to something that looks like what you blow out of your nose after a bad cold. "Clings to vertical surfaces" forget about that.
Still it works quite well, and many a cylinder of mine (and other things) has spent a couple of hours in it. But beware, it will remove anodizing as well.
Vinegar is cheaper and is available anywhere.
I've been convinced to buy a bottle of the stuff after watching all the YouTube restoration videos.
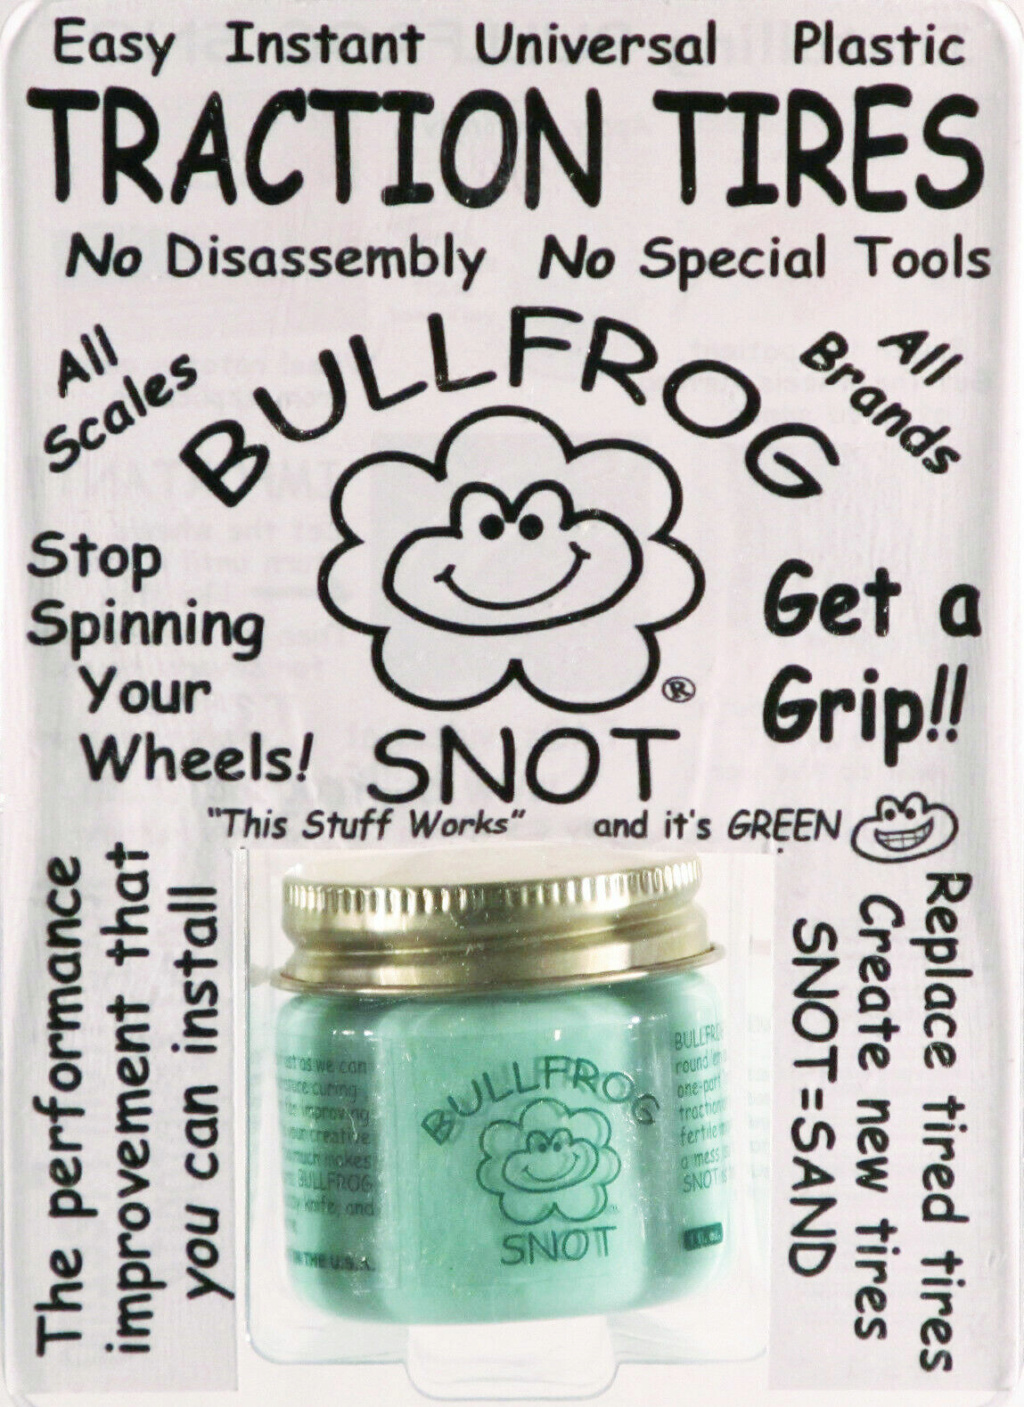
Hey, as long as the snot still works
Bretherman- Moderate Poster
- Posts : 23
Join date : 2021-01-09
Location : Florida
Re: Getting Ready to Attempt some Restorations - Newbie
![]() OhBee Wed Jan 13, 2021 1:39 pm
OhBee Wed Jan 13, 2021 1:39 pm
cky as I get when it comes to polishing!
OhBee- Platinum Member
- Posts : 698
Join date : 2016-03-23
Age : 73
Location : Minnesota
Re: Getting Ready to Attempt some Restorations - Newbie
![]() rsv1cox Wed Jan 13, 2021 1:45 pm
rsv1cox Wed Jan 13, 2021 1:45 pm
Bretherman wrote:rsv1cox wrote:OhBee wrote:FYI...Evaporust is WAY better at rust removal than vinegar. I've used both on mountain bike parts. Nothing is rustier than the last set of suspension forks I had to deal with...stuck tight for years. Now functioning quite nicely!. Makes crusty old sprockets shine like new.
Your right OB, it does work much better than vinegar. But it changes character over time and disintegrates to something that looks like what you blow out of your nose after a bad cold. "Clings to vertical surfaces" forget about that.
Still it works quite well, and many a cylinder of mine (and other things) has spent a couple of hours in it. But beware, it will remove anodizing as well.
Vinegar is cheaper and is available anywhere.
I've been convinced to buy a bottle of the stuff after watching all the YouTube restoration videos.
Hey, as long as the snot still works
We model railroaders have something similar:
rsv1cox- Top Poster
-
Posts : 10633
Join date : 2014-08-18
Location : West Virginia
Re: Getting Ready to Attempt some Restorations - Newbie
![]() NEW222 Wed Jan 13, 2021 8:54 pm
NEW222 Wed Jan 13, 2021 8:54 pm
NEW222- Top Poster
- Posts : 3892
Join date : 2011-08-13
Age : 45
Location : oakbank, mb
Re: Getting Ready to Attempt some Restorations - Newbie
![]() davidll1984 Wed Jan 13, 2021 10:18 pm
davidll1984 Wed Jan 13, 2021 10:18 pm
davidll1984- Diamond Member
- Posts : 2293
Join date : 2020-02-12
Age : 39
Location : shawinigan
Re: Getting Ready to Attempt some Restorations - Newbie
![]() Jason_WI Wed Jan 13, 2021 10:41 pm
Jason_WI Wed Jan 13, 2021 10:41 pm
fredvon4 wrote:did some one say shine it up?
All that bling! Better hope Bob doesn’t see that shiny bee.
Jason_WI- Top Poster
-
Posts : 3123
Join date : 2011-10-09
Age : 48
Location : Neenah, WI
Re: Getting Ready to Attempt some Restorations - Newbie
![]() rsv1cox Thu Jan 14, 2021 8:32 am
rsv1cox Thu Jan 14, 2021 8:32 am
NEW222 wrote:Interesting Bob. I never knew there was a gel version. Would be curious as to whether one works better than the other. Gel vs liquid. Or what the real differences are between the two.
I have used both, I couldn't see a difference. Liquid better for emersion, gel sticks better on vertical surfaces but I just wipe on the liquid keeping like a painter - a wet edge and using a cotton ball or cloth. But, as I have said here before I had PVC pipe capped on one end and filled with bluing for full emersion of barrels, gives a much more uniform appearance.
I always plugged my gun barrels with a tapered wooden dowel but never my model engine cylinders. Just burnished the interior with a light oil and a brass brush.
Yeah, I think that shiny engine would look great in gun metal blue....
rsv1cox- Top Poster
-
Posts : 10633
Join date : 2014-08-18
Location : West Virginia
A Little Bling-bling
![]() sosam117 Thu Jan 14, 2021 9:01 am
sosam117 Thu Jan 14, 2021 9:01 am
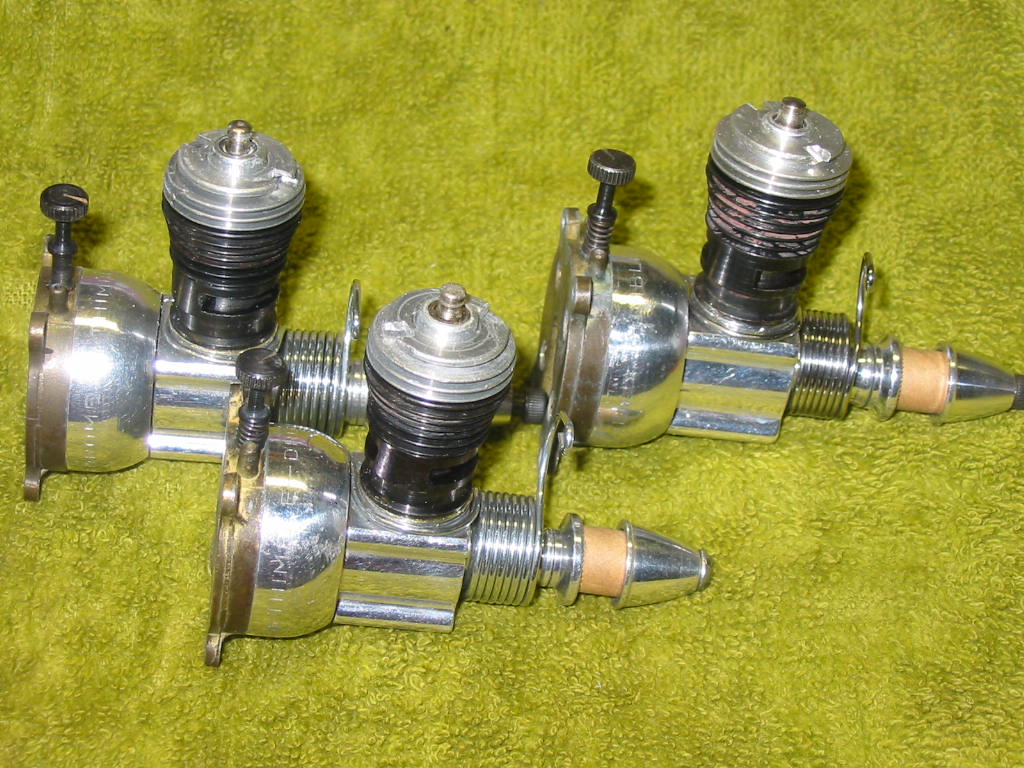
Two Thimble Drones -- one before cleaning and one after cleaning and buffing
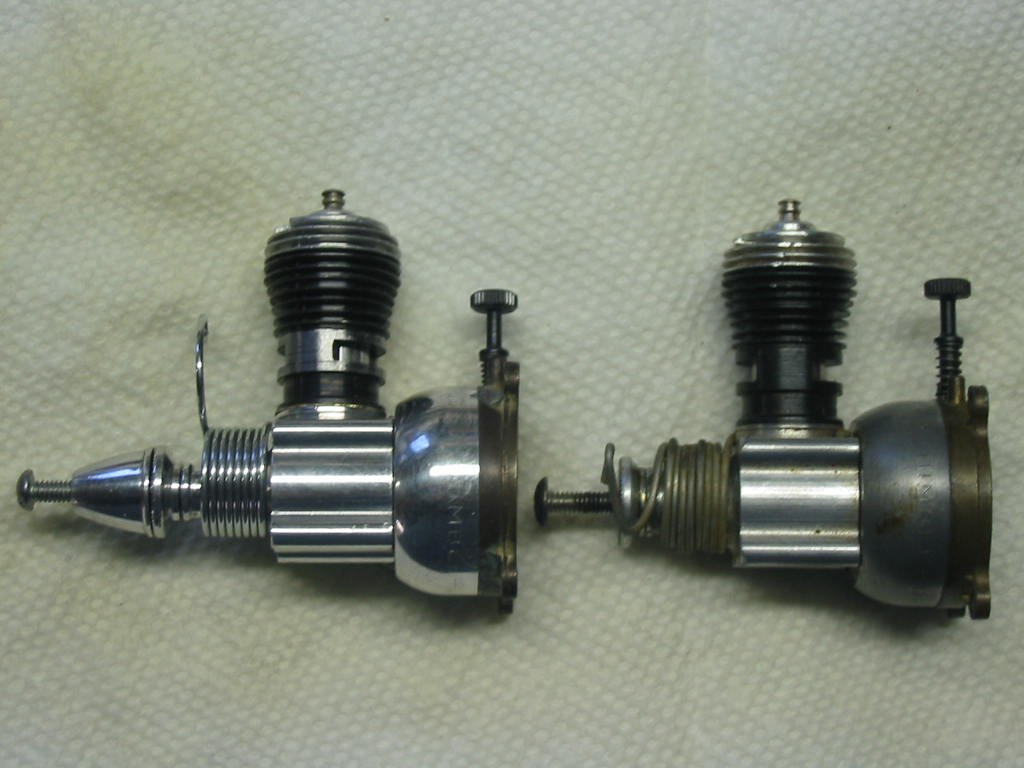
My slightly polished up Thimble Drones.
sosam117- Diamond Member
- Posts : 1292
Join date : 2016-03-23
Location : Suburb of Chicago, Illinois
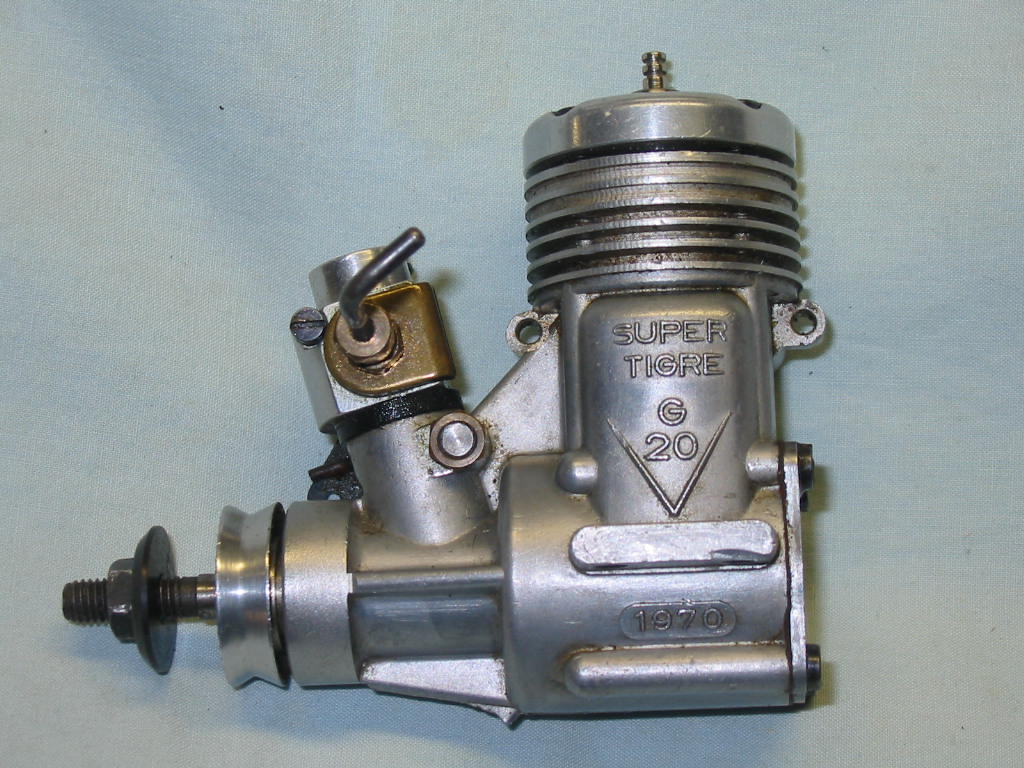
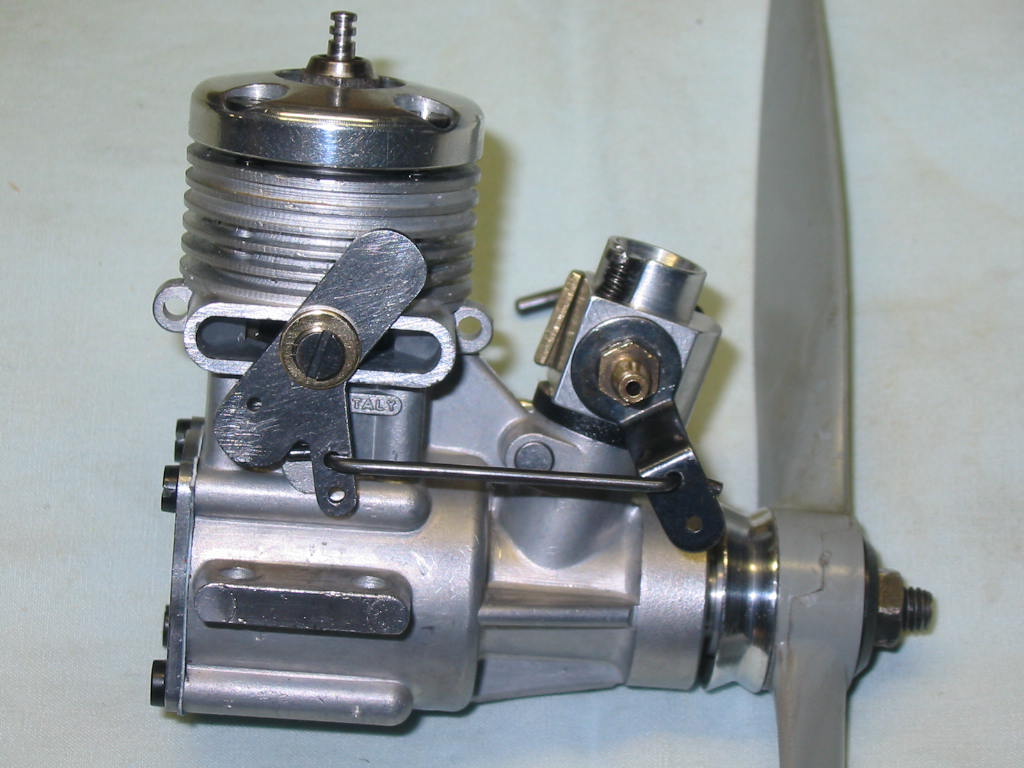
Completed restoring a Super Tiger 20 (Mfg. in 1970)
![]() sosam117 Thu Jan 14, 2021 7:31 pm
sosam117 Thu Jan 14, 2021 7:31 pm
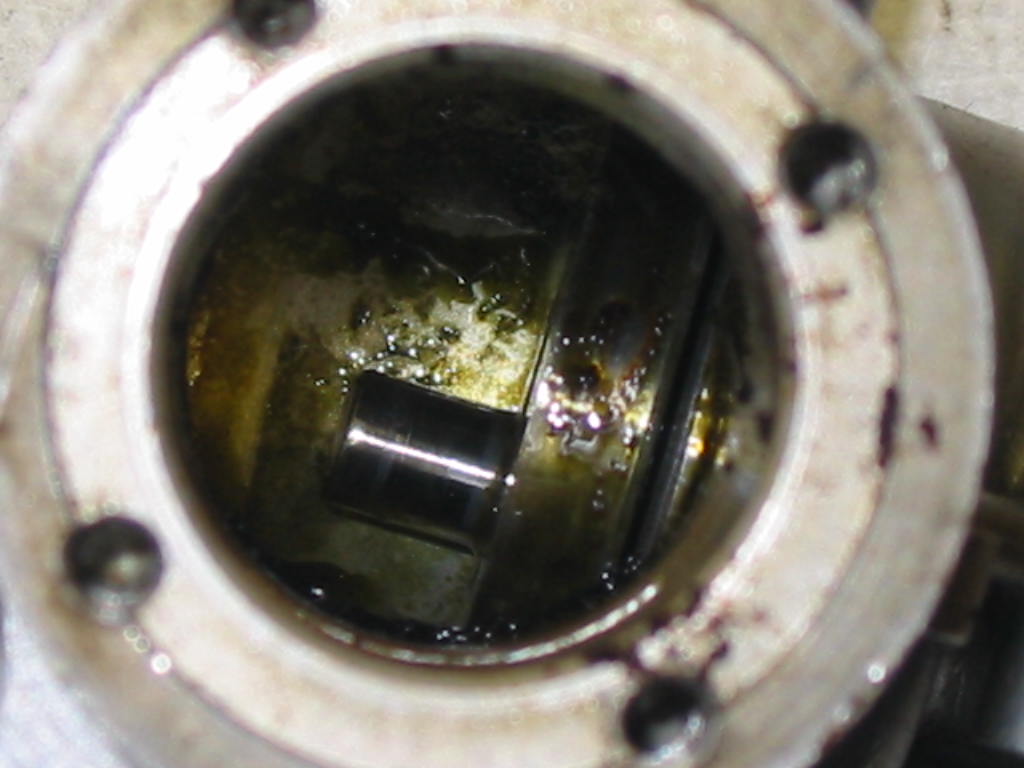
It looked good but was really stuck.
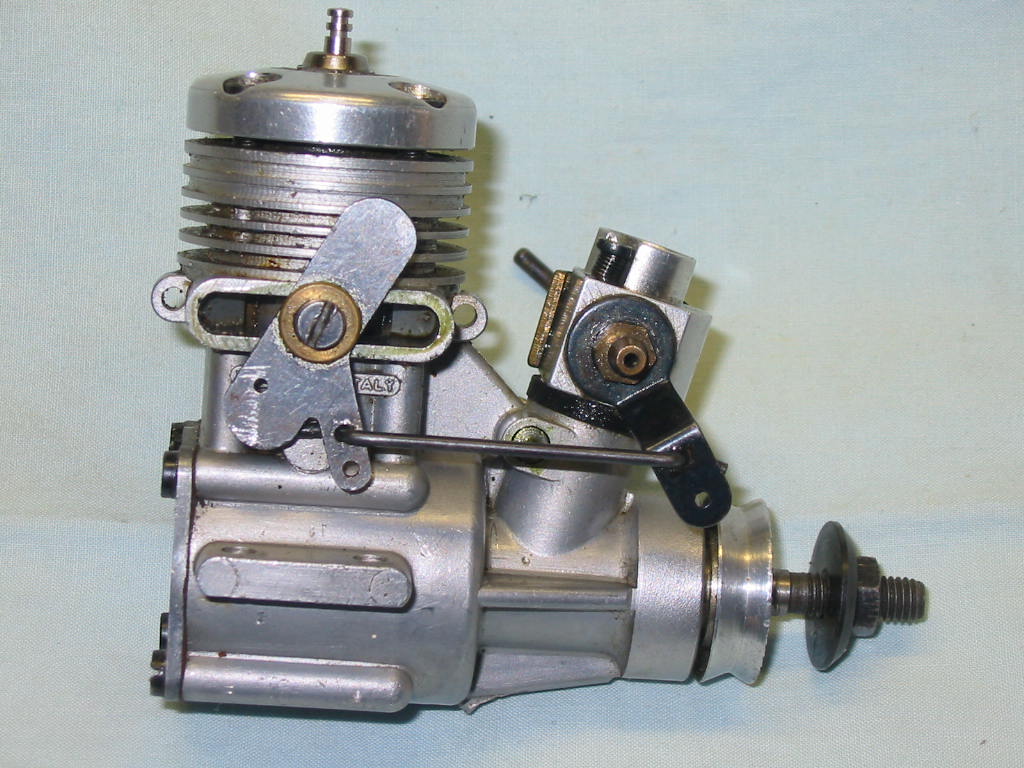
Took the head off and found the problem:
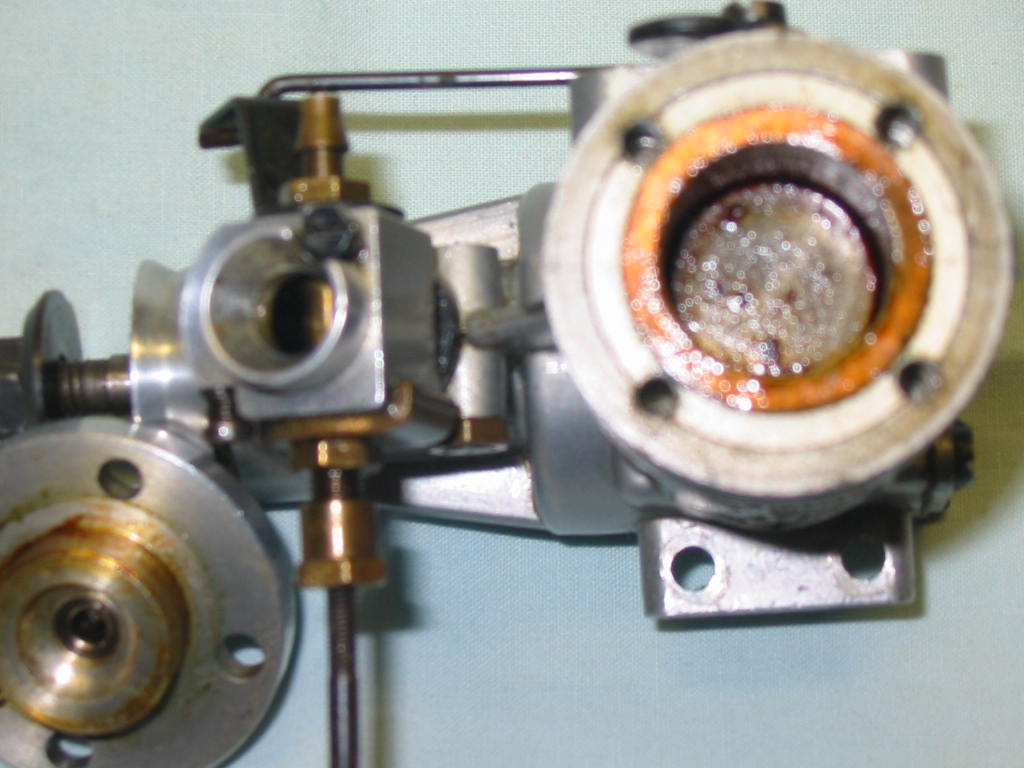
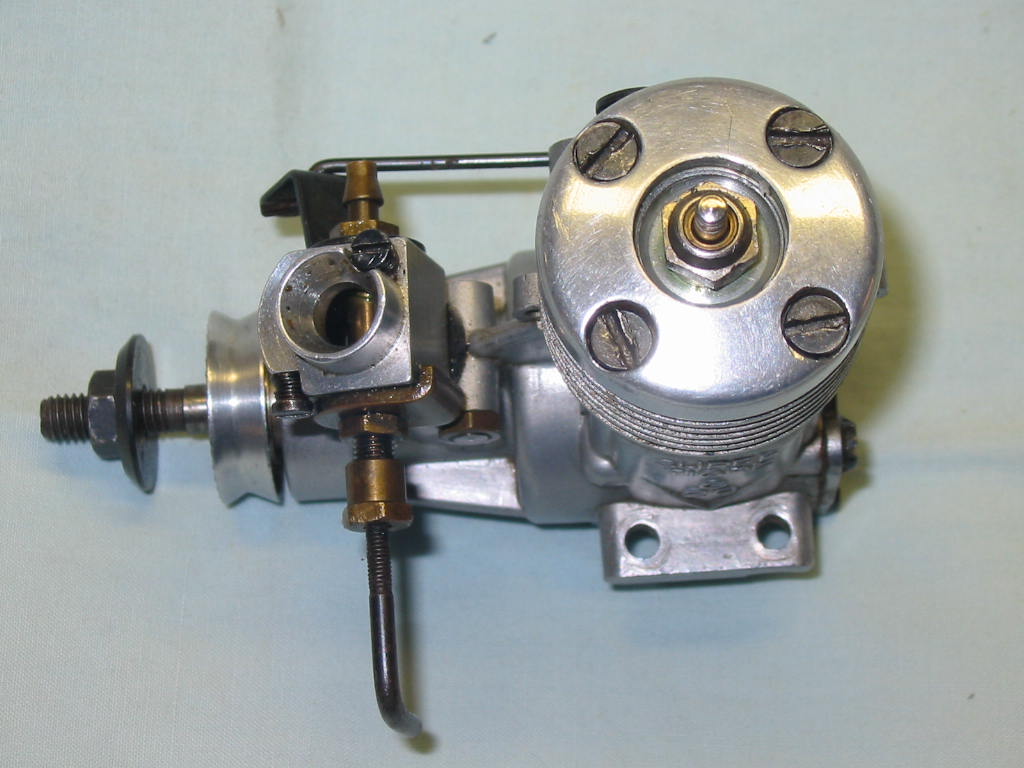
Using a paint "heat gun" to soften up the hardened castor oil to get the rest of the engine apart and removed the bearings:

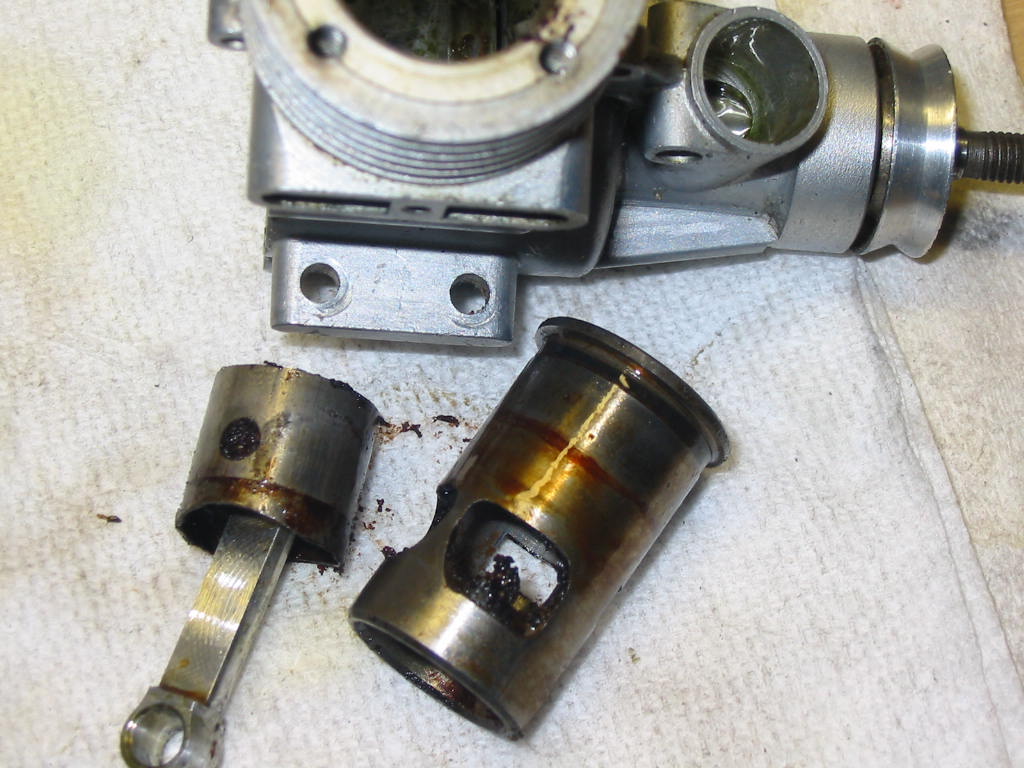
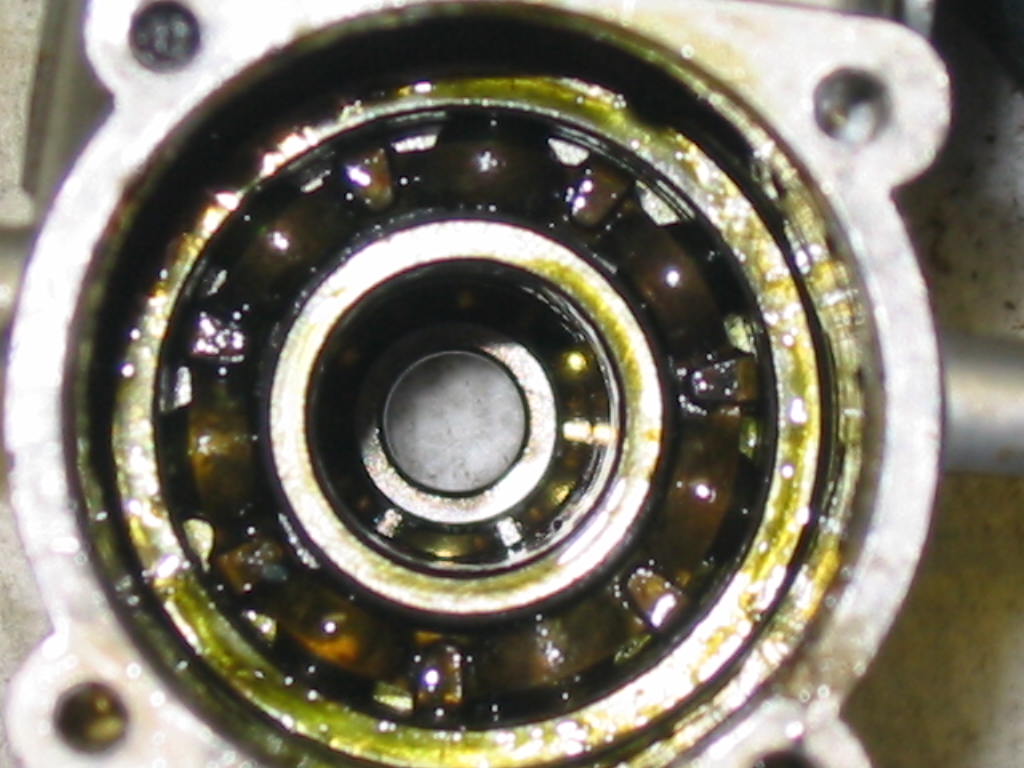
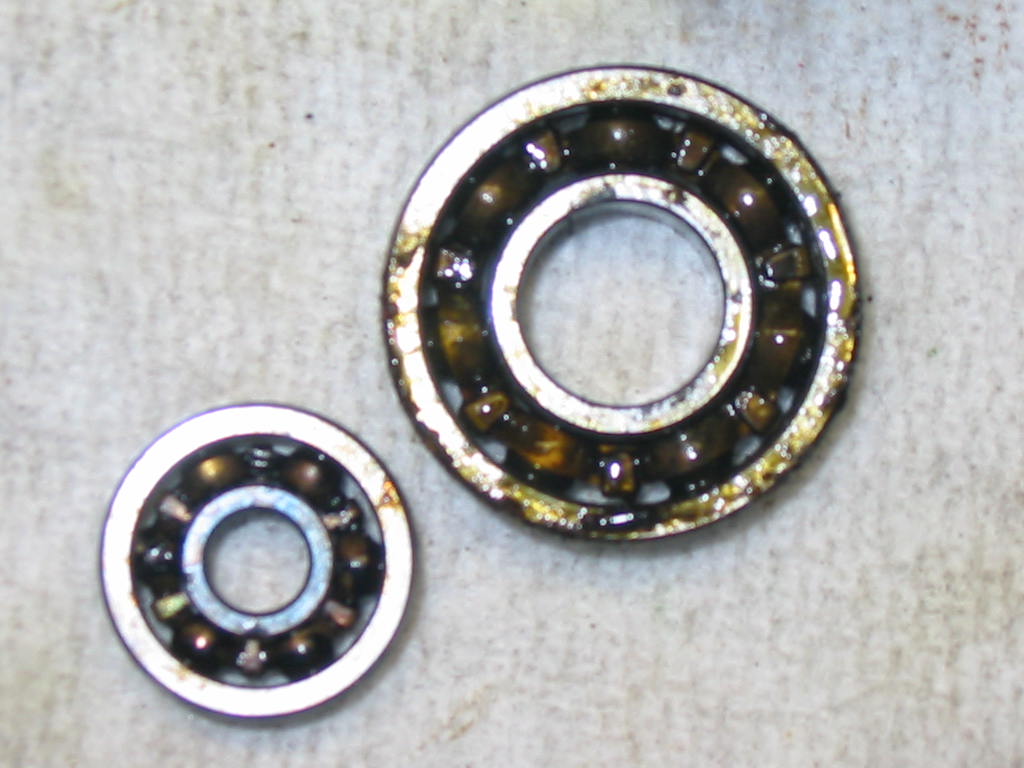
Had to replace the bearings.
So I ordered from Boca bearings a sealed bearing for the front of the engine. The original was just a ball raced bearing where dirt could enter from the front into the crankcase. And an exact replacement bearing for the back of the crankcase housing.
Made new gaskets for the back plate and the cylinder head.
The gasket material was from a sheet of gasket material from Enya, which I ordered a year ago from Bob Brooks.
Having all the different punch sizes for making the gaskets fairly easy.
Sonic cleaned all the engine parts in a sonic ("heated" at 140°) solution and in the bath for 30 minutes.
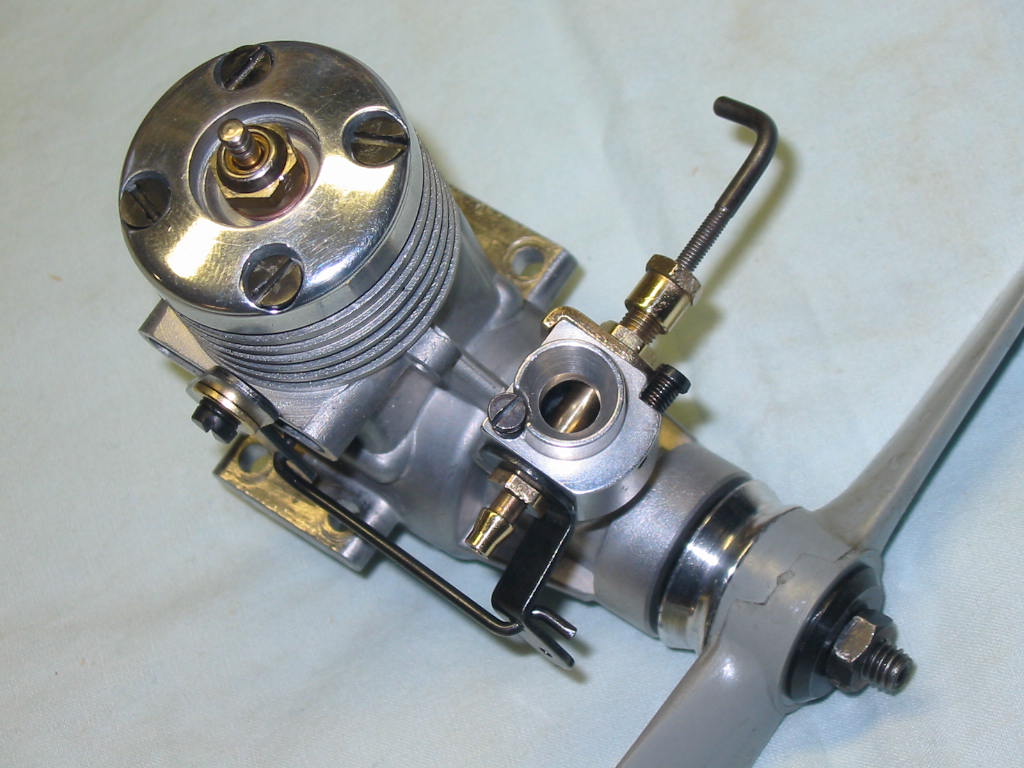
And here is the completed Super Tiger 20 engine (Mfg. in 1970) reassembled / refurbished:

sosam117- Diamond Member
- Posts : 1292
Join date : 2016-03-23
Location : Suburb of Chicago, Illinois
Re: Getting Ready to Attempt some Restorations - Newbie
![]() Bretherman Thu Jan 14, 2021 8:30 pm
Bretherman Thu Jan 14, 2021 8:30 pm
Your engines look fantastic. Thank you for the tear down and rebuild of that Super Tiger 20!
Bretherman- Moderate Poster
- Posts : 23
Join date : 2021-01-09
Location : Florida
Re: Getting Ready to Attempt some Restorations - Newbie
![]() Bretherman Thu Jan 14, 2021 8:41 pm
Bretherman Thu Jan 14, 2021 8:41 pm
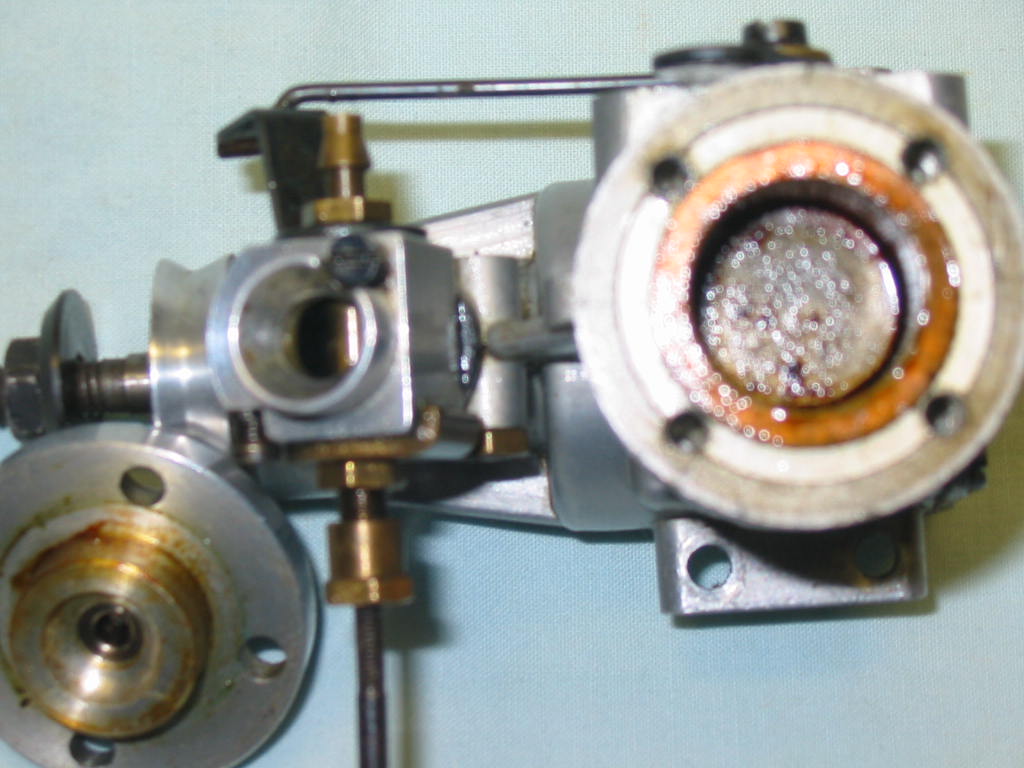
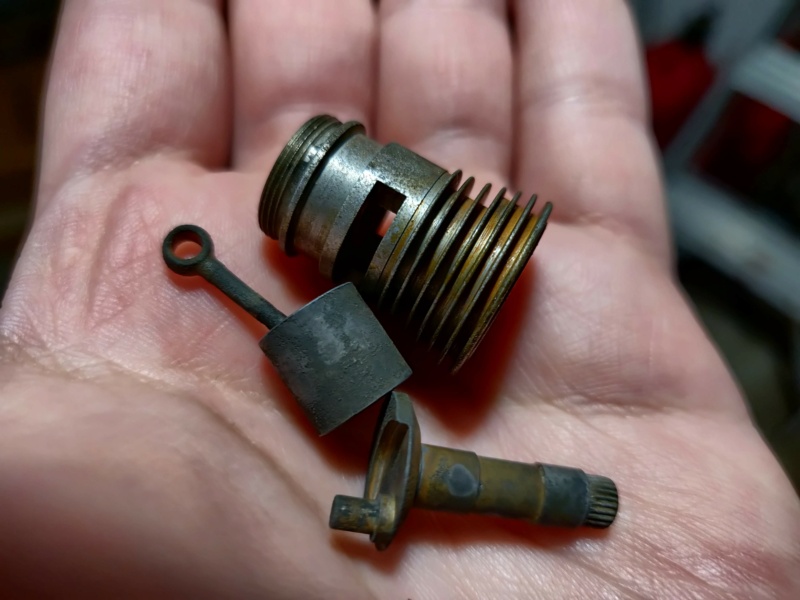
I put the parts in vinegar, and checked on it every now and then.
Saw little bubbles, and it looked like it was working, so I figured all was great.
Picture of parts after about one day in vinegar:
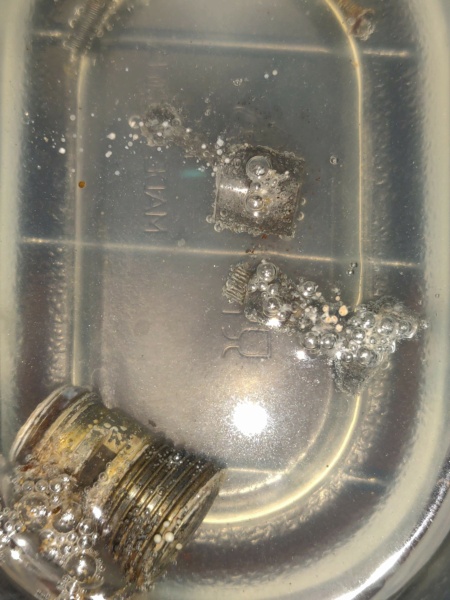
Looking really good, right?!
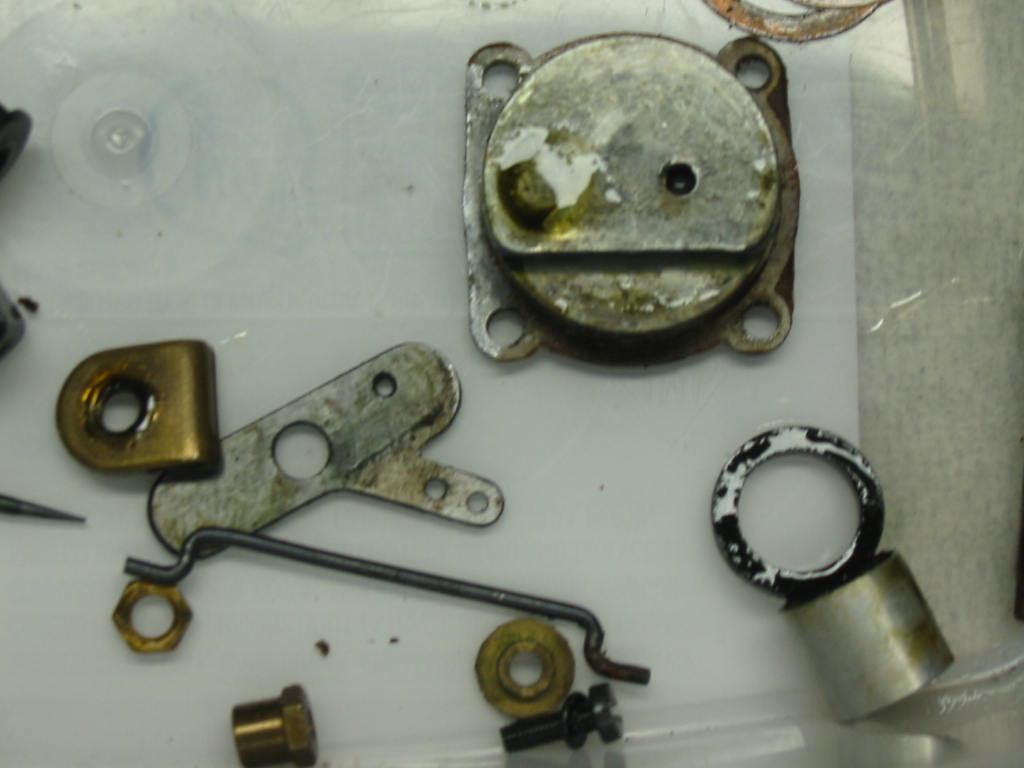
Then I got busy, and figured, ah what the hell, I'll leave it in for another day.
Picture of parts after about two days in vinegar:
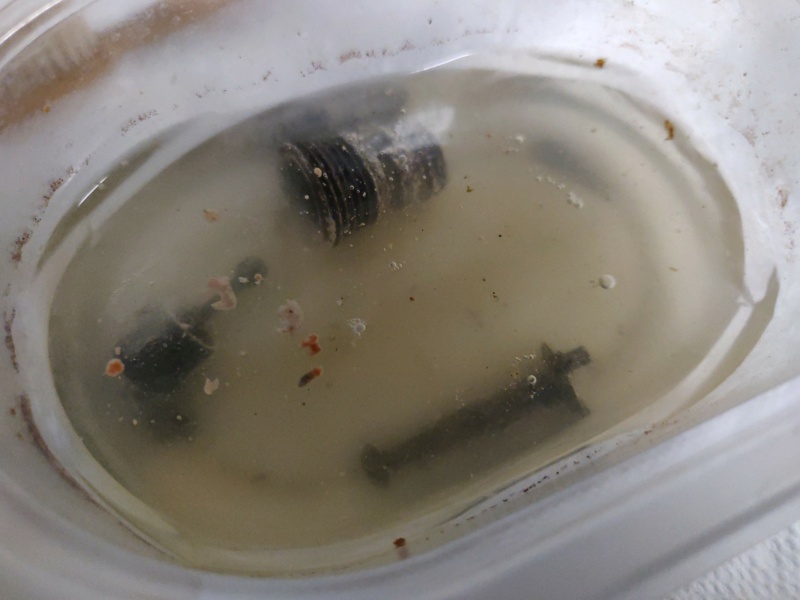
Ok, so now everything looks black. This is when I started getting worried.
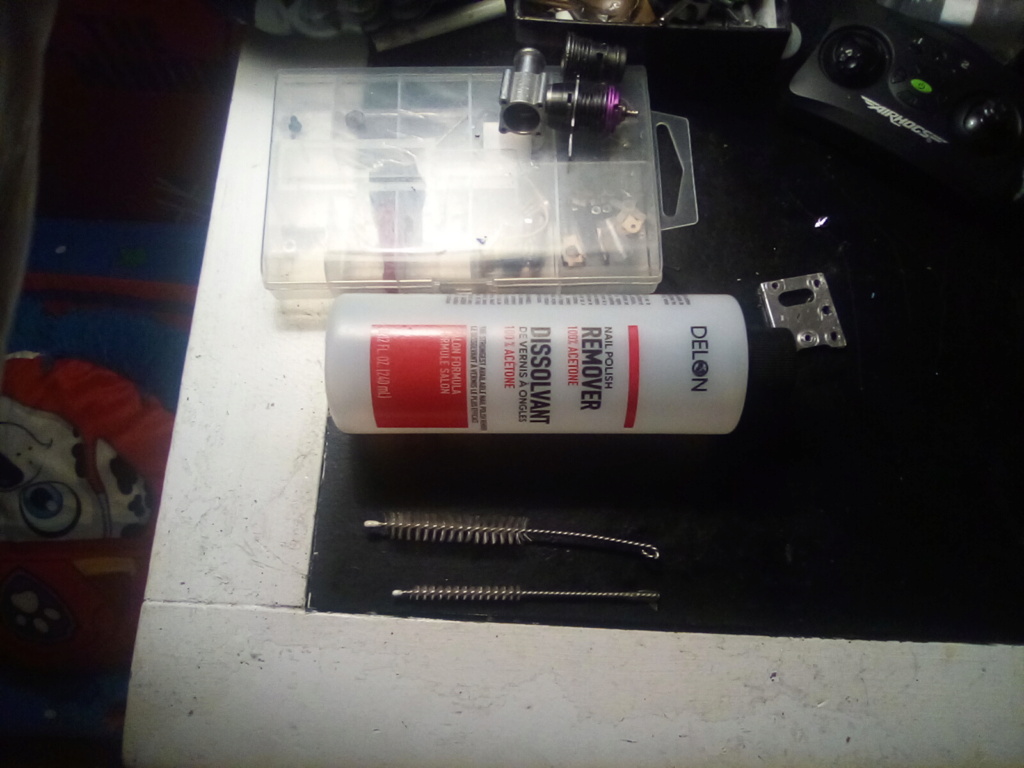
I took a toothbrush, and started scrubbing everything down.
Then I took some acetone and scrubbed it with that.
In the end, it looks like the vinegar might have gone passed the sweet spot, and corroded everything.
It all looks like it has a cruddy coat of black on it.
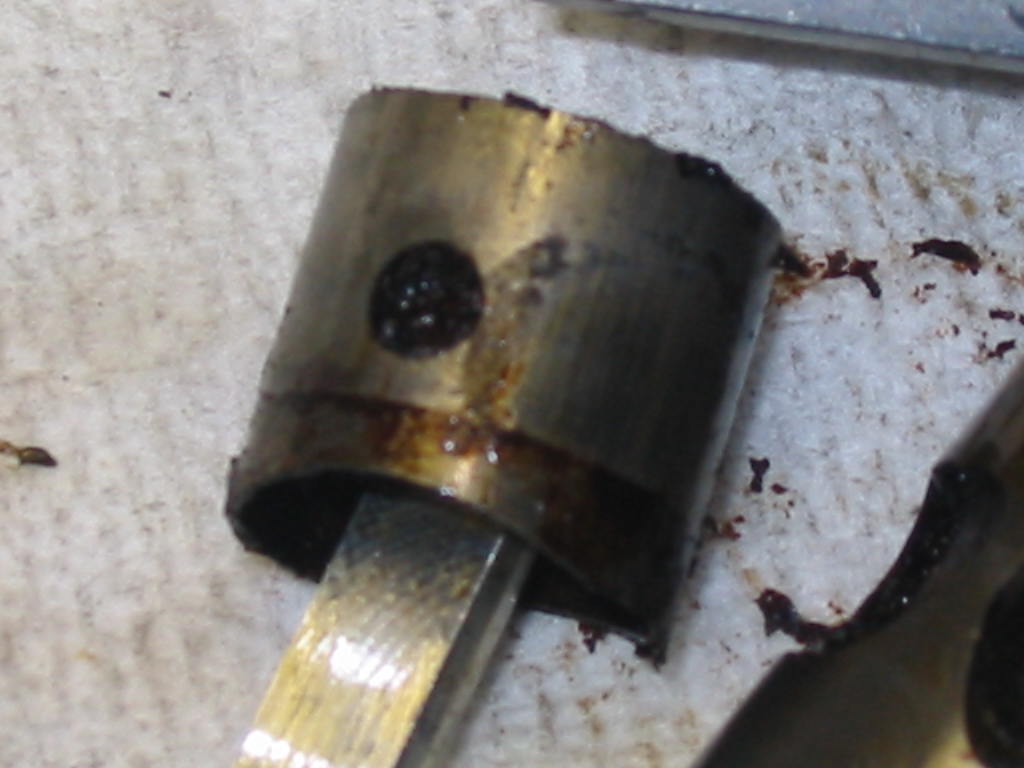
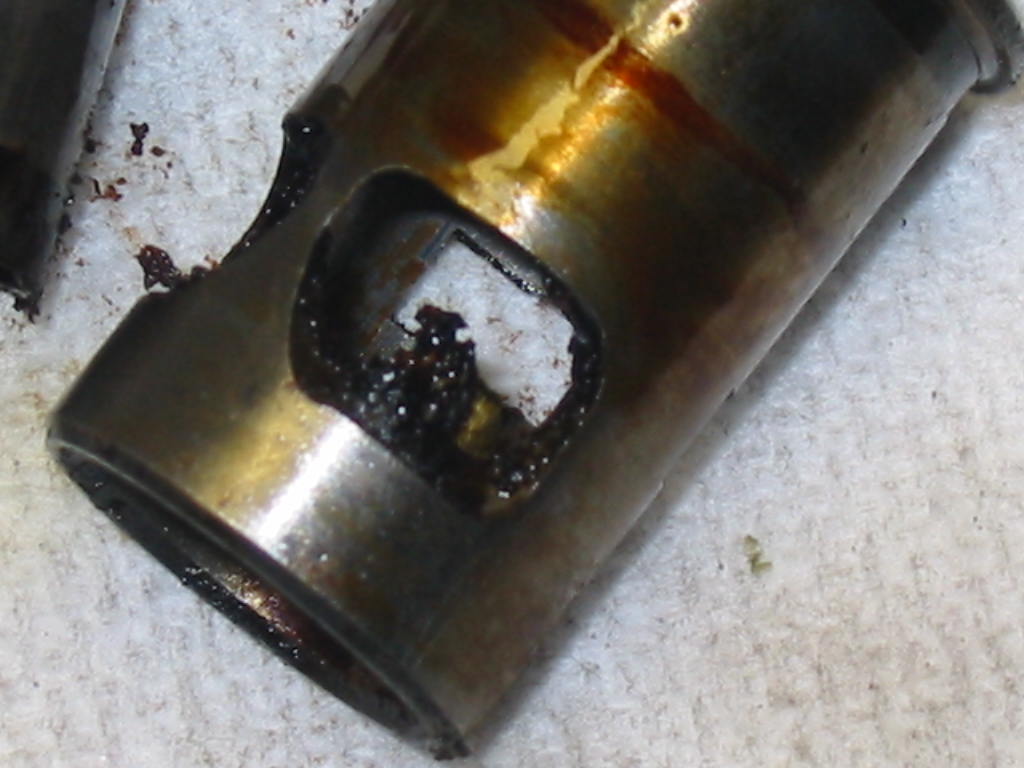
Pictures of parts after cleaning:
I guess the only good news I have is, I've upgraded from WD-40, to Hoppes Number 9 Gun Oil:
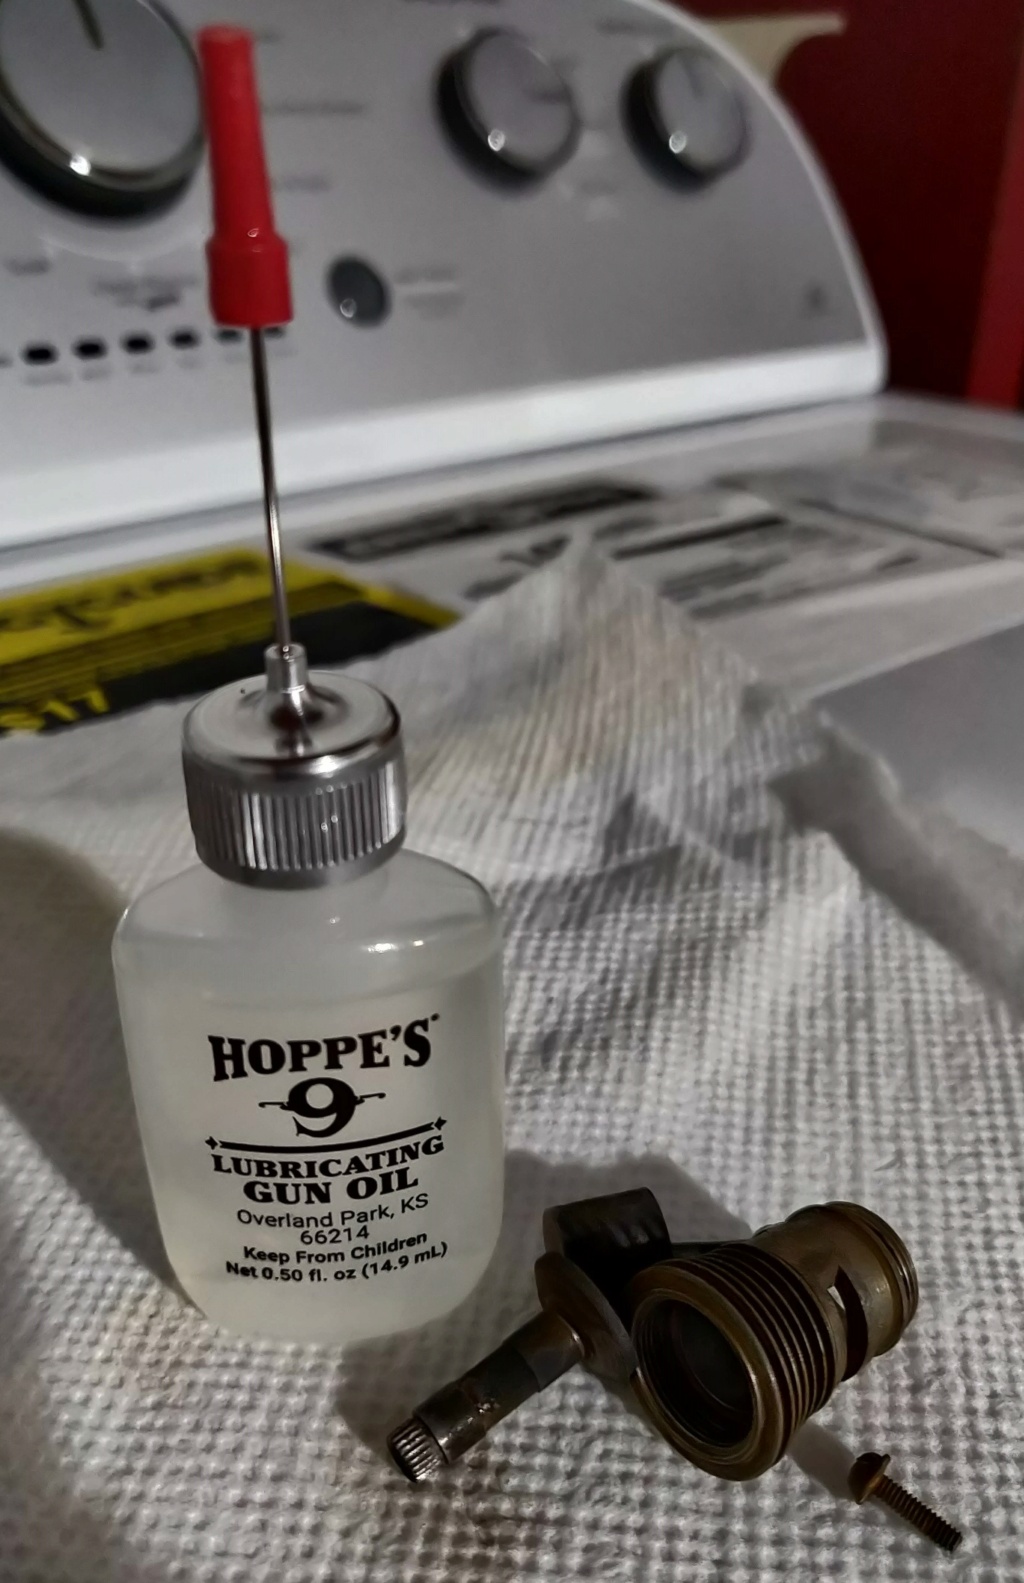
I've rubbed everything down with that, and will leave it until I have some time to get to it.
I think I have no choice but to break out to #0000 steel wool.
What do you think?
Bretherman- Moderate Poster
- Posts : 23
Join date : 2021-01-09
Location : Florida
Re: Getting Ready to Attempt some Restorations - Newbie
![]() 944_Jim Thu Jan 14, 2021 9:00 pm
944_Jim Thu Jan 14, 2021 9:00 pm
From there, add head and backplate and do another oily check.
At this point you should have about an bour-mabey ninety minutes in quick checks. If all is good, then fire it up!
Worry about the appearance later.
_________________
Never enough time to build them all...always enough time to smash them all!
944_Jim- Diamond Member
-
Posts : 1961
Join date : 2017-02-08
Age : 59
Location : NE MS
Re: Getting Ready to Attempt some Restorations - Newbie
![]() Bretherman Thu Jan 14, 2021 9:08 pm
Bretherman Thu Jan 14, 2021 9:08 pm
944_Jim wrote:I'd say drop the crank in the block with some oil and see how it feels. Do the same with piston and cylinder. Of those two feel good, then install the piston on the crank in the block with cylinder and see how all four work together.
From there, add head and backplate and do another oily check.
At this point you should have about an bour-mabey ninety minutes in quick checks. If all is good, then fire it up!
Worry about the appearance later.
I put the piston in (after oiling it everything) and it actually feels smooth. But, to the touch, all the parts feel rough.
I guess I'll see with the crankshaft. I'm worried about that one.
Bretherman- Moderate Poster
- Posts : 23
Join date : 2021-01-09
Location : Florida
Re: Getting Ready to Attempt some Restorations - Newbie
![]() NEW222 Thu Jan 14, 2021 9:58 pm
NEW222 Thu Jan 14, 2021 9:58 pm
NEW222- Top Poster
- Posts : 3892
Join date : 2011-08-13
Age : 45
Location : oakbank, mb
Re: Getting Ready to Attempt some Restorations - Newbie
![]() Levent Suberk Thu Jan 14, 2021 10:58 pm
Levent Suberk Thu Jan 14, 2021 10:58 pm
Also don't soak aluminum parts in ethyl alcohol for days. Ethyl alcohol don't eat aluminum but blackens it.
Most effective way for removing rust is using kerosene and a stiff tooth brush.

Levent Suberk- Diamond Member
- Posts : 2205
Join date : 2017-12-24
Location : Türkiye
Re: Getting Ready to Attempt some Restorations - Newbie
![]() davidll1984 Fri Jan 15, 2021 4:23 am
davidll1984 Fri Jan 15, 2021 4:23 am
Y have al size even for m'y smaler tee dee .010 up To .15 just cant Find the two other for .020 .15
davidll1984- Diamond Member
- Posts : 2293
Join date : 2020-02-12
Age : 39
Location : shawinigan
Re: Getting Ready to Attempt some Restorations - Newbie
![]() 944_Jim Fri Jan 15, 2021 7:21 am
944_Jim Fri Jan 15, 2021 7:21 am
By leaving the sacrificial surface in place and running it, the engine may actually "break in" all over again.
Unfortunately, all you are left with is to test some ideas.
I have a deal for you:
If you try it the way I suggest and the engine becomes ruined, then I'll send along another old one. But, in order to take my offer, you have to do a couple things first. Assemble the engine, oil the engine, test by hand, then run it. Last step is to document with pictures any failure that occurs.
Best case, you have a runner.
Worst case, WE ALL know not to do that anymore (and why). But if it does become worst case, you are only out the time to try it, and the time to wait on the replacement...and we all learn from it.
_________________
Never enough time to build them all...always enough time to smash them all!
944_Jim- Diamond Member
-
Posts : 1961
Join date : 2017-02-08
Age : 59
Location : NE MS
Page 2 of 4 • 1, 2, 3, 4 ![]()
» Cox restorations for the week
» Another attempt to avoid work.
» Micro 12VDC Generator with a Cox .049 Sure Start Diesel Engine
» Plier Mark Repair Attempt